Sony Ericsson R380 WORLD User Guide - Page 87
to enter a phone number. Select
 |
View all Sony Ericsson R380 WORLD manuals
Add to My Manuals
Save this manual to your list of manuals |
Page 87 highlights
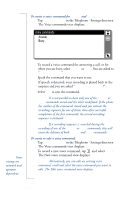
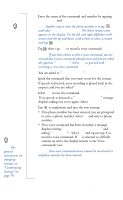
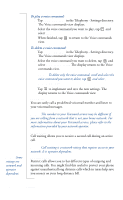
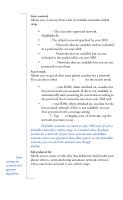
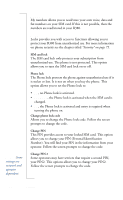
Tip! For general instructions on changing settings, see "Customizing Settings" on page 79. 3. Enter the name of the command and number by tapping and Tip! Another way to enter the phone number is to tap and select Lookup from contacts. The Select contact view appears in the display. Use the left and right Alphabet scroll arrows and the up and down scroll arrows to select a contact and tap OK . 4. Tap OK then tap Yes to record a voice command. Note: If you have chosen to edit a voice command, you are warned that a voice command already exists and you are asked the question "Overwrite?". Select Yes to proceed with recording a new voice command. You are asked to "Speak after beep". 5. Speak the command that you want to use for the contact. If speech is detected, your recording is played back in the earpiece and you are asked "Is voice command OK?". 6. Select Yes to save the command. If no speech is detected, a "Speech not detected" message displays asking you to try again. Select OK. 7. Tap OK to implement and save the new settings. • If no phone number has been entered, you are prompted to enter a phone number. Select OK and enter a phone number. • If no voice command has been recorded, a message displays stating "Voice command not recorded" and asking "Record now?". Select Yes and repeat step 5 to record a voice command. If No is selected or all fields contain an entry, the display returns to the Voice commands view. Note: New voice command entries cannot be saved until a telephone number has been entered. Settings 87
-
 1
1 -
2
-
3
-
4
-
5
-
6
-
7
-
8
-
9
-
10
-
11
-
12
-
13
-
14
-
15
-
16
-
17
-
18
-
19
-
20
-
21
-
22
-
23
-
24
-
25
-
26
-
27
-
28
-
29
-
30
-
31
-
32
-
33
-
34
-
35
-
36
-
37
-
38
-
39
-
40
-
41
-
42
-
43
-
44
-
45
-
46
-
47
-
48
-
49
-
50
-
51
-
52
-
53
-
54
-
55
-
56
-
57
-
58
-
59
-
60
-
61
-
62
-
63
-
64
-
65
-
66
-
67
-
68
-
69
-
70
-
71
-
72
-
73
-
74
-
75
-
76
-
77
-
78
-
79
-
80
-
81
-
 82
82 -
 83
83 -
 84
84 -
 85
85 -
 86
86 -
 87
87 -
 88
88 -
 89
89 -
 90
90 -
 91
91 -
 92
92 -
93
-
94
-
95
-
96
-
97
-
98
-
99
-
100
-
101
-
102
-
103
-
104
-
105
-
106
-
107
-
108
-
109
-
110
-
111
-
112
-
113
-
114
-
115
-
116
-
117
-
118
-
119
-
120
-
121
-
122
-
123
-
124
-
125
-
126
-
127
-
128
-
129
-
130
-
131
-
132
-
133
-
134
-
135
-
136
-
137
-
138
-
139
-
140
-
141
-
142
-
143
-
144
-
145
-
146
-
147
-
148
-
149
-
150
-
151
-
152
-
153
-
154
-
155
-
156
-
157
-
158
-
159
-
160
-
161
-
162
-
163
-
164
-
165
-
166
-
167
-
168
-
169
-
170
-
171
-
172
-
173
-
174
-
175
-
176
-
177
-
178
-
179
-
180
-
181
-
182
-
183
-
184
-
185
-
186
-
187
-
188
-
189
-
190
-
191
-
192
-
193
-
194
-
195
-
196
-
197
-
198
-
199
-
200
-
201
-
202
-
203
-
204
-
205
-
206
-
207
-
208
-
209
-
210
-
211
-
212
-
213
-
214
-
215
-
216
-
217
-
218
-
219
-
220
-
221
-
222
-
223
-
224
-
225
-
226
-
227
-
228
-
229
-
230
-
231
-
232
-
233
-
234
-
235
-
236
-
237
-
238
-
239
-
240
-
241
-
242
-
243
-
244
-
245
-
246
-
247
-
248
-
249
-
250
-
251
-
252
-
253
-
254
-
255
-
256
-
257
 |
 |
