Sony Ericsson R380 WORLD User Guide - Page 197
Cancel, Connect To, Properties, Server Types, TCP/IP Settings, Server Assigned IP Address, Specify
 |
View all Sony Ericsson R380 WORLD manuals
Add to My Manuals
Save this manual to your list of manuals |
Page 197 highlights
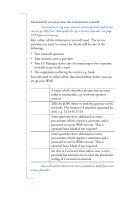
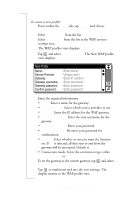
IP Assignment Click Cancel to close the Connect To dialog. Right-click on the icon and then click on Properties. Select the Server Types tab and click the TCP/IP Settings button to view the TCP/IP Settings dialog. If Server Assigned IP Address is checked then leave R380s set to . DNS assignment If Specify an IP Address is checked then change to Static and an extra field, Own IP Address is added to the list of items you need to fill in. If Server Assigned IP Address is checked then leave R380s set to . If Specify an IP Address is checked then change to Static, two extra fields are added to the bottom of the list of items you need to fill in. Own IP Address Enter the IP address shown in the 'TCP/IP Settings dialog in to the R380 Primary DNS Copy from the Primary DNS which is shown in the dialog. Secondary Copy from the Secondary DNS which is DNS shown in the dialog. 2. Click Cancel to close the windows dialog. Getting started with E-mail and WAP 197
-
 1
1 -
2
-
3
-
4
-
5
-
6
-
7
-
8
-
9
-
10
-
11
-
12
-
13
-
14
-
15
-
16
-
17
-
18
-
19
-
20
-
21
-
22
-
23
-
24
-
25
-
26
-
27
-
28
-
29
-
30
-
31
-
32
-
33
-
34
-
35
-
36
-
37
-
38
-
39
-
40
-
41
-
42
-
43
-
44
-
45
-
46
-
47
-
48
-
49
-
50
-
51
-
52
-
53
-
54
-
55
-
56
-
57
-
58
-
59
-
60
-
61
-
62
-
63
-
64
-
65
-
66
-
67
-
68
-
69
-
70
-
71
-
72
-
73
-
74
-
75
-
76
-
77
-
78
-
79
-
80
-
81
-
82
-
83
-
84
-
85
-
86
-
87
-
88
-
89
-
90
-
91
-
92
-
93
-
94
-
95
-
96
-
97
-
98
-
99
-
100
-
101
-
102
-
103
-
104
-
105
-
106
-
107
-
108
-
109
-
110
-
111
-
112
-
113
-
114
-
115
-
116
-
117
-
118
-
119
-
120
-
121
-
122
-
123
-
124
-
125
-
126
-
127
-
128
-
129
-
130
-
131
-
132
-
133
-
134
-
135
-
136
-
137
-
138
-
139
-
140
-
141
-
142
-
143
-
144
-
145
-
146
-
147
-
148
-
149
-
150
-
151
-
152
-
153
-
154
-
155
-
156
-
157
-
158
-
159
-
160
-
161
-
162
-
163
-
164
-
165
-
166
-
167
-
168
-
169
-
170
-
171
-
172
-
173
-
174
-
175
-
176
-
177
-
178
-
179
-
180
-
181
-
182
-
183
-
184
-
185
-
186
-
187
-
188
-
189
-
190
-
191
-
 192
192 -
 193
193 -
 194
194 -
 195
195 -
 196
196 -
 197
197 -
 198
198 -
 199
199 -
 200
200 -
 201
201 -
 202
202 -
203
-
204
-
205
-
206
-
207
-
208
-
209
-
210
-
211
-
212
-
213
-
214
-
215
-
216
-
217
-
218
-
219
-
220
-
221
-
222
-
223
-
224
-
225
-
226
-
227
-
228
-
229
-
230
-
231
-
232
-
233
-
234
-
235
-
236
-
237
-
238
-
239
-
240
-
241
-
242
-
243
-
244
-
245
-
246
-
247
-
248
-
249
-
250
-
251
-
252
-
253
-
254
-
255
-
256
-
257
 |
 |
