Sony DCR-TRV50 Operating Instructions (primary manual) - Page 130
Recording images with the flash, Recording still images on, Memory Stick, Memory Photo recording
 |
View all Sony DCR-TRV50 manuals
Add to My Manuals
Save this manual to your list of manuals |
Page 130 highlights
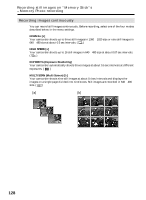
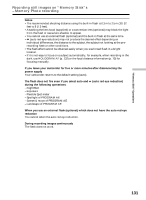
Recording still images on "Memory Stick"s - Memory Photo recording When selecting NORMAL or HIGH SPEED Recording continues up to the maximum number of still images during pressing PHOTO deeper. Release PHOTO to stop recording. When selecting HIGH SPEED Flickering or changes in color may occur. Also, your camcorder prevents focusing on near objects. If there is space remaining on the "Memory Stick" for less than three photos You cannot carry out the exposure bracketing (EXP BRKTG). " FULL" is displayed when you press PHOTO. The effect of exposure bracketing (EXP BRKTG) The effect may not appear clearly on the LCD screen. Checking images on a TV monitor or computer display for the expected effect is recommended. Recording images with the flash The flash automatically pops up to strobe. The default setting is auto (no indicator). To change the flash mode, press (flash) repeatedly until the flash mode indicator appears on the screen. (flash) Each press of (flash) changes the indicator as follows: t t t No indicator Auto red-eye reduction: The flash fires before recording to reduce the red-eye phenomenon. Forced flash: The flash fires regardless of the surrounding brightness. No flash: The flash does not fire. The flash is automatically adjusted to the appropriate brightness. You can also change FLASH LVL to the desired brightness in the menu settings (p. 200). Try recording various images to find the most appropriate setting for FLASH LVL. 130
-
 1
1 -
2
-
3
-
4
-
5
-
6
-
7
-
8
-
9
-
10
-
11
-
12
-
13
-
14
-
15
-
16
-
17
-
18
-
19
-
20
-
21
-
22
-
23
-
24
-
25
-
26
-
27
-
28
-
29
-
30
-
31
-
32
-
33
-
34
-
35
-
36
-
37
-
38
-
39
-
40
-
41
-
42
-
43
-
44
-
45
-
46
-
47
-
48
-
49
-
50
-
51
-
52
-
53
-
54
-
55
-
56
-
57
-
58
-
59
-
60
-
61
-
62
-
63
-
64
-
65
-
66
-
67
-
68
-
69
-
70
-
71
-
72
-
73
-
74
-
75
-
76
-
77
-
78
-
79
-
80
-
81
-
82
-
83
-
84
-
85
-
86
-
87
-
88
-
89
-
90
-
91
-
92
-
93
-
94
-
95
-
96
-
97
-
98
-
99
-
100
-
101
-
102
-
103
-
104
-
105
-
106
-
107
-
108
-
109
-
110
-
111
-
112
-
113
-
114
-
115
-
116
-
117
-
118
-
119
-
120
-
121
-
122
-
123
-
124
-
 125
125 -
 126
126 -
 127
127 -
 128
128 -
 129
129 -
 130
130 -
 131
131 -
 132
132 -
 133
133 -
 134
134 -
 135
135 -
136
-
137
-
138
-
139
-
140
-
141
-
142
-
143
-
144
-
145
-
146
-
147
-
148
-
149
-
150
-
151
-
152
-
153
-
154
-
155
-
156
-
157
-
158
-
159
-
160
-
161
-
162
-
163
-
164
-
165
-
166
-
167
-
168
-
169
-
170
-
171
-
172
-
173
-
174
-
175
-
176
-
177
-
178
-
179
-
180
-
181
-
182
-
183
-
184
-
185
-
186
-
187
-
188
-
189
-
190
-
191
-
192
-
193
-
194
-
195
-
196
-
197
-
198
-
199
-
200
-
201
-
202
-
203
-
204
-
205
-
206
-
207
-
208
-
209
-
210
-
211
-
212
-
213
-
214
-
215
-
216
-
217
-
218
-
219
-
220
-
221
-
222
-
223
-
224
-
225
-
226
-
227
-
228
-
229
-
230
-
231
-
232
-
233
-
234
-
235
-
236
-
237
-
238
-
239
-
240
-
241
-
242
-
243
-
244
-
245
-
246
-
247
-
248
 |
 |
