Sony DSC-RX100M5 Help Guide Printable PDF - Page 128
D-Range Opt. DRO
 |
View all Sony DSC-RX100M5 manuals
Add to My Manuals
Save this manual to your list of manuals |
Page 128 highlights
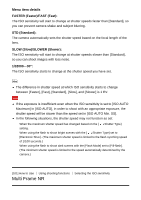
4 images are added for the multi frame NR effect. High: 12 images are added for the multi frame NR effect to produce images with even less noise. Note When [High] is selected, it takes longer to shoot and combine images. [103] How to Use Using shooting functions Correcting the brightness or contrast D-Range Opt. (DRO) By dividing the image into small areas, the product analyzes the contrast of light and shadow between the subject and the background, and creates an image with the optimal brightness and gradation. 1. MENU → (Camera Settings) → [DRO/Auto HDR] → [D-Range Opt.]. 2. Select the desired setting using the left/right side of the control wheel. Menu item details D-Range Optimizer: Auto: Corrects the brightness automatically. D-Range Optimizer: Lv1 ― D-Range Optimizer: Lv5: Optimizes the gradation of a recorded image for each divided area. Select the optimization level from Lv1 (weak) to Lv5 (strong). Note [DRO/Auto HDR] is fixed to [Off] when the shooting mode is set to [Sweep Panorama], or when [Multi Frame NR] or [Picture Effect] is set to other than [Off]. [DRO/Auto HDR] is fixed to [Off] when [Picture Profile] is set to something other than [Off]. [DRO/Auto HDR] is fixed to [Off] when the following modes are selected in [Scene Selection].
-
 1
1 -
2
-
3
-
4
-
5
-
6
-
7
-
8
-
9
-
10
-
11
-
12
-
13
-
14
-
15
-
16
-
17
-
18
-
19
-
20
-
21
-
22
-
23
-
24
-
25
-
26
-
27
-
28
-
29
-
30
-
31
-
32
-
33
-
34
-
35
-
36
-
37
-
38
-
39
-
40
-
41
-
42
-
43
-
44
-
45
-
46
-
47
-
48
-
49
-
50
-
51
-
52
-
53
-
54
-
55
-
56
-
57
-
58
-
59
-
60
-
61
-
62
-
63
-
64
-
65
-
66
-
67
-
68
-
69
-
70
-
71
-
72
-
73
-
74
-
75
-
76
-
77
-
78
-
79
-
80
-
81
-
82
-
83
-
84
-
85
-
86
-
87
-
88
-
89
-
90
-
91
-
92
-
93
-
94
-
95
-
96
-
97
-
98
-
99
-
100
-
101
-
102
-
103
-
104
-
105
-
106
-
107
-
108
-
109
-
110
-
111
-
112
-
113
-
114
-
115
-
116
-
117
-
118
-
119
-
120
-
121
-
122
-
 123
123 -
 124
124 -
 125
125 -
 126
126 -
 127
127 -
 128
128 -
 129
129 -
 130
130 -
 131
131 -
 132
132 -
 133
133 -
134
-
135
-
136
-
137
-
138
-
139
-
140
-
141
-
142
-
143
-
144
-
145
-
146
-
147
-
148
-
149
-
150
-
151
-
152
-
153
-
154
-
155
-
156
-
157
-
158
-
159
-
160
-
161
-
162
-
163
-
164
-
165
-
166
-
167
-
168
-
169
-
170
-
171
-
172
-
173
-
174
-
175
-
176
-
177
-
178
-
179
-
180
-
181
-
182
-
183
-
184
-
185
-
186
-
187
-
188
-
189
-
190
-
191
-
192
-
193
-
194
-
195
-
196
-
197
-
198
-
199
-
200
-
201
-
202
-
203
-
204
-
205
-
206
-
207
-
208
-
209
-
210
-
211
-
212
-
213
-
214
-
215
-
216
-
217
-
218
-
219
-
220
-
221
-
222
-
223
-
224
-
225
-
226
-
227
-
228
-
229
-
230
-
231
-
232
-
233
-
234
-
235
-
236
-
237
-
238
-
239
-
240
-
241
-
242
-
243
-
244
-
245
-
246
-
247
-
248
-
249
-
250
-
251
-
252
-
253
-
254
-
255
-
256
-
257
-
258
-
259
-
260
-
261
-
262
-
263
-
264
-
265
-
266
-
267
-
268
-
269
-
270
-
271
-
272
-
273
-
274
-
275
-
276
-
277
-
278
-
279
-
280
-
281
-
282
-
283
-
284
-
285
-
286
-
287
-
288
-
289
-
290
-
291
-
292
-
293
-
294
-
295
-
296
-
297
-
298
-
299
-
300
-
301
-
302
-
303
 |
 |
