Sony DSC-RX100M5 Help Guide Printable PDF - Page 175
Finder/monitor
 |
View all Sony DSC-RX100M5 manuals
Add to My Manuals
Save this manual to your list of manuals |
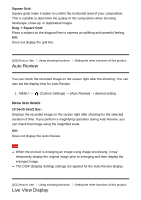
Page 175 highlights
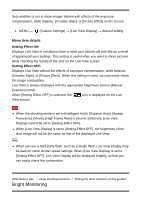
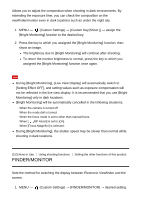
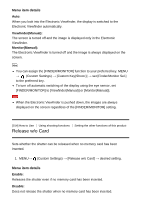
Allows you to adjust the composition when shooting in dark environments. By extending the exposure time, you can check the composition on the viewfinder/monitor even in dark locations such as under the night sky. 1. MENU → (Custom Settings) → [Custom Key(Shoot.)] → assign the [Bright Monitoring] function to the desired key. 2. Press the key to which you assigned the [Bright Monitoring] function, then shoot an image. The brightness due to [Bright Monitoring] will continue after shooting. To return the monitor brightness to normal, press the key to which you assigned the [Bright Monitoring] function once again. Note During [Bright Monitoring], [Live View Display] will automatically switch to [Setting Effect OFF], and setting values such as exposure compensation will not be reflected in the live view display. It is recommended that you use [Bright Monitoring] only in dark locations. [Bright Monitoring] will be automatically cancelled in the following situations. When the camera is turned off. When the mode dial is turned. When the focus mode is set to other than manual focus. When [ MF Assist] is set to [On]. When [Focus Magnifier] is selected. During [Bright Monitoring], the shutter speed may be slower than normal while shooting in dark locations. [153] How to Use Using shooting functions Setting the other functions of this product FINDER/MONITOR Sets the method for switching the display between Electronic Viewfinder and the screen. 1. MENU → (Custom Settings) → [FINDER/MONITOR] → desired setting.
-
 1
1 -
2
-
3
-
4
-
5
-
6
-
7
-
8
-
9
-
10
-
11
-
12
-
13
-
14
-
15
-
16
-
17
-
18
-
19
-
20
-
21
-
22
-
23
-
24
-
25
-
26
-
27
-
28
-
29
-
30
-
31
-
32
-
33
-
34
-
35
-
36
-
37
-
38
-
39
-
40
-
41
-
42
-
43
-
44
-
45
-
46
-
47
-
48
-
49
-
50
-
51
-
52
-
53
-
54
-
55
-
56
-
57
-
58
-
59
-
60
-
61
-
62
-
63
-
64
-
65
-
66
-
67
-
68
-
69
-
70
-
71
-
72
-
73
-
74
-
75
-
76
-
77
-
78
-
79
-
80
-
81
-
82
-
83
-
84
-
85
-
86
-
87
-
88
-
89
-
90
-
91
-
92
-
93
-
94
-
95
-
96
-
97
-
98
-
99
-
100
-
101
-
102
-
103
-
104
-
105
-
106
-
107
-
108
-
109
-
110
-
111
-
112
-
113
-
114
-
115
-
116
-
117
-
118
-
119
-
120
-
121
-
122
-
123
-
124
-
125
-
126
-
127
-
128
-
129
-
130
-
131
-
132
-
133
-
134
-
135
-
136
-
137
-
138
-
139
-
140
-
141
-
142
-
143
-
144
-
145
-
146
-
147
-
148
-
149
-
150
-
151
-
152
-
153
-
154
-
155
-
156
-
157
-
158
-
159
-
160
-
161
-
162
-
163
-
164
-
165
-
166
-
167
-
168
-
169
-
 170
170 -
 171
171 -
 172
172 -
 173
173 -
 174
174 -
 175
175 -
 176
176 -
 177
177 -
 178
178 -
 179
179 -
 180
180 -
181
-
182
-
183
-
184
-
185
-
186
-
187
-
188
-
189
-
190
-
191
-
192
-
193
-
194
-
195
-
196
-
197
-
198
-
199
-
200
-
201
-
202
-
203
-
204
-
205
-
206
-
207
-
208
-
209
-
210
-
211
-
212
-
213
-
214
-
215
-
216
-
217
-
218
-
219
-
220
-
221
-
222
-
223
-
224
-
225
-
226
-
227
-
228
-
229
-
230
-
231
-
232
-
233
-
234
-
235
-
236
-
237
-
238
-
239
-
240
-
241
-
242
-
243
-
244
-
245
-
246
-
247
-
248
-
249
-
250
-
251
-
252
-
253
-
254
-
255
-
256
-
257
-
258
-
259
-
260
-
261
-
262
-
263
-
264
-
265
-
266
-
267
-
268
-
269
-
270
-
271
-
272
-
273
-
274
-
275
-
276
-
277
-
278
-
279
-
280
-
281
-
282
-
283
-
284
-
285
-
286
-
287
-
288
-
289
-
290
-
291
-
292
-
293
-
294
-
295
-
296
-
297
-
298
-
299
-
300
-
301
-
302
-
303
 |
 |