Sony DSC-RX100M5 Help Guide Printable PDF - Page 81
Switching the screen display Shooting
 |
View all Sony DSC-RX100M5 manuals
Add to My Manuals
Save this manual to your list of manuals |
Page 81 highlights
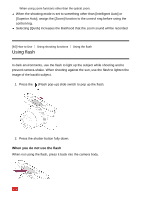
values (- side) makes the flash level lower. Note [Flash Comp.] does not work when the shooting mode is set to the following modes: [Intelligent Auto] [Superior Auto] [Sweep Panorama] [Scene Selection] The higher flash effect may not be visible due to the limited amount of flash light available, if the subject is outside the maximum range of the flash. If the subject is very close, the lower flash effect may not be visible. [50] How to Use Using shooting functions Selecting a screen display mode Switching the screen display (Shooting) You can change the display contents on the screen. 1. Press the DISP (Display Setting) button. Each time you press the DISP button, the recording information display changes. Graphic Display Display All Info.
-
 1
1 -
2
-
3
-
4
-
5
-
6
-
7
-
8
-
9
-
10
-
11
-
12
-
13
-
14
-
15
-
16
-
17
-
18
-
19
-
20
-
21
-
22
-
23
-
24
-
25
-
26
-
27
-
28
-
29
-
30
-
31
-
32
-
33
-
34
-
35
-
36
-
37
-
38
-
39
-
40
-
41
-
42
-
43
-
44
-
45
-
46
-
47
-
48
-
49
-
50
-
51
-
52
-
53
-
54
-
55
-
56
-
57
-
58
-
59
-
60
-
61
-
62
-
63
-
64
-
65
-
66
-
67
-
68
-
69
-
70
-
71
-
72
-
73
-
74
-
75
-
 76
76 -
 77
77 -
 78
78 -
 79
79 -
 80
80 -
 81
81 -
 82
82 -
 83
83 -
 84
84 -
 85
85 -
 86
86 -
87
-
88
-
89
-
90
-
91
-
92
-
93
-
94
-
95
-
96
-
97
-
98
-
99
-
100
-
101
-
102
-
103
-
104
-
105
-
106
-
107
-
108
-
109
-
110
-
111
-
112
-
113
-
114
-
115
-
116
-
117
-
118
-
119
-
120
-
121
-
122
-
123
-
124
-
125
-
126
-
127
-
128
-
129
-
130
-
131
-
132
-
133
-
134
-
135
-
136
-
137
-
138
-
139
-
140
-
141
-
142
-
143
-
144
-
145
-
146
-
147
-
148
-
149
-
150
-
151
-
152
-
153
-
154
-
155
-
156
-
157
-
158
-
159
-
160
-
161
-
162
-
163
-
164
-
165
-
166
-
167
-
168
-
169
-
170
-
171
-
172
-
173
-
174
-
175
-
176
-
177
-
178
-
179
-
180
-
181
-
182
-
183
-
184
-
185
-
186
-
187
-
188
-
189
-
190
-
191
-
192
-
193
-
194
-
195
-
196
-
197
-
198
-
199
-
200
-
201
-
202
-
203
-
204
-
205
-
206
-
207
-
208
-
209
-
210
-
211
-
212
-
213
-
214
-
215
-
216
-
217
-
218
-
219
-
220
-
221
-
222
-
223
-
224
-
225
-
226
-
227
-
228
-
229
-
230
-
231
-
232
-
233
-
234
-
235
-
236
-
237
-
238
-
239
-
240
-
241
-
242
-
243
-
244
-
245
-
246
-
247
-
248
-
249
-
250
-
251
-
252
-
253
-
254
-
255
-
256
-
257
-
258
-
259
-
260
-
261
-
262
-
263
-
264
-
265
-
266
-
267
-
268
-
269
-
270
-
271
-
272
-
273
-
274
-
275
-
276
-
277
-
278
-
279
-
280
-
281
-
282
-
283
-
284
-
285
-
286
-
287
-
288
-
289
-
290
-
291
-
292
-
293
-
294
-
295
-
296
-
297
-
298
-
299
-
300
-
301
-
302
-
303
 |
 |
values (– side) makes the flash level lower.
Note
[Flash Comp.] does not work when the shooting mode is set to the following
modes:
[Intelligent Auto]
[Superior Auto]
[Sweep Panorama]
[Scene Selection]
The higher flash effect may not be visible due to the limited amount of flash light
available, if the subject is outside the maximum range of the flash. If the subject
is very close, the lower flash effect may not be visible.
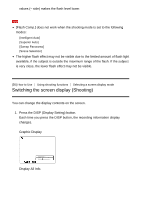
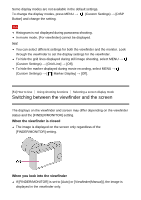
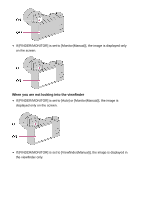
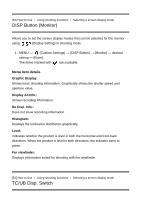
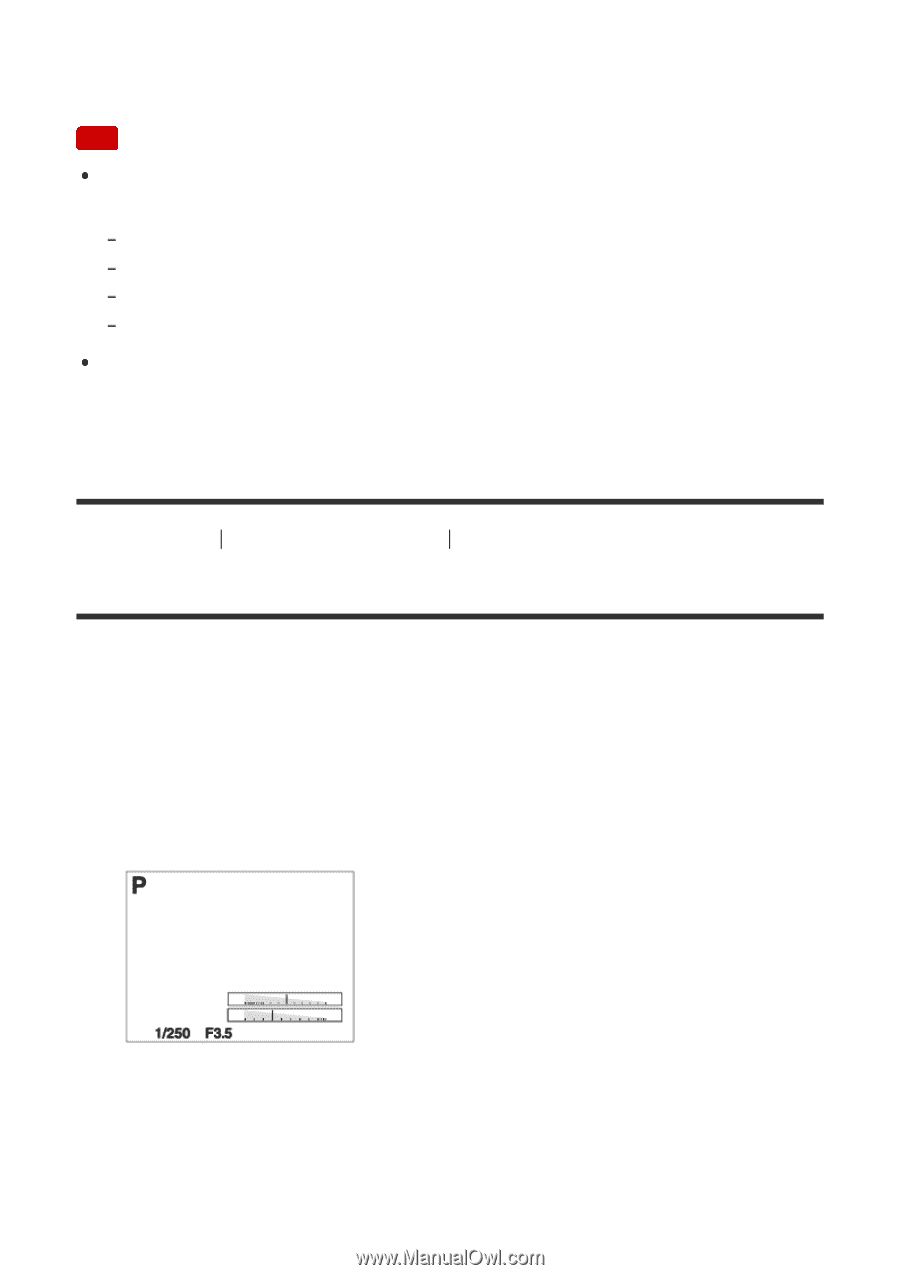
[50] How to Use
Using shooting functions
Selecting a screen display mode
Switching the screen display (Shooting)
You can change the display contents on the screen.
1. Press the DISP (Display Setting) button.
Each time you press the DISP button, the recording information display
changes.
Graphic Display
Display All Info.