Sony SRR4 Product Manual (SRMASTER: SRR4 Operation Manual)
Sony SRR4 Manual
 |
View all Sony SRR4 manuals
Add to My Manuals
Save this manual to your list of manuals |
Sony SRR4 manual content summary:
- Sony SRR4 | Product Manual (SRMASTER: SRR4 Operation Manual) - Page 1
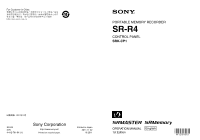
PORTABLE MEMORY RECORDER SR-R4 CONTROL PANEL SRK-CP1 SR-R4 (SY) 4-412-781-01 (1) Sony Corporation Printed on recycled paper. Printed in Japan 2011.11 32 © 2011 OPERATION MANUAL [English] 1st Edition - Sony SRR4 | Product Manual (SRMASTER: SRR4 Operation Manual) - Page 2
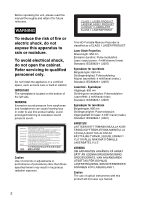
operating the unit, please read this manual thoroughly and retain it for future reference. WARNING To reduce the risk of fire or electric shock, do not expose this apparatus to rain or moisture. To avoid electrical shock, do not open the cabinet. Refer servicing to qualified personnel only. Do not - Sony SRR4 | Product Manual (SRMASTER: SRR4 Operation Manual) - Page 3
if not installed and used in accordance with the instruction manual, may cause harmful interference to radio communications. Operation Sony Deutschland GmbH, Hedelfinger Strasse 61, 70327 Stuttgart, Germany. For any service or guarantee matters please refer to the addresses given in separate service - Sony SRR4 | Product Manual (SRMASTER: SRR4 Operation Manual) - Page 4
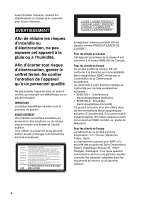
1-7-1 Konan, Minato-ku, Tokyo, Japon. Le représentant autorisé pour EMC et la sécurité des produits est Sony Deutschland GmbH, Hedelfinger Strasse 61, 70327 Stuttgart, Allemagne. Pour toute question concernant le service ou la garantie, veuillez consulter les adresses indiquées dans les documents de - Sony SRR4 | Product Manual (SRMASTER: SRR4 Operation Manual) - Page 5
Bitte lesen Sie dieses Handbuch vor der Benutzung des Geräts sorgfältig durch und bewahren Sie es zum späteren Nachschlagen auf. WARNUNG Um die Gefahr von Bränden oder elektrischen Schlägen zu verringern, darf dieses Gerät nicht Regen oder Feuchtigkeit ausgesetzt werden. Um einen elektrischen Schlag - Sony SRR4 | Product Manual (SRMASTER: SRR4 Operation Manual) - Page 6
Corporation, 1-7-1 Konan, Minato-ku, Tokyo, Japan. Der autorisierte Repräsentant für EMV und Produktsicherheit ist Sony Deutschland GmbH, Hedelfinger Strasse 61, 70327 Stuttgart, Deutschland. Bei jeglichen Angelegenheiten in Bezug auf Kundendienst oder Garantie wenden Sie sich bitte an die in den - Sony SRR4 | Product Manual (SRMASTER: SRR4 Operation Manual) - Page 7
Table of Contents Chapter 1 : Overview Features 9 System Configuration Example 9 Names of Parts 10 Overall View 10 Left Side View 10 Rear and Right Side View ......... 11 Control Panel (SRK-CP1, Option 12 Display 13 Chapter 2 : Preparation Work Flow 15 Mount Control Panel on Unit 15 - Sony SRR4 | Product Manual (SRMASTER: SRR4 Operation Manual) - Page 8
Connectors 50 Supplied Accessories 51 Optional Accessories 51 Error Messages and Warning Messages 52 About Error Messages 52 About Warning Messages ......... 52 Warning System 53 Troubleshooting 54 About Recording/Playback Formats.. 57 Index 58 8 Table of Contents - Sony SRR4 | Product Manual (SRMASTER: SRR4 Operation Manual) - Page 9
for the recording media. SRMASTER and SRMemory are trademarks of Sony Corporation. F65RAW Recording Supports F65RAW recording. There is 16-channel (uncompressed, 24-bit, 48 kHz) support for audio. F65 dockable operation Supports dockable operation in combination with the F65. The following figure - Sony SRR4 | Product Manual (SRMASTER: SRR4 Operation Manual) - Page 10
765 4 1. Lid open/close button (page 22) 2. Tally indicator (page 22) Lights up during recording. Flashes as a warning indication when an error or problem has occurred. 3. POWER (power supply) indicator (page 21) Lights up in green when power to the unit is on. 4. EJECT button (page 23) 5. SRMemory - Sony SRR4 | Product Manual (SRMASTER: SRR4 Operation Manual) - Page 11
Chapter 1 Overview Rear and Right Side View 1 2 3 1. Power switch (page 21) Setting the switch to the ? side turns power on, and setting the switch to the 1 side turns power off. 2. Cable clamp (page 16) 3. Fan Note Do not block the ventilation openings. Otherwise internal heat buildup can lead - Sony SRR4 | Product Manual (SRMASTER: SRR4 Operation Manual) - Page 12
flashing. In addition, over a long period of use, because of the physical characteristics of the liquid crystal display, such "stuck" pixels may appear spontaneously. These problems are not a malfunction. Note that any such problems have no effect on recorded data. 12 Names of Parts - Sony SRR4 | Product Manual (SRMASTER: SRR4 Operation Manual) - Page 13
Chapter 1 Overview Display The condition shown below is called the HOME screen in this manual. 1 2 dB SDI SDI SDI SDI SDI SDI SDI SDI SDI SDI SDI SDI SDI SDI SDI SDI 0 -10 -20 -30 -60 EE EMP EMP EMP - Sony SRR4 | Product Manual (SRMASTER: SRR4 Operation Manual) - Page 14
Chapter 1 Overview 5. Status indication Shows the control mode of the unit (LOCAL), power mode (EE), and current time. Top row Shows LOCAL always. Bottom row Shows the current time. 6. Signal format indication Shows the format of the signal being recorded. 7. Encoding format indication (page 57) - Sony SRR4 | Product Manual (SRMASTER: SRR4 Operation Manual) - Page 15
Chapter 2 Preparation 2 Chapter Preparation Work Flow Mount Control Panel on Unit The steps that are required before starting to use the SR-R4 are listed below. When mounting Control Panel (SRK-CP1, Option) on the unit Mount control panel on unit (page 15) Connect F65 (page 17) Turn power on ( - Sony SRR4 | Product Manual (SRMASTER: SRR4 Operation Manual) - Page 16
Chapter 2 Preparation 3 Use the supplied control panel cable to connect the unit and the control panel. To remove the control panel Grasp the underside of the CP bracket and push it in the B direction to release the lock. Then slide the control panel out. 4 Use the cable clamp as shown, to fix - Sony SRR4 | Product Manual (SRMASTER: SRR4 Operation Manual) - Page 17
, first mount the F65 on a tripod and secure it such that it does not move. For details of mounting on a tripod, refer to the Operation Manual for the F65. • When mounting the unit, do so in an environment relatively free from dust, etc. 1 Remove the connector cap from the CAMERA connector - Sony SRR4 | Product Manual (SRMASTER: SRR4 Operation Manual) - Page 18
3 Press down firmly on the point shown in the diagram, and fasten the docking screws. Note Do not push down on the lid. Removing the Unit from the F65 1 Press down firmly on the point shown in the diagram, and loosen the docking screws. Chapter 2 Preparation Tip You can leave the connector cap, - Sony SRR4 | Product Manual (SRMASTER: SRR4 Operation Manual) - Page 19
Chapter 2 Preparation Mount Control Panel on the F65 3 Slide the control panel into the CP bracket. Attach the Control Panel (SRK-CP1, Option) to the F65, and connect the unit and the control panel with the control panel cable. 1 Attach the outside bracket supplied with the control panel to the - Sony SRR4 | Product Manual (SRMASTER: SRR4 Operation Manual) - Page 20
Chapter 2 Preparation To remove the control panel Grasp the underside of the CP bracket and push it in the B direction to release the lock. Then slide the control panel out. Attach the Battery Pack To attach the battery pack, the following options must be installed using the BKP spacer supplied - Sony SRR4 | Product Manual (SRMASTER: SRR4 Operation Manual) - Page 21
2 Attach the supplied BKP spacer. The S symbol must face up. S symbols Turn Power On Chapter 2 Preparation 3 Attach the BKP-L551 using the screw holes labeled with an S symbol, and fasten. BKP-L551 fastening L screws To accessory BKP-L551 fastening L wrench To power up the unit 1 Press the power - Sony SRR4 | Product Manual (SRMASTER: SRR4 Operation Manual) - Page 22
END and END warnings. (see page 46) When AC power is selected The connector symbol is shown. 16.5V Insert SRMemory Card Supported SRMemory cards The unit supports the following SRMemory cards. 59.94p SRMemory card SR-256S55 SR-512S55 Recording time1) (F65RAW mode) 6 12 23.97p SRMemory card SR - Sony SRR4 | Product Manual (SRMASTER: SRR4 Operation Manual) - Page 23
normally. For information on what to do in this case, see "Salvaging SRMemory cards for which recording did not complete properly" (page 54) in the "Troubleshooting" section. To remove the SRMemory card 1 Press the EJECT button on the control panel while power to the unit is on or turn the power - Sony SRR4 | Product Manual (SRMASTER: SRR4 Operation Manual) - Page 24
Chapter 2 Preparation 2 Select and confirm "SRMemory" t select and confirm "FORMAT" t move the cursor to [OK] and confirm while pressing the FUNC button. The file system formatting process starts. When the process is finished, the indication "Completed" is shown. 3 Return to the HOME screen. (see - Sony SRR4 | Product Manual (SRMASTER: SRR4 Operation Manual) - Page 25
Chapter 3 Basic Menu Operations 3 Chapter Basic Menu Operations The menu system of the SR-R4 consists of the following four menus. Menu Overview TC Setup Serves for making time code settings. AUDIO Setup Serves for making audio signal related settings. SYSTEM Setup Serves for making system - Sony SRR4 | Product Manual (SRMASTER: SRR4 Operation Manual) - Page 26
Chapter 3 Basic Menu Operations 2 Rotate the SELECT/ENTER dial to move the cursor to the target item, and press the SELECT/ENTER dial. Submenu window TC Setup TIMER SEL TIMER RESET TIMER PRESET TCR SEL TCG MODE RUN MODE TCG SET OTHERS TC LTC PRST R RUN TCG Setting(Main) DF/NDF DF UBG SRC TCG - Sony SRR4 | Product Manual (SRMASTER: SRR4 Operation Manual) - Page 27
Chapter 3 Basic Menu Operations Signal Format Settings Selecting the Signal Format Making "SIGNAL FORMAT" settings 1 Press the SYSTEM button. The SYSTEM Setup menu appears. 2 1 Select "SIGNAL FORMAT", and confirm t2 select "FRAME", and confirm t3 select the format to use, and confirm. 1 SIGNAL - Sony SRR4 | Product Manual (SRMASTER: SRR4 Operation Manual) - Page 28
Operation Mode Settings Display Settings Chapter 3 Basic Menu Operations The operation mode must be switched to RECORDER for recording, and to PLAYER for playback. You change mode using RECORDER/PLAYER (see page 42) in the VIDEO Setup menu. Note The unit restarts after changing the mode. The - Sony SRR4 | Product Manual (SRMASTER: SRR4 Operation Manual) - Page 29
Chapter 3 Basic Menu Operations Date Settings Display the System menu and select OTHERS >SET DATE menu to set the date and time of the unit. To set the date and time (OTHERS >SET DATE menu) 1 Display the System menu, and then select and confirm "OTHERS" t select and confirm "SET DATE." 2 Set the - Sony SRR4 | Product Manual (SRMASTER: SRR4 Operation Manual) - Page 30
4 Chapter Recording and Playback Chapter 4 Recording and Playback Recording Preparations and Operations Before recording, make the following preparations. Recording preparations Preparation Operation Reference Set the date and OTHERS >SET page 29 time for the unit. DATE in the SYSTEM Setup - Sony SRR4 | Product Manual (SRMASTER: SRR4 Operation Manual) - Page 31
Chapter 4 Recording and Playback 2 Set the signal to record for each of the other tracks in the same way. To set the audio signals to monitor Set the audio monitor signal to output from the EARPHONES jack for each channel. 1 Display the AUDIO Setup menu and then select and confirm "PHONE SEL." The - Sony SRR4 | Product Manual (SRMASTER: SRR4 Operation Manual) - Page 32
Chapter 4 Recording and Playback Full Peak: Displays 0 dBFS as the peak value. Full Ref: Displays the reference level (+4 dBu) as 0 dB. Fine: Displays a scale with 0.25 dB steps and the reference level at the center. To set the recording levels The recording level can be set for each channel. Note - Sony SRR4 | Product Manual (SRMASTER: SRR4 Operation Manual) - Page 33
To select the time code to record The time code can be selected in the following menu. Menu item TCG MODE PRST RGN Time code An arbitrary time code can be set. (R RUN/F RUN and DF/NDF can be set to an arbitrary value in the menu.) In accordance with the time code input via the TC IN connector. - Sony SRR4 | Product Manual (SRMASTER: SRR4 Operation Manual) - Page 34
Chapter 4 Recording and Playback To record the time code The following methods are available for recording the time code. • Set the initial value and record the time code. • Externally synchronize the internal time code generator. To set the initial value and record the time code Set an arbitrary - Sony SRR4 | Product Manual (SRMASTER: SRR4 Operation Manual) - Page 35
Chapter 4 Recording and Playback When the REC INHI indicator is lit Record inhibit is set. • Set SYSTEM Setup > REC INHI to "OFF." (see page 46) • Check that FS LOCK for the SRMemory card is not locked. (see page 47) • Check that the write-protect switch for the SRMemory card is not in the WP - Sony SRR4 | Product Manual (SRMASTER: SRR4 Operation Manual) - Page 36
Chapter 4 Recording and Playback To set the operation mode The operation mode must be switched to PLAYER for playback. For details, see "Operation Mode Settings" (page 28). Playback 1 Insert the SRMemory card to play back. For details, see "To insert the SRMemory card" (page 22). 2 Press the PLAY - Sony SRR4 | Product Manual (SRMASTER: SRR4 Operation Manual) - Page 37
Chapter 4 Recording and Playback How to Use the Recording and Playback Operation Buttons Button STOP button PLAY button and indicator REC button and indicator REW button and indicator F FWD button and indicator PAUSE button and indicator Function when pressed alone Function when pressed with - Sony SRR4 | Product Manual (SRMASTER: SRR4 Operation Manual) - Page 38
Chapter 4 Recording and Playback FILE LIST Operations "FILE LIST" in the SYSTEM Setup menu allows you to perform operations such as displaying a list of the files recorded to the SRMemory card, displaying detailed information, performing file operations (deleting and renaming), and playing back - Sony SRR4 | Product Manual (SRMASTER: SRR4 Operation Manual) - Page 39
Chapter 4 Recording and Playback Display when the SRMemory card contains no files File list [0/0] No file data Name Date DUR: --:--:--:-Format SR-R4:CAM STOP TCG 00:00:00:00 Display during recording When recording starts, a new file with a red icon to indicate recording is in - Sony SRR4 | Product Manual (SRMASTER: SRR4 Operation Manual) - Page 40
5 Chapter Menu Details • The settings displayed in bold are the factory default settings. • The settings enclosed in [] are the settings as displayed in the settings windows. TC Setup Menu Chapter 5 Menu Details Setting Item TIMER SEL TIMER RESET TIMER PRESET TCR SEL TCG MODE 40 TC Setup Menu - Sony SRR4 | Product Manual (SRMASTER: SRR4 Operation Manual) - Page 41
Setting Item Settings RUN MODE Selects the run mode of the internal time code generator. F RUN [Free Run]: Advances the time code while the power is on. R RUN [Rec Run]: Advances the time code only during recording. TCG SET Time code generator settings related to the main time code DF/NDF Sets - Sony SRR4 | Product Manual (SRMASTER: SRR4 Operation Manual) - Page 42
VIDEO Setup Menu Setting Item RECORDER/PLAYER Settings Selects RECORDER or PLAYER operation mode. Note After pressing the ENTER button, the unit restarts in the selected operation mode (see page 28). Chapter 5 Menu Details 42 VIDEO Setup Menu - Sony SRR4 | Product Manual (SRMASTER: SRR4 Operation Manual) - Page 43
AUDIO Setup Menu Chapter 5 Menu Details Setting Item INPUT SEL Selection of input signals PHONE SEL MIX MODE TRACK1 TRACK2 TRACK3 TRACK4 TRACK5 TRACK6 TRACK7 TRACK8 TRACK9 TRACK10 TRACK11 TRACK12 TRACK13 TRACK14 TRACK15 TRACK16 REC LEVEL PB LEVEL Settings Selects the signal to assign to track - Sony SRR4 | Product Manual (SRMASTER: SRR4 Operation Manual) - Page 44
Setting Item METER TYPE PEAK HOLD BEEP (PHONE) ALARM Sets the volume of the beep tone. WARN INPUT DELAY Recording audio signal phase setting ANALOG INPUT DELAY Settings Sets the display range of the audio level meters. PEAK [Full Peak]: Displays 0 dBFS as the peak value. REF [Full Ref]: - Sony SRR4 | Product Manual (SRMASTER: SRR4 Operation Manual) - Page 45
SYSTEM Setup Menu Setting Item FILE LIST FILE LIST SORT SIGNAL FORMAT Settings of signal formats FRAME LCD Settings of display backlight LIGHT OFF BRIGHT SAVER SAVER MSG Settings Displays a list of recording files and allows recording files to be selected and file operations to be performed - Sony SRR4 | Product Manual (SRMASTER: SRR4 Operation Manual) - Page 46
Setting Item Settings KEYMAP EJECT Settings of keymap EJECT button function DIS [Disable]: Disables the button function. ENA [Enable]: Enables the button function. STOP STOP button function PLAY PLAY button function REC REC button function REW REW button function FFWD FFWD button function - Sony SRR4 | Product Manual (SRMASTER: SRR4 Operation Manual) - Page 47
Setting Item SRMemory SRMemory related settings INFO DISP FILENAME CAMERA ID REEL NO. FS LOCK FORMAT OTHERS SOFT VERSION HOURS METER OPTION LIST SET DATE Settings Displays SRMemory card information. Determines the file name generated when recording. DEFAULT [Default]: Uses SR-R1000 format file - Sony SRR4 | Product Manual (SRMASTER: SRR4 Operation Manual) - Page 48
F65 DOCK indicator turns on yellow or red, clean the connector using the following procedure. For details about the DOCK indicator, refer to the Operation Manual for the F65. The following items are required to clean the CAMERA connector. • Shutter opening jig JT-FODSP-4 for the D-Sub connector plug - Sony SRR4 | Product Manual (SRMASTER: SRR4 Operation Manual) - Page 49
If no shutter opening jig is available Press point 1 on the CAMERA connector using your finger or other object to open the protective shutter and expose the optical contacts. Then proceed to step 4. 6 Release the connector's protective shutter, and connect the unit to the F65. If not connecting the - Sony SRR4 | Product Manual (SRMASTER: SRR4 Operation Manual) - Page 50
Specifications Video F65RAW format General Recording format F65RAW Power supply 11 to 17 V DC Power consumption 37 W (F65RAW 23P recording) Operating temperature 0 °C to 40 °C (32 °F to 104 °F) Storage temperature -20 °C to +60 °C (-4 °F to +140 °F) Operating relative humidity 10% to 95% (no - Sony SRR4 | Product Manual (SRMASTER: SRR4 Operation Manual) - Page 51
Control panel connector (1) Supplied Accessories BKP spacer (1) Operation Manual (this document) (1) Optional Accessories Control Panel SRK-CP1 ANY TYPE. • Always verify that the unit is operating properly before use. SONY WILL NOT BE LIABLE FOR DAMAGES OF ANY KIND INCLUDING, BUT NOT LIMITED TO - Sony SRR4 | Product Manual (SRMASTER: SRR4 Operation Manual) - Page 52
of the error, and power the system off and on again. If the same error message appears again when the system is powered on, contact a Sony service representative. To close the error message popup window Press the HOME button or the BACK button. The error code is shown in the operation status - Sony SRR4 | Product Manual (SRMASTER: SRR4 Operation Manual) - Page 53
Operation Check the error continues or message, and resolve stops, the condition. depending on Alternatively, contact a the type of Sony service error. representative. - a) SRMemory card is Operation Prepare to replace almost full. continues. SRMemory card. - SRMemory card is Recording - Sony SRR4 | Product Manual (SRMASTER: SRR4 Operation Manual) - Page 54
Troubleshooting Salvaging SRMemory cards for which recording did not complete properly After recording to an SRMemory card is complete, The formatting process starts, and the "Please wait" message appears. The message closes automatically when the process is complete. Appendix 54 Troubleshooting - Sony SRR4 | Product Manual (SRMASTER: SRR4 Operation Manual) - Page 55
not support the Some older monitors support only the 59.94/ format. 60 frequencies. Use a monitor with specifications supporting the monitor settings. Try turning it off and on again. Audio Problem Cause Countermeasures No sound. Mode was switched. To prevent noise Troubleshooting 55 - Sony SRR4 | Product Manual (SRMASTER: SRR4 Operation Manual) - Page 56
Other Problem Power goes off. Cannot record. Power to other equipment does not come on. Cause Countermeasures The current limiter of the power Adjust to the original position. Power switch of other equipment is Turn power switch of other equipment on. not on. Appendix 56 Troubleshooting - Sony SRR4 | Product Manual (SRMASTER: SRR4 Operation Manual) - Page 57
About Recording/Playback Formats Scanning system System frame frequency Progressive 23.98 24 25 29.97 59.94 a : Recording and playback are possible Encoding F65RAW a a a a a Appendix About Recording/Playback Formats 57 - Sony SRR4 | Product Manual (SRMASTER: SRR4 Operation Manual) - Page 58
Index A Accessories supplied 51 ADJUST knob 12 Adjusting playback audio levels 35 AUDIO INPUT CH-1, CH-2 connectors 10 AUDIO INPUT CH-1, CH-2 input selection switches 10 Audio level meters 13 Audio monitor signal settings 35 AUDIO Setup menu 43 AUX IN connector 10 B Backlight 28 BATTERY 46 BEEP ( - Sony SRR4 | Product Manual (SRMASTER: SRR4 Operation Manual) - Page 59
40 TCG MODE 40 TCG SET 41 TCR SEL 40 Time code 32 Time data 35 TIMER PRESET 40 TIMER RESET 40 TIMER SEL 40 Troubleshooting 54 U User bits 32 W Warning system 53 Index 59 Index - Sony SRR4 | Product Manual (SRMASTER: SRR4 Operation Manual) - Page 60
Index 60 Index - Sony SRR4 | Product Manual (SRMASTER: SRR4 Operation Manual) - Page 61
Corporation and is intended solely for use by the purchasers of the equipment described in this manual. Sony Corporation expressly prohibits the duplication of any portion of this manual or the use thereof for any purpose other than the operation or maintenance of the equipment described in this
-
 1
1 -
 2
2 -
 3
3 -
 4
4 -
 5
5 -
 6
6 -
 7
7 -
8
-
9
-
10
-
11
-
12
-
13
-
14
-
15
-
16
-
17
-
18
-
19
-
20
-
21
-
22
-
23
-
24
-
25
-
26
-
27
-
28
-
29
-
30
-
31
-
32
-
33
-
34
-
35
-
36
-
37
-
38
-
39
-
40
-
41
-
42
-
43
-
44
-
45
-
46
-
47
-
48
-
49
-
50
-
51
-
52
-
53
-
54
-
55
-
56
-
57
-
58
-
59
-
60
-
61
 |
 |
SR-R4
(SY)
4-412-781-
01
(1)
Sony Corporation
Printed on recycled paper.
Printed in Japan
2011.11 32
© 2011
PORTABLE MEMORY RECORDER
SR-R4
CONTROL PANEL
SRK-CP1
OPERATION MANUAL
[English]
1st Edition