Sony SRR4 Product Manual (SRMASTER: SRR4 Operation Manual) - Page 16
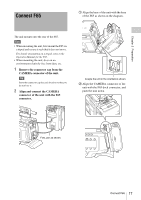
Use the supplied control panel cable to, connect the unit and the control panel.
 |
View all Sony SRR4 manuals
Add to My Manuals
Save this manual to your list of manuals |
Page 16 highlights
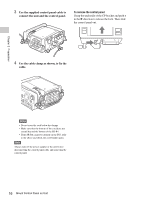
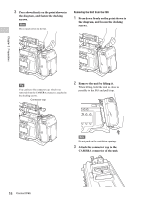
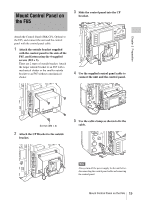
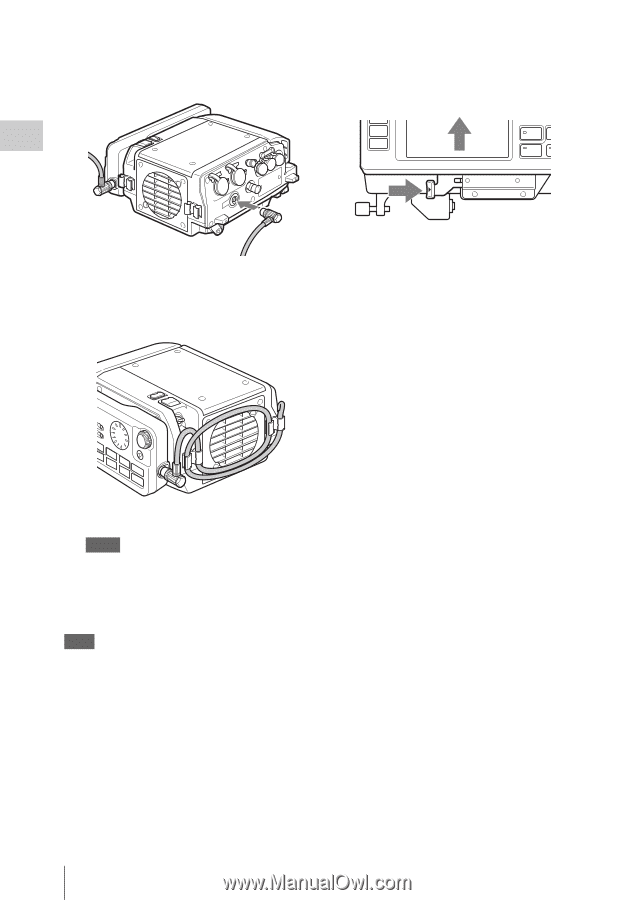
Chapter 2 Preparation 3 Use the supplied control panel cable to connect the unit and the control panel. To remove the control panel Grasp the underside of the CP bracket and push it in the B direction to release the lock. Then slide the control panel out. 4 Use the cable clamp as shown, to fix the cable. Notes • Do not cross the cord below the clamps. • Make sure that the bottom of the cord does not extend beyond the bottom of the SR-R4. • If the SR-R4 cannot be docked on the F65, refer to the above and check the cord bundle again. Note Always turn off the power supply for the unit before disconnecting the control panel cable and removing the control panel. 16 Mount Control Panel on Unit
-
 1
1 -
2
-
3
-
4
-
5
-
6
-
7
-
8
-
9
-
10
-
 11
11 -
 12
12 -
 13
13 -
 14
14 -
 15
15 -
 16
16 -
 17
17 -
 18
18 -
 19
19 -
 20
20 -
 21
21 -
22
-
23
-
24
-
25
-
26
-
27
-
28
-
29
-
30
-
31
-
32
-
33
-
34
-
35
-
36
-
37
-
38
-
39
-
40
-
41
-
42
-
43
-
44
-
45
-
46
-
47
-
48
-
49
-
50
-
51
-
52
-
53
-
54
-
55
-
56
-
57
-
58
-
59
-
60
-
61
 |
 |
Mount Control Panel on Unit
16
Chapter 2
Preparation
3
Use the supplied control panel cable to
connect the unit and the control panel.
4
Use the cable clamp as shown, to fix the
cable.
Notes
•
Do not cross the cord below the clamps.
•
Make sure that the bottom of the cord does not
extend beyond the bottom of the SR-R4.
•
If the SR-R4 cannot be docked on the F65, refer
to the above and check the cord bundle again.
Note
Always turn off the power supply for the unit before
disconnecting the control panel cable and removing the
control panel.
To remove the control panel
Grasp the underside of the CP bracket and push it
in the
B
direction to release the lock. Then slide
the control panel out.