Sony SRR4 Product Manual (SRMASTER: SRR4 Operation Manual) - Page 12
Control Panel (SRK-CP1, Option), SELECT/ENTER dial
 |
View all Sony SRR4 manuals
Add to My Manuals
Save this manual to your list of manuals |
Page 12 highlights
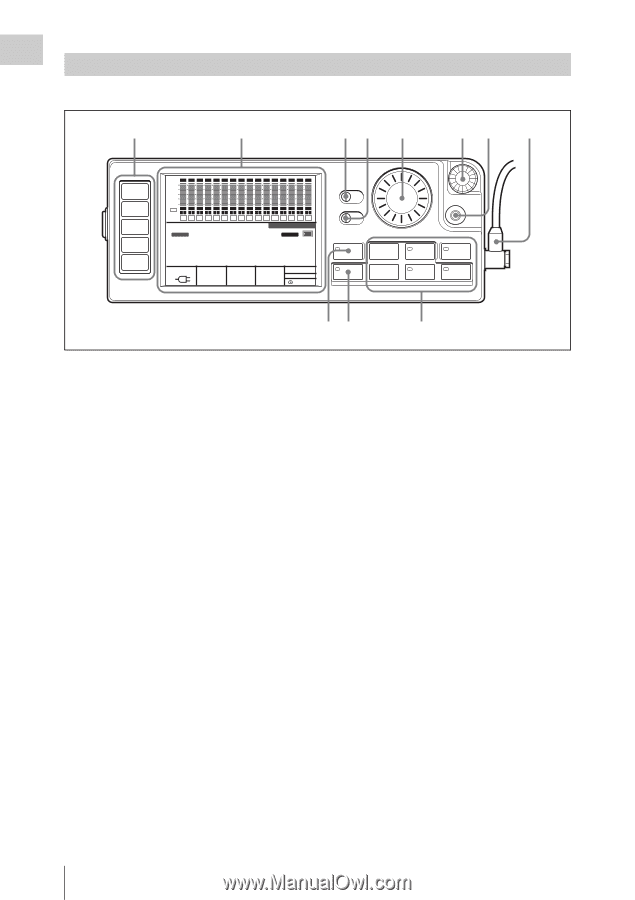
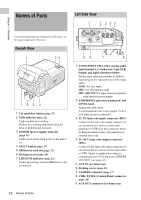
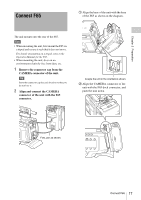
Chapter 1 Overview Control Panel (SRK-CP1, Option) For information on how to use the control panel, see "Basic Menu Operations" (page 25). 1 2 34 5 67 8 HOME TC VIDEO AUDIO SYSTEM dB SDI SDI SDI SDI SDI SDI SDI SDI SDI SDI SDI SDI SDI SDI SDI SDI 0 -10 -20 -30 -60 EE EMP EMP EMP EMP EMP EMP EMP EMP EMP EMP EMP EMP EMP EMP EMP EMP LR LR LR LR LR LR LR LR LR LR LR LR LR LR LR LR 1 2 3 4 5 6 7 8 9 10 11 12 13 14 15 16 STOP SR-R4:CAM TCG KEYINHI RECINHI 00 H 00 M 00 S 00 F 16.5V REMAIN ENCODE F65RAW STANDARD 23.98P 10min LOCAL EE 21:46 KEY INHI OFF ON LIGHT OFF ON ADJUST EJECT Z FUNC STOP x REW m PLAY B F FWD M SELECT/ENTER BACK REC z PAUSE X 11 10 9 1. Menu selection buttons (page 25) For information on menu items, see "Menu Details" (page 40). 2. Display (page 13) 3. KEY INHI (key inhibit) switch (page 26) 4. LIGHT switch (page 28) Setting this switch to ON turns the backlight on. 5. ADJUST knob Serves to adjust audio levels etc. 6. SELECT/ENTER dial (page 25) Serves to make menu selections etc. Rotate the dial to move the cursor and press the dial to change and confirm settings. 7. BACK button (page 25) When a menu is displayed, you can press this button to back up one level in the menu structure. 8. Control panel connection cable (page 16) 9. Record/Play buttons (page 34, 36, 37) Use these buttons to play recordings and files. The functions of the buttons change when they are pressed together with the FUNC button. 10. FUNC (Function) button (page 37) Holding down this button changes the operation of the Record/Play buttons. 11. EJECT button and indicator (page 23) Note on faulty pixels on the LCD panel The LCD panel fitted to this unit is manufactured with high precision technology, giving a functioning pixel ratio of at least 99.99%. Thus a very small proportion of pixels maybe "stuck", either always off (black), always on (red, green, or blue), or flashing. In addition, over a long period of use, because of the physical characteristics of the liquid crystal display, such "stuck" pixels may appear spontaneously. These problems are not a malfunction. Note that any such problems have no effect on recorded data. 12 Names of Parts
-
 1
1 -
2
-
3
-
4
-
5
-
6
-
 7
7 -
 8
8 -
 9
9 -
 10
10 -
 11
11 -
 12
12 -
 13
13 -
 14
14 -
 15
15 -
 16
16 -
 17
17 -
18
-
19
-
20
-
21
-
22
-
23
-
24
-
25
-
26
-
27
-
28
-
29
-
30
-
31
-
32
-
33
-
34
-
35
-
36
-
37
-
38
-
39
-
40
-
41
-
42
-
43
-
44
-
45
-
46
-
47
-
48
-
49
-
50
-
51
-
52
-
53
-
54
-
55
-
56
-
57
-
58
-
59
-
60
-
61
 |
 |