Sony SRR4 Product Manual (SRMASTER: SRR4 Operation Manual) - Page 35
Playback Preparations and Operations, Making Settings Related to Audio Monitor Signals
 |
View all Sony SRR4 manuals
Add to My Manuals
Save this manual to your list of manuals |
Page 35 highlights
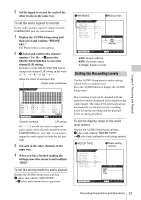
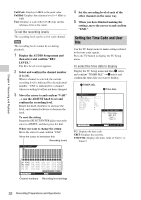
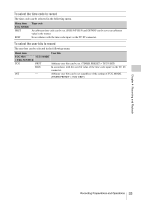
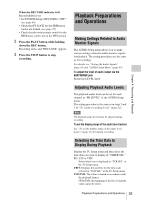
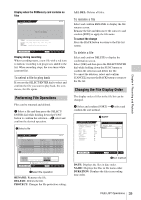
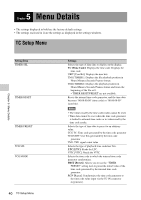
Chapter 4 Recording and Playback When the REC INHI indicator is lit Record inhibit is set. • Set SYSTEM Setup > REC INHI to "OFF." (see page 46) • Check that FS LOCK for the SRMemory card is not locked. (see page 47) • Check that the write-protect switch for the SRMemory card is not in the WP position. 2 Press the PLAY button while holding down the REC button. Recording starts, and "REC LOCK" appears. 3 Press the STOP button to stop recording. Playback Preparations and Operations Making Settings Related to Audio Monitor Signals The AUDIO Setup menu allows you to make various settings related to audio monitor signals for playback. The setting procedures are the same as for recording. For details, see "Setting the Audio Signals" (page 30) and "AUDIO Setup Menu" (page 43). To adjust the level of audio output via the EARPHONES jack Rotate the LEVEL knob. Adjusting Playback Audio Levels The playback audio level can be set for each channel in "PB LEVEL" of the AUDIO Setup menu. The setting procedure is the same as in steps 2 and 3 of "To set the recording levels" (page 32). Note The playback audio level cannot be adjusted during recording. To set the display range of the audio level meters See "To set the display range of the audio level meters" (page 31) for during recording. Selecting the Time Data to Display During Playback Display the TC Setup menu and then select the time data you want to display in "TIMER SEL." TC: LTC or VITC Select which one is displayed in "TCR SEL" in the TC Setup menu. UBIT: Displays the user bits for the time code selected in "TCR SEL" in the TC Setup menu. TM1/TM2: The values counted in accordance with the playback frames. (With TM2, the beginning of the file is 0 and the value cannot be reset.) Playback Preparations and Operations 35
-
 1
1 -
2
-
3
-
4
-
5
-
6
-
7
-
8
-
9
-
10
-
11
-
12
-
13
-
14
-
15
-
16
-
17
-
18
-
19
-
20
-
21
-
22
-
23
-
24
-
25
-
26
-
27
-
28
-
29
-
 30
30 -
 31
31 -
 32
32 -
 33
33 -
 34
34 -
 35
35 -
 36
36 -
 37
37 -
 38
38 -
 39
39 -
 40
40 -
41
-
42
-
43
-
44
-
45
-
46
-
47
-
48
-
49
-
50
-
51
-
52
-
53
-
54
-
55
-
56
-
57
-
58
-
59
-
60
-
61
 |
 |