Sony SRR4 Product Manual (SRMASTER: SRR4 Operation Manual) - Page 22
Insert SRMemory Card, Supported SRMemory cards
 |
View all Sony SRR4 manuals
Add to My Manuals
Save this manual to your list of manuals |
Page 22 highlights
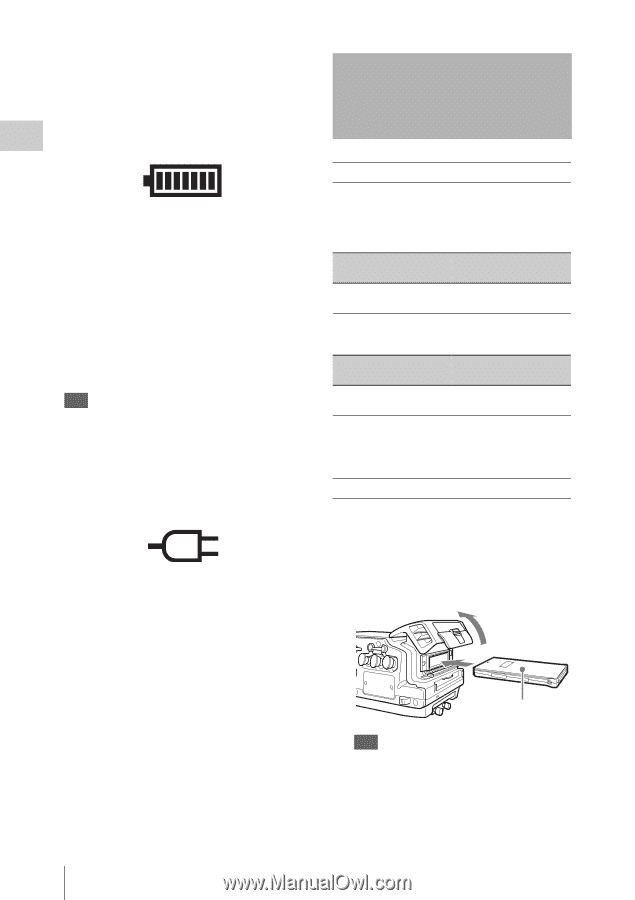
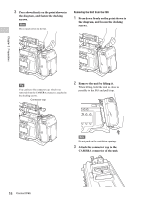
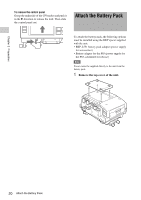
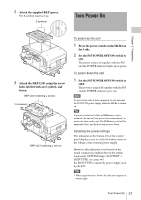
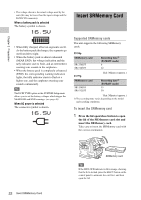
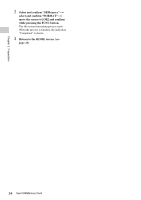
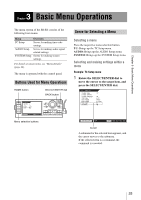
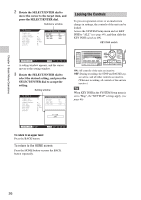
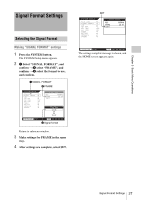
Chapter 2 Preparation • The voltage shown is the actual voltage used by the unit (this may be lower than the input voltage and the F65 DC IN connector). When a battery pack is selected The battery symbol is shown. 16.5V • When fully charged, all seven segments are lit. As the battery pack discharges, the segments go out from left to right. • When the battery pack is almost exhausted (NEAR END), the voltage indication and the tally indicator start to flash, and an intermittent warning tone sounds in the earphones. • When the battery pack is completely exhausted (END), the corresponding warning indication lights, the tally indicator starts to flash at a higher rate, and the earphones warning tone sounds continuously. Tip The DCIN TYPE option in the SYSTEM Setup menu allows you to set the battery voltages which trigger the NEAR END and END warnings. (see page 46) When AC power is selected The connector symbol is shown. 16.5V Insert SRMemory Card Supported SRMemory cards The unit supports the following SRMemory cards. 59.94p SRMemory card SR-256S55 SR-512S55 Recording time1) (F65RAW mode) 6 12 23.97p SRMemory card SR-256S55 SR-512S55 Unit: Minutes (approx.) Recording time1) (F65RAW mode) 15 30 Unit: Minutes (approx.) 1) The recording time varies depending on the model and recording conditions. To insert the SRMemory card 1 Press the lid open/close button to open the lid of the SRMemory card slot and insert the SRMemory card. Take care to insert the SRMemory card with the correct orientation. 22 Insert SRMemory Card SRMemory card Tip If the LID LOCK indicator is lit in orange, showing that the lid is locked, press the EJECT button on the control panel to unmount the card first, and then open the lid.
-
 1
1 -
2
-
3
-
4
-
5
-
6
-
7
-
8
-
9
-
10
-
11
-
12
-
13
-
14
-
15
-
16
-
 17
17 -
 18
18 -
 19
19 -
 20
20 -
 21
21 -
 22
22 -
 23
23 -
 24
24 -
 25
25 -
 26
26 -
 27
27 -
28
-
29
-
30
-
31
-
32
-
33
-
34
-
35
-
36
-
37
-
38
-
39
-
40
-
41
-
42
-
43
-
44
-
45
-
46
-
47
-
48
-
49
-
50
-
51
-
52
-
53
-
54
-
55
-
56
-
57
-
58
-
59
-
60
-
61
 |
 |