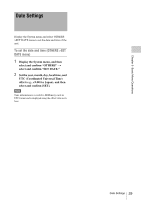
Sony SRR4 Product Manual (SRMASTER: SRR4 Operation Manual) - Page 30
Recording and Playback, Recording Preparations and Operations, Setting the Audio Signals
 |
View all Sony SRR4 manuals
Add to My Manuals
Save this manual to your list of manuals |
Page 30 highlights
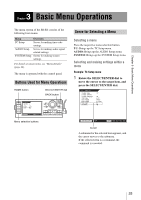
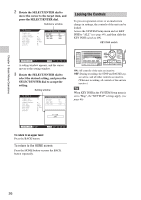
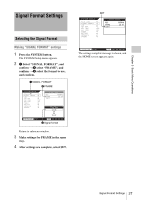
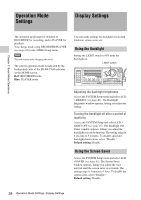
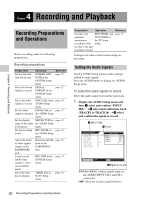
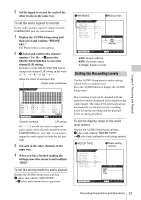
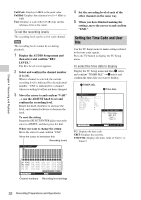
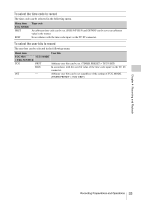
4 Chapter Recording and Playback Chapter 4 Recording and Playback Recording Preparations and Operations Before recording, make the following preparations. Recording preparations Preparation Operation Reference Set the date and OTHERS >SET page 29 time for the unit. DATE in the SYSTEM Setup menu Select the format SIGNAL page 27 signals to record. FORMAT in the SYSTEM Setup menu Select the audio INPUT SEL in the page 30 signals to record. AUDIO Setup menu Set the audio PHONE SEL in page 31 signals to monitor. the AUDIO Setup menu Set the display METER TYPE in page 31 range of the audio the AUDIO Setup level meters. menu Set the recording REC LEVEL in page 32 levels. the AUDIO Setup menu Adjust the levels Rotate the LEVEL page 10 of audio signals knob of the output via the EARPHONES EARPHONES jack. jack. Cancel record REC INHI in the page 34 inhibit if the SYSTEM Setup system is set to menu record inhibit mode. Select the time TIMER SEL in page 32 data to display. the TC Setup menu Preparation Operation Reference Set time code RUN MODE, and page 33 generator TCG MODE in operation in the TC Setup accordance with menu the time code and user bits to record. Configure the other related menu settings as necessary. Setting the Audio Signals Use the AUDIO Setup menu to make settings related to audio signals. Press the AUDIO button to display the AUDIO Setup menu. To select the audio signals to record Select the audio signal to record for each track. 1 Display the AUDIO Setup menu and then 1 select and confirm "INPUT SEL" t2 select and confirm the track (TRACK1 to TRACK16) t3 select and confirm the signal to record. 1 INPUT SEL 2 Track AUDIO Setup INPUT SEL PHONE SEL MIX MODE REC LEVEL PB LEVEL METER TYPE PEAK HOLD BEEP(PHONE) INPUT DELAY RMS PEAK ON 0 INPUT Select TRACK1 OFF TRACK2 OFF TRACK3 OFF TRACK4 OFF SR-R4:CAM STOP TCR 00:00:00:00 3Signal to record ANA1 to ANA2: Analog signals input via the AUDIO INPUT CH-1 and CH-2 connectors. OFF: Does not record a signal (silence). 30 Recording Preparations and Operations
-
 1
1 -
2
-
3
-
4
-
5
-
6
-
7
-
8
-
9
-
10
-
11
-
12
-
13
-
14
-
15
-
16
-
17
-
18
-
19
-
20
-
21
-
22
-
23
-
24
-
 25
25 -
 26
26 -
 27
27 -
 28
28 -
 29
29 -
 30
30 -
 31
31 -
 32
32 -
 33
33 -
 34
34 -
 35
35 -
36
-
37
-
38
-
39
-
40
-
41
-
42
-
43
-
44
-
45
-
46
-
47
-
48
-
49
-
50
-
51
-
52
-
53
-
54
-
55
-
56
-
57
-
58
-
59
-
60
-
61
 |
 |
