Sony SRR4 Product Manual (SRMASTER: SRR4 Operation Manual) - Page 18
Remove the unit by lifting it., Attach the connector cap to
 |
View all Sony SRR4 manuals
Add to My Manuals
Save this manual to your list of manuals |
Page 18 highlights
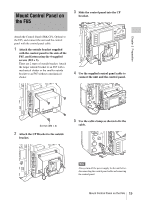
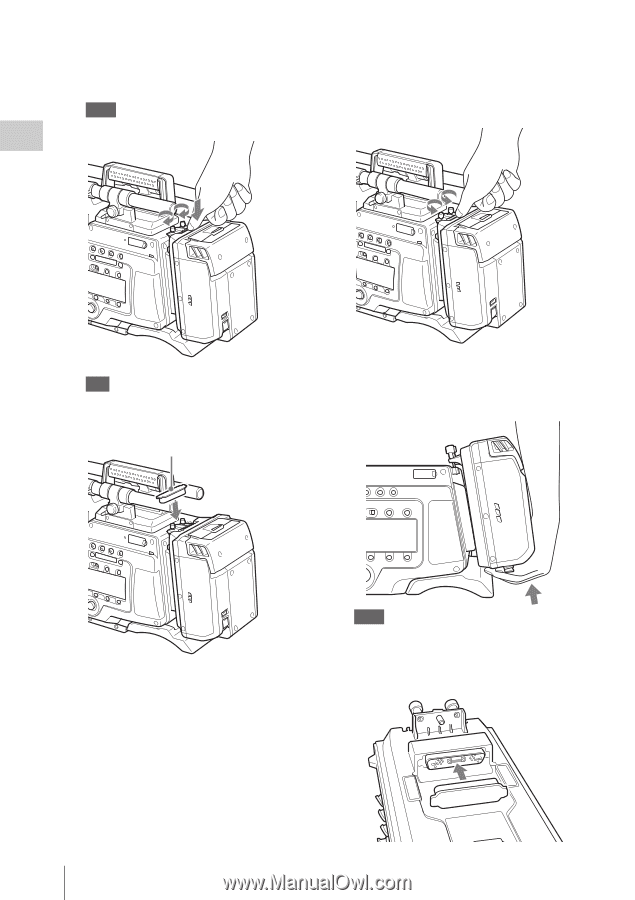
3 Press down firmly on the point shown in the diagram, and fasten the docking screws. Note Do not push down on the lid. Removing the Unit from the F65 1 Press down firmly on the point shown in the diagram, and loosen the docking screws. Chapter 2 Preparation Tip You can leave the connector cap, which was removed from the CAMERA connector, attached to the docking screws. Connector cap 2 Remove the unit by lifting it. When lifting, hold the unit as close as possible to the F65 and pull it up. Note Do not push on the ventilation openings. 3 Attach the connector cap to the CAMERA connector of the unit. 18 Connect F65
-
 1
1 -
2
-
3
-
4
-
5
-
6
-
7
-
8
-
9
-
10
-
11
-
12
-
 13
13 -
 14
14 -
 15
15 -
 16
16 -
 17
17 -
 18
18 -
 19
19 -
 20
20 -
 21
21 -
 22
22 -
 23
23 -
24
-
25
-
26
-
27
-
28
-
29
-
30
-
31
-
32
-
33
-
34
-
35
-
36
-
37
-
38
-
39
-
40
-
41
-
42
-
43
-
44
-
45
-
46
-
47
-
48
-
49
-
50
-
51
-
52
-
53
-
54
-
55
-
56
-
57
-
58
-
59
-
60
-
61
 |
 |
Connect F65
18
Chapter 2
Preparation
3
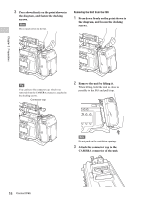
Press down firmly on the point shown in
the diagram, and fasten the docking
screws.
Note
Do not push down on the lid.
Tip
You can leave the connector cap, which was
removed from the CAMERA connector, attached to
the docking screws.
Removing the Unit from the F65
1
Press down firmly on the point shown in
the diagram, and loosen the docking
screws.
2
Remove the unit by lifting it.
When lifting, hold the unit as close as
possible to the F65 and pull it up.
Note
Do not push on the ventilation openings.
3
Attach the connector cap to the
CAMERA connector of the unit.
Connector cap