TP-Link TL-SG3216 TL-SG3216 V1 User Guide - Page 191
NDP Config
 |
View all TP-Link TL-SG3216 manuals
Add to My Manuals
Save this manual to your list of manuals |
Page 191 highlights
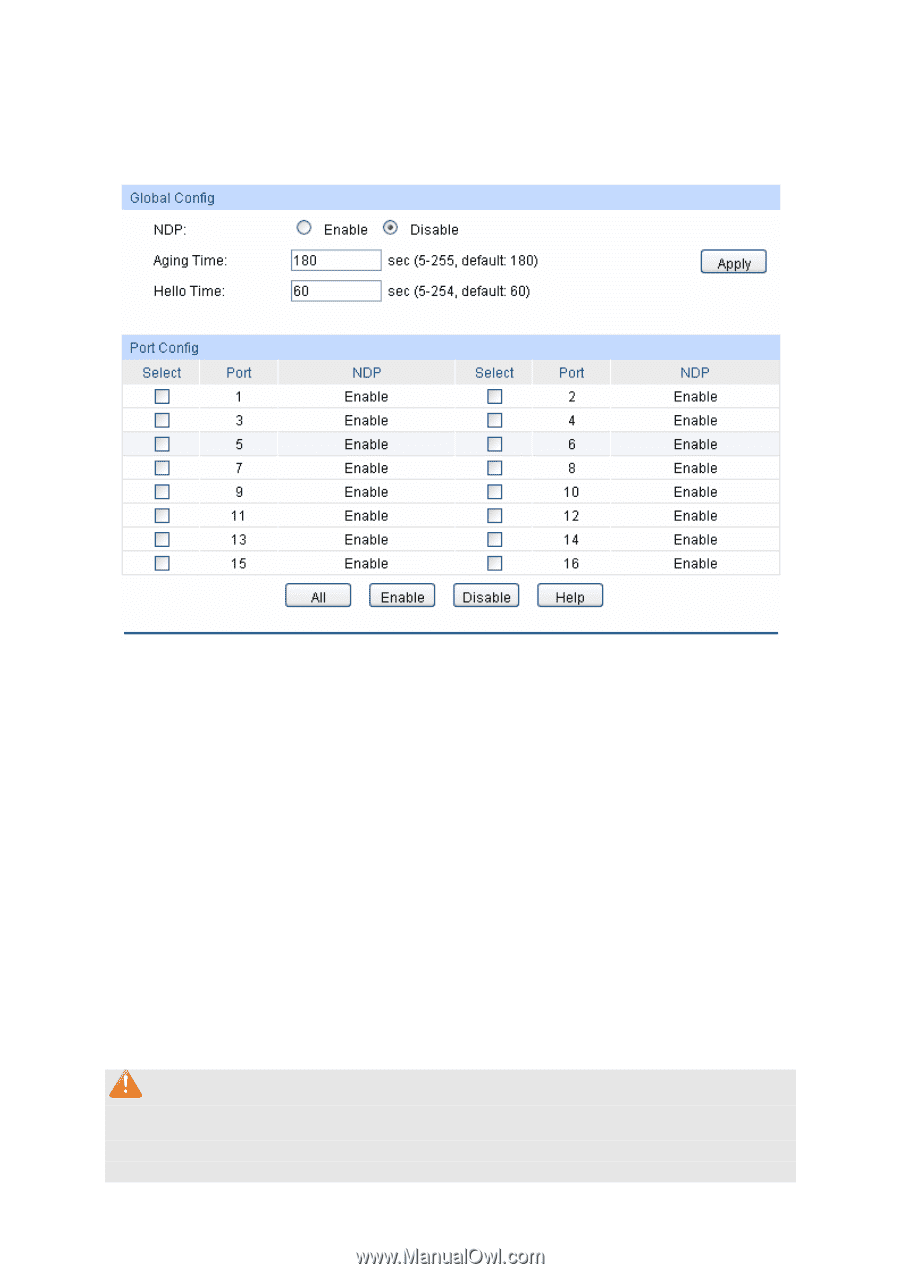
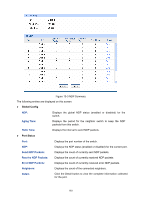
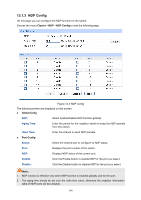
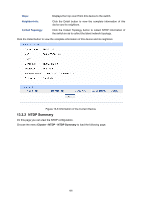
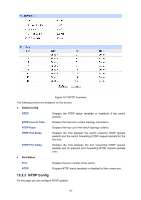
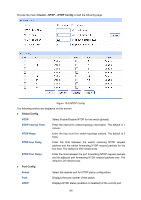
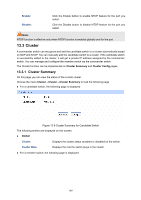
13.1.3 NDP Config On this page you can configure the NDP function for the switch. Choose the menu Cluster→NDP→NDP Config to load the following page. Figure 13-4 NDP Config The following entries are displayed on this screen: ¾ Global Cofig NDP: Select Enable/Disable NDP function globally. Aging Time: Enter the period for the neighbor switch to keep the NDP packets from this switch. Hello Time: Enter the interval to send NDP packets. ¾ Port Config Select: Select the desired port to configure its NDP status. Port: Displays the port number of the switch. NDP: Displays NDP status of the current port. Enable: Click the Enable button to enable NDP for the port you select. Disable: Click the Disable button to disable NDP for the port you select. Note: 1. NDP function is effective only when NDP function is enabled globally and for the port. 2. The aging time should be set over the hello time value, otherwise the neighbor information table of NDP ports will be unstable. 184
-
 1
1 -
2
-
3
-
4
-
5
-
6
-
7
-
8
-
9
-
10
-
11
-
12
-
13
-
14
-
15
-
16
-
17
-
18
-
19
-
20
-
21
-
22
-
23
-
24
-
25
-
26
-
27
-
28
-
29
-
30
-
31
-
32
-
33
-
34
-
35
-
36
-
37
-
38
-
39
-
40
-
41
-
42
-
43
-
44
-
45
-
46
-
47
-
48
-
49
-
50
-
51
-
52
-
53
-
54
-
55
-
56
-
57
-
58
-
59
-
60
-
61
-
62
-
63
-
64
-
65
-
66
-
67
-
68
-
69
-
70
-
71
-
72
-
73
-
74
-
75
-
76
-
77
-
78
-
79
-
80
-
81
-
82
-
83
-
84
-
85
-
86
-
87
-
88
-
89
-
90
-
91
-
92
-
93
-
94
-
95
-
96
-
97
-
98
-
99
-
100
-
101
-
102
-
103
-
104
-
105
-
106
-
107
-
108
-
109
-
110
-
111
-
112
-
113
-
114
-
115
-
116
-
117
-
118
-
119
-
120
-
121
-
122
-
123
-
124
-
125
-
126
-
127
-
128
-
129
-
130
-
131
-
132
-
133
-
134
-
135
-
136
-
137
-
138
-
139
-
140
-
141
-
142
-
143
-
144
-
145
-
146
-
147
-
148
-
149
-
150
-
151
-
152
-
153
-
154
-
155
-
156
-
157
-
158
-
159
-
160
-
161
-
162
-
163
-
164
-
165
-
166
-
167
-
168
-
169
-
170
-
171
-
172
-
173
-
174
-
175
-
176
-
177
-
178
-
179
-
180
-
181
-
182
-
183
-
184
-
185
-
 186
186 -
 187
187 -
 188
188 -
 189
189 -
 190
190 -
 191
191 -
 192
192 -
 193
193 -
 194
194 -
 195
195 -
 196
196 -
197
-
198
-
199
-
200
-
201
-
202
-
203
-
204
-
205
-
206
-
207
-
208
-
209
-
210
-
211
-
212
-
213
-
214
-
215
-
216
-
217
-
218
-
219
-
220
-
221
-
222
-
223
-
224
-
225
-
226
-
227
-
228
-
229
-
230
-
231
-
232
 |
 |