Toshiba 40SL500U Owners Manual - Page 57
Adjusting the picture
 |
View all Toshiba 40SL500U manuals
Add to My Manuals
Save this manual to your list of manuals |
Page 57 highlights
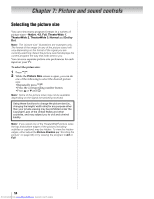
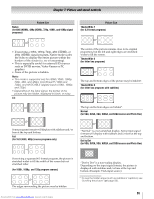
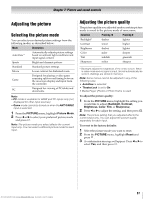
Chapter 7: Picture and sound controls Adjusting the picture Selecting the picture mode You can select your desired picture settings from the following modes, as described below. Mode Description AutoView™ Automatically adjusts picture settings based on ambient light conditions and input signal content. Sports Bright and dynamic picture. Standard Standard picture settings. Movie Lower contrast for darkened room. Game Designed for playing a video game requiring split-second timing between the on-screen display and input from the controller. PC Designed for viewing of PC tables and documents. Note: • PC mode is available for HDMI and PC inputs only (not displayed for other input sources). • Game mode cannot be turned on when the ANT/CABLE input is selected. 1 From the PICTURE menu, highlight Picture Mode. 2 Press C or c to select your preferred picture mode and press . EXIT Note: The picture mode you select affects the current input only. You can select a different picture mode for each input. Adjusting the picture quality The picture quality you adjusted under a certain picture mode is saved to the picture mode of same name. Selection Pressing C Pressing c Backlight* darker lighter Contrast Brightness lower darker higher lighter Color paler deeper Tint Sharpness reddish softer greenish sharper * Backlight adjusts the brightness of the entire screen. When in video mode and no signal is input, this will automatically be set to 0. (Settings are stored in memory.) Note: Some menus cannot be adjusted in any of the following case. • AutoView is selected. • TheaterLock is set to On. • Media Player (Photo) or Photo Frame is used. To adjust the picture quality: 1 From the PICTURE menu, highlight the setting you would like to adjust (Backlight, Contrast, Brightness, Color, Tint, or Sharpness). 2 Press C or c to adjust the setting, and then press . EXIT Note: The picture setting that you adjusted affects the current input only. You can adjust the picture quality separately for each input. To revert to the factory defaults: 1 Select the picture mode you want to reset. 2 From the PICTURE menu, highlight Reset and press . OK 3 A confirmation message will appear. Press C or c to select Yes, and then press . OK 57 Downloaded from www.Manualslib.com manuals search engine
-
 1
1 -
2
-
3
-
4
-
5
-
6
-
7
-
8
-
9
-
10
-
11
-
12
-
13
-
14
-
15
-
16
-
17
-
18
-
19
-
20
-
21
-
22
-
23
-
24
-
25
-
26
-
27
-
28
-
29
-
30
-
31
-
32
-
33
-
34
-
35
-
36
-
37
-
38
-
39
-
40
-
41
-
42
-
43
-
44
-
45
-
46
-
47
-
48
-
49
-
50
-
51
-
 52
52 -
 53
53 -
 54
54 -
 55
55 -
 56
56 -
 57
57 -
 58
58 -
 59
59 -
 60
60 -
 61
61 -
 62
62 -
63
-
64
-
65
-
66
-
67
-
68
-
69
-
70
-
71
-
72
-
73
-
74
-
75
-
76
-
77
-
78
-
79
-
80
-
81
-
82
-
83
-
84
-
85
-
86
-
87
-
88
-
89
-
90
-
91
-
92
-
93
-
94
 |
 |
