Toshiba 40SL500U Owners Manual - Page 76
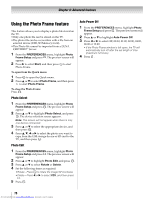
Using the Photo Frame feature
 |
View all Toshiba 40SL500U manuals
Add to My Manuals
Save this manual to your list of manuals |
Page 76 highlights
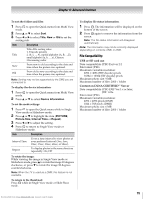
Chapter 8: Advanced features Using the Photo Frame feature This feature allows you to display a photo file stored on the TV. •Only one photo file can be stored on the TV. •The photo file can be overwritten with a file from an external device (USB, SD Memory Card). •This Photo file cannot be imported from a DLNA CERTIFIED™ Server. 1 From the PREFERENCES menu, highlight Photo Frame Setup and press OK . The preview screen will appear. 2 Press c to select Start, and then press OK to start Photo Frame. To open from the Quick menu 1 Press QOUIKCK to open the Quick menu. 2 Press B or b to select Photo Frame, and then press OK to start Photo Frame. To close the Photo Frame: Press . EXIT Photo Select 1 From the PREFERENCES menu, highlight Photo Frame Setup and press OK . The preview screen will appear. 2 Press B or b to highlight Photo Select, and press OK . The device selection screen appears. Note: This screen will not appear when there is only one device connected. 3 Press B or b to select the appropriate device, and then press . OK 4 Press B, b, C or c to select the photo you want to copy from the USB storage device or SD card to the TV, and then press . OK Photo Edit 1 From the PREFERENCES menu, highlight Photo Frame Setup and press OK . The preview screen will appear. 2 Press B or b to highlight Photo Edit, and press . OK 3 Press B or b to select Rotate or Delete. 4 Set the following items as required. • Rotate - Press OK to rotate the image 90°clockwise. • Delete - Press C or c to select YES, and then press . O K 5 Press . EXIT Auto Power Off 1 From the PREFERENCES menu, highlight Photo Frame Setup and press OK . The preview screen will appear. 2 Press B or b to highlight Auto Power Off. 3 Press C or c to select Off, 00:30, 01:00, 02:00, 04:00, 06:00 or 12:00. • If the Photo Frame window is left open, the TV will automatically turn off after the set length of time (maximum 12 hours). 4 Press . EXIT 76 Downloaded from www.Manualslib.com manuals search engine
-
 1
1 -
2
-
3
-
4
-
5
-
6
-
7
-
8
-
9
-
10
-
11
-
12
-
13
-
14
-
15
-
16
-
17
-
18
-
19
-
20
-
21
-
22
-
23
-
24
-
25
-
26
-
27
-
28
-
29
-
30
-
31
-
32
-
33
-
34
-
35
-
36
-
37
-
38
-
39
-
40
-
41
-
42
-
43
-
44
-
45
-
46
-
47
-
48
-
49
-
50
-
51
-
52
-
53
-
54
-
55
-
56
-
57
-
58
-
59
-
60
-
61
-
62
-
63
-
64
-
65
-
66
-
67
-
68
-
69
-
70
-
 71
71 -
 72
72 -
 73
73 -
 74
74 -
 75
75 -
 76
76 -
 77
77 -
 78
78 -
 79
79 -
 80
80 -
 81
81 -
82
-
83
-
84
-
85
-
86
-
87
-
88
-
89
-
90
-
91
-
92
-
93
-
94
 |
 |