ZyXEL ARMOR Z1 User Guide - Page 33
Notification, Table 13, LABEL, DESCRIPTION
 |
View all ZyXEL ARMOR Z1 manuals
Add to My Manuals
Save this manual to your list of manuals |
Page 33 highlights
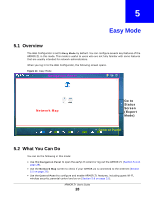
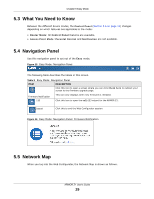
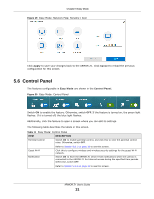
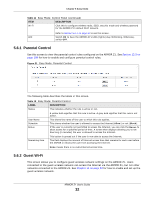
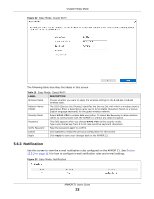
Chapter 5 Easy Mode Figure 22 Easy Mode: Guest Wi-Fi The following table describes the labels in this screen. Table 13 Easy Mode: Guest Wi-Fi LABEL DESCRIPTION Wireless Radio Choose whether you want to apply the wireless settings to the 2.4G Hz or 5G Hz wireless radio. Network Name (SSID) The SSID (Service Set IDentity) identifies the Service Set with which a wireless client is associated. Enter a descriptive name (up to 32 printable characters found on a typical English language keyboard) for the guest wireless network. Security Mode Select WPA2-PSK to enable data encryption. Or select No Security to allow wireless clients to communicate with the ARMOR Z1 without any data encryption. Password This field appears when you choose WPA2-PSK as the security mode. Type a pre-shared key from 8 to 63 case-sensitive keyboard characters. Verify Password Type the password again to confirm. Cancel Click Cancel to reload the previous configuration for this screen. Apply Click Apply to save your changes back to the ARMOR Z1. 5.6.3 Notification Use this screen to view the e-mail notification rules configured on the ARMOR Z1. See Section 13.2.2 on page 113 for how to configure e-mail notification rules and e-mail settings. Figure 23 Easy Mode: Notification ARMOR Z1 User's Guide 33
-
 1
1 -
2
-
3
-
4
-
5
-
6
-
7
-
8
-
9
-
10
-
11
-
12
-
13
-
14
-
15
-
16
-
17
-
18
-
19
-
20
-
21
-
22
-
23
-
24
-
25
-
26
-
27
-
 28
28 -
 29
29 -
 30
30 -
 31
31 -
 32
32 -
 33
33 -
 34
34 -
 35
35 -
 36
36 -
 37
37 -
 38
38 -
39
-
40
-
41
-
42
-
43
-
44
-
45
-
46
-
47
-
48
-
49
-
50
-
51
-
52
-
53
-
54
-
55
-
56
-
57
-
58
-
59
-
60
-
61
-
62
-
63
-
64
-
65
-
66
-
67
-
68
-
69
-
70
-
71
-
72
-
73
-
74
-
75
-
76
-
77
-
78
-
79
-
80
-
81
-
82
-
83
-
84
-
85
-
86
-
87
-
88
-
89
-
90
-
91
-
92
-
93
-
94
-
95
-
96
-
97
-
98
-
99
-
100
-
101
-
102
-
103
-
104
-
105
-
106
-
107
-
108
-
109
-
110
-
111
-
112
-
113
-
114
-
115
-
116
-
117
-
118
-
119
-
120
-
121
-
122
-
123
-
124
-
125
-
126
-
127
-
128
-
129
-
130
-
131
-
132
-
133
-
134
-
135
-
136
-
137
-
138
-
139
-
140
-
141
-
142
-
143
-
144
-
145
-
146
-
147
-
148
-
149
-
150
-
151
-
152
-
153
-
154
-
155
-
156
-
157
-
158
-
159
-
160
-
161
-
162
-
163
-
164
-
165
-
166
-
167
-
168
-
169
-
170
-
171
-
172
-
173
-
174
-
175
-
176
-
177
-
178
-
179
-
180
-
181
-
182
-
183
-
184
-
185
-
186
-
187
-
188
-
189
-
190
-
191
-
192
-
193
-
194
-
195
-
196
-
197
-
198
-
199
-
200
-
201
-
202
-
203
-
204
-
205
-
206
-
207
-
208
-
209
-
210
-
211
-
212
-
213
-
214
-
215
 |
 |
