ZyXEL P-100 User Guide - Page 50
Follow the instructions in Table 3-1.on how to con the DHCP fields.
 |
View all ZyXEL P-100 manuals
Add to My Manuals
Save this manual to your list of manuals |
Page 50 highlights
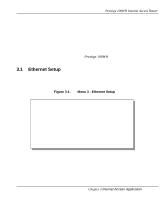
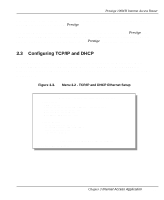
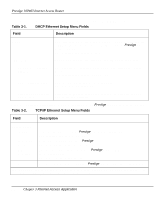
Prestige 100WH Internet Access Router Follow the instructions in Table 3-1.on how to configure the DHCP fields. Table 3-1. DHCP Ethernet Setup Menu Fields Field Description DHCP This field determines the mode of DHCP support. If set to [None], DHCP will not be used. If it is set to [Server], your Prestige will act as a DHCP server. The default in this field is [Server]. If DHCP=Server: When DHCP is used, the following four items need to be set: Client IP Pool Starting Address The Client IP Pool Starting Address gives the first address in the pool. The default in this field is 192.168.1.33 Size of Client IP Pool The count of the IP addresses in the pool. The default in this field is 32. Primary and Secondary Enter the IP address of the DNS server(s) provided by your ISP DNS Server or network administrator. Table 3-2 contains instructions on how to configure your Prestige for TCP/IP Ethernet Setup. Table 3-2. TCP/IP Ethernet Setup Menu Fields Field Description TCP/IP Setup IP Address IP Subnet Mask RIP Direction Enter the IP address of your Prestige in dotted decimal notation. The default in this field is 192.168.1.1. Enter the subnet mask of your Prestige. The default in this field is 255.255.255.0. This parameter determines how your Prestige handles RIP traffic (In/Out/both/none). The default in this field is [Both]. Version Version of RIP packets sent by the Prestige. The default in this field is RIP-1. When you have completed this menu, press [Enter] at the prompt [Press ENTER to Confirm...] to save your configuration, or press [Esc] at any time to cancel. 3-6 Chapter 3 Internet Access Application
-
 1
1 -
2
-
3
-
4
-
5
-
6
-
7
-
8
-
9
-
10
-
11
-
12
-
13
-
14
-
15
-
16
-
17
-
18
-
19
-
20
-
21
-
22
-
23
-
24
-
25
-
26
-
27
-
28
-
29
-
30
-
31
-
32
-
33
-
34
-
35
-
36
-
37
-
38
-
39
-
40
-
41
-
42
-
43
-
44
-
 45
45 -
 46
46 -
 47
47 -
 48
48 -
 49
49 -
 50
50 -
 51
51 -
 52
52 -
 53
53 -
 54
54 -
 55
55 -
56
-
57
-
58
-
59
-
60
-
61
-
62
-
63
-
64
-
65
-
66
-
67
-
68
-
69
-
70
-
71
-
72
-
73
-
74
-
75
-
76
-
77
-
78
-
79
-
80
-
81
-
82
-
83
-
84
-
85
-
86
-
87
-
88
-
89
-
90
-
91
-
92
-
93
-
94
-
95
-
96
-
97
-
98
-
99
-
100
-
101
-
102
-
103
-
104
-
105
-
106
-
107
-
108
-
109
-
110
-
111
-
112
-
113
-
114
-
115
-
116
-
117
-
118
-
119
-
120
-
121
-
122
-
123
-
124
-
125
-
126
 |
 |