ZyXEL P-100 User Guide - Page 52
for Internet Access.
 |
View all ZyXEL P-100 manuals
Add to My Manuals
Save this manual to your list of manuals |
Page 52 highlights
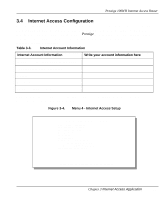
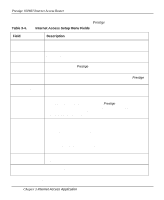
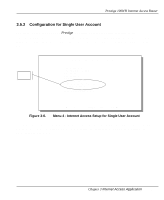
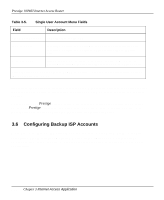
Prestige 100WH Internet Access Router Table 3-4 contain instructions on how to configure your Prestige for Internet Access. Table 3-4. Internet Access Setup Menu Fields Field Description ISP's Name Enter the name of your Internet Service Provider. (This information is for identification purposes only.) ISP IP Addr (optional) Enter the IP Address of the remote gateway at the ISP's site. If you do not have this data, just leave it blank. Pri(mary) Phone # (required) The first number your Prestige will dial to connect to the ISP. Sec(ondary) Phone # If the Primary Phone number is busy or does not answer, your Prestige (optional) will call the Secondary Phone number if available. My Login Name (required) Enter the login name assigned to you by your ISP. My Password (required) Enter the password associated with the login name above. Note that this login name/password pair is only for your Prestige to connect to the ISP's gateway. When you use TCP/IP applications (for example, FTP) to access the Internet from your workstation, you will need a separate login name and password for each server. Single User Account Local IP Addr: See Section 3.5 for detailed discussion on the Single User Account feature. The default in this field is Yes. If your ISP assigns you a static IP address, enter it in this field; otherwise, leave it as 0.0.0.0. (default) Server IP Addr: If you have a server that you want it to be accessible from the outside, enter its local IP address in this field; otherwise, leave it as 0.0.0.0. (default) Edit Script Options To edit the parameters, select [Yes] and press [Enter]. This will bring you to Menu 4.1 - Remote Node Script Options. Press [Enter] at the prompt [Press ENTER to Confirm...] to save your configuration, or press [Esc] at any time to cancel. At this point, the SMT will ask if you wish to test the Internet connection. If you answer [y] 3-8 Chapter 3 Internet Access Application
-
 1
1 -
2
-
3
-
4
-
5
-
6
-
7
-
8
-
9
-
10
-
11
-
12
-
13
-
14
-
15
-
16
-
17
-
18
-
19
-
20
-
21
-
22
-
23
-
24
-
25
-
26
-
27
-
28
-
29
-
30
-
31
-
32
-
33
-
34
-
35
-
36
-
37
-
38
-
39
-
40
-
41
-
42
-
43
-
44
-
45
-
46
-
 47
47 -
 48
48 -
 49
49 -
 50
50 -
 51
51 -
 52
52 -
 53
53 -
 54
54 -
 55
55 -
 56
56 -
 57
57 -
58
-
59
-
60
-
61
-
62
-
63
-
64
-
65
-
66
-
67
-
68
-
69
-
70
-
71
-
72
-
73
-
74
-
75
-
76
-
77
-
78
-
79
-
80
-
81
-
82
-
83
-
84
-
85
-
86
-
87
-
88
-
89
-
90
-
91
-
92
-
93
-
94
-
95
-
96
-
97
-
98
-
99
-
100
-
101
-
102
-
103
-
104
-
105
-
106
-
107
-
108
-
109
-
110
-
111
-
112
-
113
-
114
-
115
-
116
-
117
-
118
-
119
-
120
-
121
-
122
-
123
-
124
-
125
-
126
 |
 |
