ZyXEL P-100 User Guide - Page 57
Con a Backup ISP, To Switch ISP
 |
View all ZyXEL P-100 manuals
Add to My Manuals
Save this manual to your list of manuals |
Page 57 highlights
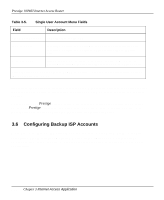
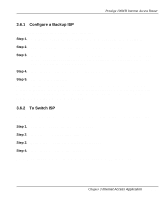
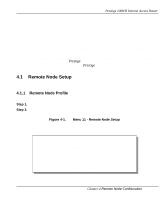
Prestige 100WH Internet Access Router 3.6.1 Configure a Backup ISP To configure a backup ISP Account, follow these steps: Step 1. Configure your primary ISP using Menu 4, as described earlier in this chapter. Step 2. Enter Menu 11, then select the number of an unused remote node. Step 3. In Menu 11.1, choose a name for your backup ISP account, then set the Active field to [No], and enter your outgoing login name, password, and phone number(s). The Remote IP Address field should be set to [1.1.1.1]. Step 4. In Menu 11.3, set the remote node's subnet mask to [0.0.0.0], and set RIP to [None]. Step 5. Save the new configuration. Please note that the remote IP address of 1.1.1.1 is only a place-holder to avoid conflicting with the IP address of the primary ISP, which is implicitly set at 0.0.0.0. When combined with the subnet mask of 0.0.0.0, it creates a default route identical to the one derived from the primary ISP when this remote node is activated. 3.6.2 To Switch ISP Once you have done this, if you need to switch from your primary ISP to a backup ISP follow these steps: Step 1. Enter Menu 11 and select your Primary ISP. Step 2. In Menu 11.1, set the Active field to [No]. Step 3. Enter Menu 11 again and select your Backup ISP. Step 4. In Menu 11.1, set the Active field to [Yes]. You will now be able to access the Internet through the backup ISP remote node. Chapter 3 Internet Access Application 3-13
-
 1
1 -
2
-
3
-
4
-
5
-
6
-
7
-
8
-
9
-
10
-
11
-
12
-
13
-
14
-
15
-
16
-
17
-
18
-
19
-
20
-
21
-
22
-
23
-
24
-
25
-
26
-
27
-
28
-
29
-
30
-
31
-
32
-
33
-
34
-
35
-
36
-
37
-
38
-
39
-
40
-
41
-
42
-
43
-
44
-
45
-
46
-
47
-
48
-
49
-
50
-
51
-
 52
52 -
 53
53 -
 54
54 -
 55
55 -
 56
56 -
 57
57 -
 58
58 -
 59
59 -
 60
60 -
 61
61 -
 62
62 -
63
-
64
-
65
-
66
-
67
-
68
-
69
-
70
-
71
-
72
-
73
-
74
-
75
-
76
-
77
-
78
-
79
-
80
-
81
-
82
-
83
-
84
-
85
-
86
-
87
-
88
-
89
-
90
-
91
-
92
-
93
-
94
-
95
-
96
-
97
-
98
-
99
-
100
-
101
-
102
-
103
-
104
-
105
-
106
-
107
-
108
-
109
-
110
-
111
-
112
-
113
-
114
-
115
-
116
-
117
-
118
-
119
-
120
-
121
-
122
-
123
-
124
-
125
-
126
 |
 |
