Alpine INE-S920HD Owner's Manual (english)
Alpine INE-S920HD Manual
 |
View all Alpine INE-S920HD manuals
Add to My Manuals
Save this manual to your list of manuals |
Alpine INE-S920HD manual content summary:
- Alpine INE-S920HD | Owner's Manual (english) - Page 1
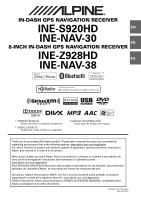
R IN-DASH GPS NAVIGATION RECEIVER INE-S920HD EN INE-NAV-30 FR 8-INCH IN-DASH GPS NAVIGATION RECEIVER INE-Z928HD ES INE-NAV-38 This HD Radio receiver enables: • OWNER'S MANUAL Please read before using this equipment. • MODE D'EMPLOI Veuillez lire avant d'utiliser cet appareil. • MANUAL DE - Alpine INE-S920HD | Owner's Manual (english) - Page 2
S.A.R.L. (RCS PONTOISE B 338 101 280) 98, Rue de la Belle Etoile, Z.I. Paris Nord Il, B.P. 50016, 95945 Roissy Charles de Gaulle Cedex, France Phone 01-48638989 ALPINE ELECTRONICS OF AUSTRALIA PTY. LTD. 161-165 Princes Highway, Hallam Victoria 3803, Australia Phone 03-8787-1200 - Alpine INE-S920HD | Owner's Manual (english) - Page 3
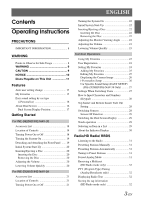
CAUTION 9 NOTICE 10 Discs Playable on This Unit 11 Features Auto user setting change 15 My Favorites 15 Easy sound setting by car type (i-Personalize 16 About Dual Screen 16 Dual Screen Display Position 17 Getting Started For INE-S920HD/INE-NAV-30 Accessory List 18 Location of Controls 18 - Alpine INE-S920HD | Owner's Manual (english) - Page 4
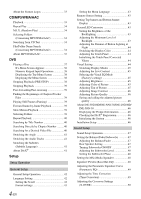
About MP3/WMA/AAC 35 DVD Playing a Disc 37 If Video File 40 Switching the Angle 41 Switching the Audio INE-S920HD/INE-NAV-30/INE-Z928HD/ INE-NAV-38 46 Displaying the Product Information 46 Checking the DivX® Registration 46 Initializing the System 46 Installation Setup 46 Sound Setup Sound - Alpine INE-S920HD | Owner's Manual (english) - Page 5
DVD Menu Language 53 Setting of the Audio Camera Setup Camera Setup Operation 61 Direct Camera Setting 61 Setting the Camera Input 61 AUX Camera Setting 62 Setting the Camera Input 62 Camera Interrupt Setting (Power OFF Mode 63 BLUETOOTH Operation Setup Before Using 64 About BLUETOOTH - Alpine INE-S920HD | Owner's Manual (english) - Page 6
Manually 75 Switching the Image Pattern for the Front Camera 75 About the adjustment of guide display ON/OFF setting and adjustment of Caution display location 76 Other Camera Operation 76 About the adjustment of the Caution display location 76 SiriusXM Satellite Radio (Optional) Receiving - Alpine INE-S920HD | Owner's Manual (english) - Page 7
Information Product Software Update 90 About DVDs 90 List of Language Codes 91 List of Country Codes 92 In Case of Difficulty 94 If this Message Appears 95 Specifications 97 END USER LICENSE AGREEMENT (Microsoft 99 END USER LICENSE AGREEMENT (NAVTEQ 100 Installation and Connections Warning - Alpine INE-S920HD | Owner's Manual (english) - Page 8
an experienced radio/TV technician. WARNING Points to Observe for Safe Usage • Read this manual carefully before using this disc and the system components. They contain instructions on how to use this product in a safe and effective manner. Alpine cannot be responsible for problems resulting from - Alpine INE-S920HD | Owner's Manual (english) - Page 9
INE-S920HD/INE-NAV-30/INE-Z928HD/INE-NAV-38. It cannot and may not be used in conjunction with other hardware. WARNING This symbol means important instructions. Failure to heed them can result in serious injury or death. INSTALL THE PRODUCT CORRECTLY SO THAT THE DRIVER CANNOT WATCH TV/VIDEO UNLESS - Alpine INE-S920HD | Owner's Manual (english) - Page 10
problems, do not attempt to repair the unit yourself. Return it to your Alpine dealer or the nearest Alpine Service Station for servicing Installation Location Make sure the INE-S920HD/INE-NAV-30/INE-Z928HD/INENAV-38 will not be installed correctly, push the RESET switch with a cause the DVD player to - Alpine INE-S920HD | Owner's Manual (english) - Page 11
not on the INE-S920HD/ INE-NAV-30/INE-Z928HD/INE-NAV-38. This has been done for the safety of the driver and passengers. Setup operations cannot be made if the car is moving. The car must be parked and the parking brake must be engaged for the procedure described in the Owner's Manual to be valid - Alpine INE-S920HD | Owner's Manual (english) - Page 12
back, make sure the last recording session was closed (finalized). • Finalize the CD-R/CD-RW if necessary, and attempt playback again. Tips for making your own discs The INE-S920HD/INE-NAV-30/INE-Z928HD/INE-NAV-38 plays DVD Video, DivX®, Audio leave the disc in the car or the unit for a long time. - Alpine INE-S920HD | Owner's Manual (english) - Page 13
cable with the unit. A USB hub is not supported. • Depending on the connected USB memory device, the unit may not function or some functions may not be performed. • The audio file format that can be played back on the unit is MP3/ WMA/AAC. • The video file format that can be played back on the unit - Alpine INE-S920HD | Owner's Manual (english) - Page 14
in the United States and/or other countries. • iPhone, iPod, iPod BLUETOOTH® word mark and logos are registered trademarks owned by the Bluetooth SIG, Inc. and any use of such marks by Alpine Electronics, Inc. is under license. • "MPEG Layer-3 audio terrestrial, satellite, cable and/or any - Alpine INE-S920HD | Owner's Manual (english) - Page 15
INE-S920HD/INE-NAV-30/INE-Z928HD/INE-NAV-38, you can register up to two users. Each user can configure their own preferred settings. By registering their respective BLUETOOTH devices to the unit . • If no BLUETOOTH device has been registered or if you want to switch users manually, users can be - Alpine INE-S920HD | Owner's Manual (english) - Page 16
, refer to "Car Specific Sound Setup (EASY SETUP) (INE-Z928HD/INE-NAV-38 Only)" (page 27). About Dual Screen If you want to display the music playback screen while route guidance is displayed, etc., you can display the Navigation and Audio/Visual screens simultaneously. Navigation Full screen - Alpine INE-S920HD | Owner's Manual (english) - Page 17
Dual Screen Display Position You can switch the right and left screens using drag & drop. To switch the screens, touch the middle of the screen you want to move and drag it to the desired display position. The screens will switch positions when you remove your finger. 17-EN - Alpine INE-S920HD | Owner's Manual (english) - Page 18
Started For INE-S920HD/INE-NAV-30 Accessory List • INE-S920HD/INE-NAV-30 1 • Power cable 1 • Flush head screw (M5×8 6 • Screw (M5×8 8 • GPS Antenna 1 • Antenna mounting plate 1 • Cable clamp 3 • AUX/PRE OUT cable 1 • Camera cable 1 • USB extension cable 1 • Microphone 1 • Mounting sleeve - Alpine INE-S920HD | Owner's Manual (english) - Page 19
is in motion. Be sure to stop your vehicle in a safe location and apply the parking brake before attempting these operations. Detaching and Attaching the Front Panel Detaching 1 Turn off the unit power. 2 Press (Release) at the upper left side until the front panel pops out. 3 Grasp the up side - Alpine INE-S920HD | Owner's Manual (english) - Page 20
dB. 2 Pressing Rotary encoder again will bring the audio back to its previous level. microSD memory card slot* * The microSD memory card does not support Music/Video playback. For details on how to use microSD memory cards, refer to "Navigation system OM" on the supplied CD-ROM. Inserting/Ejecting - Alpine INE-S920HD | Owner's Manual (english) - Page 21
List • INE-Z928HD/INE-NAV-38 1 • Power cable 1 • Screw (M5×8 8 • GPS Antenna 1 • Antenna mounting plate 1 • Cable clamp 3 • AUX/PRE OUT cable 1 • Camera cable 1 • USB extension cable 1 • iPod/iPhone Connection Cable 1 • iPod VIDEO AV extension cable 1 • Microphone 1 • Cushion 1 • Owner - Alpine INE-S920HD | Owner's Manual (english) - Page 22
in a safe location and apply the parking brake before attempting these operations. Initial System Start-Up Be sure to press the RESET switch when using the unit for the first time, after changing the car battery, etc. 1 Turn off the unit power. 2 Press RESET switch with a ballpoint pen or similar - Alpine INE-S920HD | Owner's Manual (english) - Page 23
activate the MUTE mode. The audio level will decrease by about 20 dB. 2 Pressing MUTE again will bring the audio back to its previous level. Common button: Use to edit My Favorites (page 25) Camera button: Use to display the camera image (page 26) i-Personalize button: Use to configure the i-Personalize - Alpine INE-S920HD | Owner's Manual (english) - Page 24
[Skip] registers the user name as "USER 1" or "USER 2" and no BLUETOOTH device is registered. In this case, the users will not be switched automatically. • Favorites) button for at least 3 seconds. The My Favorites user guide is displayed. Repeat steps 2 through 6 to register USER2. Setting My - Alpine INE-S920HD | Owner's Manual (english) - Page 25
• For details of navigation operations, refer to "Navigation System OM" in mobile phone is connected. Audio/Visual : Lets you switch directly to an audio source [Radio]: HD-Radio/RBDS: You can BLUETOOTH Pandora]/[Aux- 1]/[Aux-2]/[Aux-3]/[BT audio]: You can switch directly to any of these audio - Alpine INE-S920HD | Owner's Manual (english) - Page 26
camera or side camera (AUX camera) are connected simultaneously, the screen for selecting which camera image to display appears. i-Personalize Setup You can configure the audio settings by car type. Touch [i-Personalize]. The i-Personalize Setup screen is displayed. Car Specific Sound installation - Alpine INE-S920HD | Owner's Manual (english) - Page 27
Car Specific Sound Setup (EASY SETUP) (INE-Z928HD/INE-NAV-38 Only) Simply by selecting a car type from the list registered to the INEZ928HD/INE-NAV-38, the audio environment that is most appropriate to the car 24 Displaying the Camera Image*2 26 HD Radio/RBDS Displaying Radio Text 32 General - Alpine INE-S920HD | Owner's Manual (english) - Page 28
indicated by " " in this manual. Example: How to Input Characters AUDIO) Button During audio/visual playback, press the (AUDIO) button repeatedly to switch to the desired source. Radio Disc*1 USB/iPod*1 PANDORA®*1 PANDORA®(BLUETOOTH)*2 SiriusXM*1 AUX-1*3 AUX-2*3 AUX-3*4 BLUETOOTH AUDIO*1 Radio - Alpine INE-S920HD | Owner's Manual (english) - Page 29
Audio INE-S920HD/INE-NAV-30 only). • Screen OFF mode is canceled when the power or ACC is turned off. • When the gear lever is shifted to the reverse (R) position while the rear camera is connected, the rear camera image is displayed. • When a call is received while a BLUETOOTH during video playback, - Alpine INE-S920HD | Owner's Manual (english) - Page 30
they provide digital audio distribution and data services. This unit receives the above digital broadcasts for your highquality sound enjoyment. Depending on the signal strength in TUNER mode, INE-S920HD/INENAV-30/INE-Z928HD/INE-NAV-38 will automatically switch between HD radio if digital signals - Alpine INE-S920HD | Owner's Manual (english) - Page 31
on the signal status, a digital or analog broadcast is received. • During Forced Analog mode, digital broadcasts cannot be received. 5 Touch [ ], [ ] or [ ], [ ] to change the radio frequency up or down respectively. In manual mode, touch and hold to change the frequency continuously - Alpine INE-S920HD | Owner's Manual (english) - Page 32
] The sub channel of the received radio station is changed. • If iPhone. If the unit is connected to a Tagging compatible iPod/iPhone, you can use the iTunes Tagging function. For details, refer to the Owner's Manual of the Tagging compatible iPod/iPhone. When a desired song is heard on an HD Radio - Alpine INE-S920HD | Owner's Manual (english) - Page 33
] again or touch [ ] in the middle of the screen to start playback. • The INE-S920HD/INE-NAV-30/INE-Z928HD/INE-NAV-38 can play back MP3/WMA/AAC files saved to CD or DVD. Use a format compliant with this unit. For further information about playing or storing MP3/WMA/AAC files, refer to pages 35 and - Alpine INE-S920HD | Owner's Manual (english) - Page 34
mode 3 Touch the desired folder name. The File name of the selected folder is displayed. 4 Touch the desired file name. The selected file is played back. • To return to the previous hierarchy, touch [ ]. • For details on how to scroll through the list, refer to "Selecting an Item in a List" (page 29 - Alpine INE-S920HD | Owner's Manual (english) - Page 35
maximum possible number of files may decrease. • Both Audio and Video files are counted if their formats are playable on this unit. Media supported The media that this device can play back are CD-ROMs, CD-Rs, CD-RWs, DVD-Rs, DVD-RWs, DVD+Rs, DVD+RWs and USB memory. Corresponding File Systems This - Alpine INE-S920HD | Owner's Manual (english) - Page 36
Order of files Files are played back in the order that the writing DVD-Video: Audio signal output/Subtitle/Angle DivX®: Audio signal output/Subtitle Remaining time for playing Elapsed time Disc types that can be used for each heading are represented by the following marks. DVD Commercial Video - Alpine INE-S920HD | Owner's Manual (english) - Page 37
and an accident could occur. Install the INE-S920HD/INE-NAV-30/INE-Z928HD/INENAV-38 correctly so that the driver cannot watch DVD/ TV/Video unless the vehicle is stopped and the emergency brake is applied. If the INE-S920HD/INE-NAV-30/INE-Z928HD/INE-NAV38 is not installed correctly, the driver will - Alpine INE-S920HD | Owner's Manual (english) - Page 38
[ ] to hide the keypad display. Displaying the Top Menu Screen When a DVD contains two or more titles, the top menu screen appears. Touch [TOP MENU If a Menu Screen Appears" (page 38). Displaying the Menu Screen With a DVD having two or more menus, a menu screen will appear for the programs - Alpine INE-S920HD | Owner's Manual (english) - Page 39
sound may stop temporarily when playback starts from the pause mode. This is not a malfunction. 1 During playback, touch and hold [ ] (Fast- reverse) or touch and hold [ ] (Fast-forward). DVD-Video playback. • No sound is played back during fast-forwarding/fast-reversing. • On DVD mode, the menu - Alpine INE-S920HD | Owner's Manual (english) - Page 40
banner. The repeat mode switches every time the button is touched. DVD Video (Chapter) (Title) (OFF) The chapter is played repeatedly. The folder is displayed. 4 Touch the desired file name. The selected file is played back. • To return to the previous hierarchy, touch [ ]. • For details on - Alpine INE-S920HD | Owner's Manual (english) - Page 41
. Media supported The unit can play back CD-R/CD-RW/DVD-R/DVD-RW/DVD+R/ DVD+RW discs and USB memory device that are recorded in the DivX® mode. Corresponding extension "avi," "divx" Video Codec DivX® versions 3, 4, 5, and 6 (versions 5 handle both interlaced and progressive) Audio Codec MPEG1 - Alpine INE-S920HD | Owner's Manual (english) - Page 42
on the Audio/Visual Playback screen has been released. Engaging the parking brake can reactivate the General Setup Menu, as long as the car's ignition Setting items: Language / Remote Sensor / Top/Bottom Banner Fade Out / Screen/LED Customize / Visual / About / Installation • Depending on the item - Alpine INE-S920HD | Owner's Manual (english) - Page 43
remote sensor of this unit is effective. The remote sensor of the external monitor connected to AUX OUTPUT of this unit becomes effective. The remote the Top banner and Bottom banner for the audio/visual source. Setting item: Top/Bottom Banner the brightness of the car interior. Keep the background - Alpine INE-S920HD | Owner's Manual (english) - Page 44
on the application. [Video] (Video media): Display Mode*1 / Live Contrast / Visual EQ / Bright / Colour / Tint / Contrast / Sharp [Direct Camera]*2: Live Contrast / Bright / Colour / Contrast [AUX Camera]*2: Live Contrast / Bright / Colour / Contrast [Navigation]: Bright / Contrast *1 When - Alpine INE-S920HD | Owner's Manual (english) - Page 45
OFF (Initial setting) / LOW / HIGH Selecting the Visual EQ Mode (Factory's setting) You can select a mode suitable for the subject image. Setting To return to the default video settings, set this function to OFF. Any Visual EQ selection or changes made are reset their initial settings. Adjusting - Alpine INE-S920HD | Owner's Manual (english) - Page 46
change the ignition key position until system restart is completed. • For the INE-S920HD/INE-NAV-30, do not detach the front panel by pressing the (Release) button until system restart is complete. Installation Setup [Installation] is selected on the General setup menu in step 3. See "General Setup - Alpine INE-S920HD | Owner's Manual (english) - Page 47
• For automatic transmission vehicles, place the transmission lever in the Park position. Now, the locking system for the Sound mode operation has been released. Engaging the parking brake can reactivate the Sound Setup Menu, as long as the car's ignition has not been turned off. It is not necessary - Alpine INE-S920HD | Owner's Manual (english) - Page 48
Pandora AUX/AUX3 HD Radio • The MX setting can be performed only when a source is currently selected. • MP3/WMA/AAC/iPod/USB Audio/DivX®/BLUETOOTH Pandora/ BLUETOOTH Audio correspond to MX Compress Media. Equalizer Presets (Bass Max EQ) [Bass Max EQ] is selected on the Sound setup menu in step - Alpine INE-S920HD | Owner's Manual (english) - Page 49
contents: -7 to +7 (Initial setting: 0) Adjusting the Time Correction (Time Correction) [Time Correction] is selected on the Sound setup menu in step 3. Refer to "Sound Setup Operation" (page 47). Before performing the following procedures, refer to "About Time Correction" (page 51). Setting item - Alpine INE-S920HD | Owner's Manual (english) - Page 50
] is selected on the Sound setup menu in step 3. Refer to "Sound Setup Operation" (page 47). The volume level for each source can be adjusted. Setting item: Radio / SiriusXM / DVD / CD / Compressed Media / iPod Music / iPod Video / Pandora / AUX / AUX3 / BLUETOOTH Audio* Setting contents: -14 to - Alpine INE-S920HD | Owner's Manual (english) - Page 51
car vary widely due to the complex speaker placement. This difference in the distances from the speakers to the listener creates a shift in the sounds sound reaching the listener's right versus the left ear. To correct this, this unit is able to delay the audio speaker in the diagram on the above. - Alpine INE-S920HD | Owner's Manual (english) - Page 52
Park position. Now, the locking system for the Source mode operation has been released. Engaging the parking brake can reactivate the Source Setup Menu, as long as the car . • Adjust the slope to FLAT to bypass the HP or LP filters. • Do not Alpine speakers, refer to the respective Owner's Manual - Alpine INE-S920HD | Owner's Manual (english) - Page 53
menu in step 3. Refer to "Source Setup Operation" (page 52). • You can perform DVD setup in DVD video mode. • Touch [Stop] before performing Disc setup. Changing the language setting The audio language, subtitle language and DVD menu language can be set according to your preferences. Once set, this - Alpine INE-S920HD | Owner's Manual (english) - Page 54
If you want to play back a disc with parental lock, and its use number in order to play back the disc. • Once set upon the original aspect ratio of the theatrical release of the movie. 4:3 PAN-SCAN: Select , due to the mismatch in aspect ratio, parts of the movie at the extreme left and right - Alpine INE-S920HD | Owner's Manual (english) - Page 55
of all stored Songs/Artist/Games is set or not. 1 Touch [Alert]. 2 Touch [ ] or [ ] of the Alert to select ON/OFF. ON: Set to receive alert. OFF: No alert. Deleting all stored Alert The operation will delete all stored songs, artists and teams alert information. 1 Touch [Delete All]. A message is - Alpine INE-S920HD | Owner's Manual (english) - Page 56
, Weak or No Signal. • If the Signal Indicator reports Weak or No Signal and your vehicle is parked outside with no obstructions to the southern sky, then your SiriusXM antenna may not be properly installed or may have become damaged. AUX Setting [Aux] is selected on the Source setup menu in step - Alpine INE-S920HD | Owner's Manual (english) - Page 57
to 3.5ø mini phono plug). You can also play back video connecting with an optional AV cable (4pole mini AV plug to 3-RCA). Setting item: AUX3 In Sel. Setting contents: iPod Video (Initial setting) / AUX3 iPod Video: Set when connected to an iPod or iPhone. AUX3: Set when connected to an external - Alpine INE-S920HD | Owner's Manual (english) - Page 58
. • For automatic transmission vehicles, place the transmission lever in the Park position. Now, the locking system for the BLUETOOTH mode operation has been released. Engaging the parking brake can reactivate the BLUETOOTH Setup Menu, as long as the car's ignition has not been turned off. It is not - Alpine INE-S920HD | Owner's Manual (english) - Page 59
UTF-8 Unicode UTF-16LE Unicode UTF-16BE 3 Touch [OK]. Setting Received Calls Automatically [Auto Answer] is selected on the BLUETOOTH setup menu in step 3. Refer to "BLUETOOTH Setup Operation" (page 58). When a call is received, you can set whether to answer it automatically or not. Setting - Alpine INE-S920HD | Owner's Manual (english) - Page 60
in step 3. Refer to "BLUETOOTH Setup Operation" (page 58). You can select which speaker in the car will output the audio from the phone. Setting item: Phone Speaker Setting contents: All (Initial setting) / Front L / Front R / Front LR All: Front L: Front R: Front LR: The sound is output from all - Alpine INE-S920HD | Owner's Manual (english) - Page 61
For automatic transmission vehicles, place the transmission lever in the Park position. Now, the locking system for the Camera mode operation has been released. Engaging the parking brake can reactivate the Camera Setup Menu, as long as the car's ignition has not been turned off. It is not necessary - Alpine INE-S920HD | Owner's Manual (english) - Page 62
the video input signal type can be chosen. Setting item: Camera Signal Setting contents: NTSC (Initial setting) / PAL Adjusting the Rear Camera Guide If you select "Rear" you can adjust the camera guide position. Setting item: Guide Adjustment 1 Touch [Guide Adjustment]. The camera guide adjustment - Alpine INE-S920HD | Owner's Manual (english) - Page 63
simultaneously (for Rear camera only) 1 Touch [Link]. The 3 vertical guides of the currently-selected guide link together, allowing them to be adjusted simultaneously. Turning guide display ON/OFF Turning the selected guide off. 1 Touch [ON/OFF]. The currently selected guide will turn off. 2 To - Alpine INE-S920HD | Owner's Manual (english) - Page 64
Manual of the connected device(s). Hands-Free Phone Control Display example for Phone menu screen BLUETOOTH devices Name Favorites Display: Short Cut icon Dialled/Received/Missed Display: Each histories icon Connecting a BLUETOOTH Device Registering a BLUETOOTH device in INE-S920HD/INE-NAV-30/INE - Alpine INE-S920HD | Owner's Manual (english) - Page 65
is displayed. 2 Touch [Change]. The Set Bluetooth Device screen is displayed. 3 Touch [Audio] or [HFT] of the selected device. The "Setting Received Calls Automatically" (page 59) is set to "On," you can receive a call automatically. • During a call, the audio for the current mode on the unit is - Alpine INE-S920HD | Owner's Manual (english) - Page 66
call is started. Adjusting the Speech Volume You can adjust the transmit volume and receive volume respectively. Touch [ ] or [ ] for "Vol." : Outgoing volume the Voice Output The voice output for calls is switchable between car speakers and the mobile phone speaker. Touch [ ]. • Depending - Alpine INE-S920HD | Owner's Manual (english) - Page 67
5 The mobile phone accesses this unit and then transfers the phone book from the mobile phone to this unit. • Mobile phone connection is canceled ) button. The Phone menu screen is displayed. 2 Touch [Dialled], [Received] or [Missed]. The last four histories are displayed. 3 Touch the person - Alpine INE-S920HD | Owner's Manual (english) - Page 68
Ver. 1.0. • To play back audio, a mobile phone or a portable player conforming to A2DP (Advanced Audio Distribution Profile) or AVRCP (Audio/ Video Remote Control Profile) is required. Not all functions work with all devices. • During a call, sound on the BLUETOOTH audio source is muted. Compatible - Alpine INE-S920HD | Owner's Manual (english) - Page 69
unit, the onscreen buttons may not work, or their operation may differ. WARNING It is dangerous (and illegal in many states) for the driver to watch TV/video while driving the vehicle. The driver may be distracted from looking ahead and an accident could occur. Install the INE-S920HD/INE-NAV-30/INE - Alpine INE-S920HD | Owner's Manual (english) - Page 70
operate, refer to the Owner's Manual of the connected DVD player. External DVD player display example • The DVD." Change to the External DVD Mode 1 Press the (AUDIO) button. 2 Touch [EXT.DVD] of Top banner. The display shows the EXT. DVD mode screen. Touch [] [] Touch the switch to go back - Alpine INE-S920HD | Owner's Manual (english) - Page 71
how to operate, refer to the Owner's Manual of the connected DVD changer. • The DVD-CHG. operation mode screen and the Menu operation mode screen are the same as the external DVD player operation screen. Refer to "Operating an External DVD Player." External DVD changer display example 3/3 (Info mode - Alpine INE-S920HD | Owner's Manual (english) - Page 72
, refer to the Owner's Manual of the connected Digital TV Receiver (DVB-T). Menu operation Favorite channel mode. [EPG] Call up the Electronic Program Guide (EPG). [Menu] Call up the menu screen. to "TV." Change to the TV mode 1 Press the (AUDIO) button. 2 Touch [TV] of Top banner. The display shows - Alpine INE-S920HD | Owner's Manual (english) - Page 73
Rear Camera Operation Set "Rear" for "Direct Camera Setting" (page 61) or "AUX Camera Setting" (page 62). Displaying the rear view video while the car is in patterns, see the camera Owner's Manual. Guide Display ON/OFF Setting 1 Touch the screen when the image from the camera is displayed. The - Alpine INE-S920HD | Owner's Manual (english) - Page 74
Display ON/OFF Setting" (page 73) to On. Also, to adjust the guide, refer to "Adjusting the Rear/Front Camera Guide" (page 61). You can also turn off the guide in the Rear camera display screen. Indication mark meaning When the car is put into reverse gear, the monitor switches to the rear view - Alpine INE-S920HD | Owner's Manual (english) - Page 75
surface. Therefore in the case of an upward slope behind the car, the distance guides are displayed closer to the rear bumper than the actual distance the car on the road surface. Front Camera Operation Set "Front" for "Direct Camera Setting" (page 61). Displaying the Front View Video Manually 1 - Alpine INE-S920HD | Owner's Manual (english) - Page 76
Ground View • For detailed information about image patterns, see the camera Owner's Manual. About the adjustment of guide display ON/ OFF setting and adjustment of Caution display location As with the rear camera, the front camera guide display ON/OFF setting and Caution display location can be - Alpine INE-S920HD | Owner's Manual (english) - Page 77
band of the signal currently being received. Channel name Category name Channel No Satellite Radio controls on this unit are available only when a SiriusXM Tuner is connected. 1 Press the (AUDIO) button to the SiriusXM Tuner User Guide for details on how to install the SiriusXM Tuner. Touching the - Alpine INE-S920HD | Owner's Manual (english) - Page 78
to the SiriusXM Satellite Radio service, it is necessary to locate and identify the Radio ID of your SiriusXM Tuner. The Radio ID contains 8 characters by following the steps below: 1 While receiving SiriusXM Radio, touch [ ] or [ ] to select channel "0". The unit displays the ID number. 2 To cancel - Alpine INE-S920HD | Owner's Manual (english) - Page 79
Enter]; the channel will be received automatically. Storing the desired Song/Artist While listening to SiriusXM Satellite Radio, you can be alerted when or song is playing on another channel, an interruption ALERT appears on the unit display. To tune to the game, artist or song identified by the - Alpine INE-S920HD | Owner's Manual (english) - Page 80
button and then jump back to the previous channel. iPhone is disconnected from the unit during tagging, its tag information will be stored in the unit. • If there is stored tag information on the unit, when an iPod/iPhone supporting to the Owner's Manual of the Tagging compatible iPod/iPhone. When - Alpine INE-S920HD | Owner's Manual (english) - Page 81
DVD" (page 36) for information on video. • If the first file played is a music file, the mode will be the music play mode. If the first file played is a video file, the mode will be the video play mode. Also, the mode changes by selecting "AUDIO" or "VIDEO back on this unit. • not work properly - Alpine INE-S920HD | Owner's Manual (english) - Page 82
back in random sequence. Any one song does not play back again until all songs have been played back. Searching for a Desired Song INE-S920HD/INE-NAV-30/INE-Z928HD/INE-NAV information and keeping these songs organized in playlists, this unit's search functions will ease song searches in large - Alpine INE-S920HD | Owner's Manual (english) - Page 83
displayed. 5 Touch the desired album's name. All songs of the selected album are displayed. 6 Touch the desired song's name. The selected song is played back. • For details on how to scroll through the list, refer to "Selecting an Item in a List" (page 29). • After selecting a file via a Tag search - Alpine INE-S920HD | Owner's Manual (english) - Page 84
(Optional) An iPod/iPhone can be connected to this unit by using the cable KCU461iV (sold separately). You can connect a video-capable iPod to enjoy video as well as music. When the INE-S920HD/INE-NAV-30/INE-Z928HD/INE-NAV-38 is connected by the above cable, the controls on the iPod are disabled - Alpine INE-S920HD | Owner's Manual (english) - Page 85
not be played back when connected to the INE-S920HD/INE-NAV-30/INE-Z928HD/INE-NAV-38. Therefore, a maximum of 64 characters is recommended. The maximum number of characters for the unit is 64. • Some characters may not be correctly displayed. Searching for a Music File An iPod/iPhone can contain - Alpine INE-S920HD | Owner's Manual (english) - Page 86
Alphabet Skip Function The unit is provided with a alphabet skip function for effective searching. When you use this function in the search mode, you can quickly search an artist or a song, etc. Search Position Memory During iPod/iPhone playback, you can quickly move back up the selected hierarchy, - Alpine INE-S920HD | Owner's Manual (english) - Page 87
. The INE-S920HD/INE-NAV-30/INE-Z928HD/INE-NAV-38 enables you to interact with your Pandora® account by connecting an iPhone and smartphone that has the latest version of the Pandora® application installed. Display example for iPhone Pandora Radio screen Display example for BLUETOOTH Pandora Radio - Alpine INE-S920HD | Owner's Manual (english) - Page 88
continues to play back. • In some situations, "Thumbs" feedback may not be available. "Unable to save your thumb rating." will be displayed. Searching for a Desired Station You can display your station list and select stations directly from the INE-S920HD/INE-NAV-30/INE-Z928HD/INE-NAV-38. Alphabet - Alpine INE-S920HD | Owner's Manual (english) - Page 89
Bookmarking a Desired Track or Artist The currently playing song or artist can be bookmarked and saved to your Pandora account. 1 During playback, touch [Artwork display]. The type selection telop is displayed. Artwork display 2 Touch [Track] or [Artist]. The current track or artist is bookmarked. " - Alpine INE-S920HD | Owner's Manual (english) - Page 90
on updating. http://www.alpine-europe.com Multi story function* With this function, a single movie includes various story lines. You can select different story lines to view various versions of the same movie. Operation differs from disc to disc. Story line selection screens including instructions - Alpine INE-S920HD | Owner's Manual (english) - Page 91
List of Language Codes (For details, see page 53.) Abbreviation AA AB AF AM AR AS AY AZ BA BE BG BH BI BN BO BR CA CO CS CY DA DE DZ EL EN EO ES ET EU FA FI FJ FO FR FY GA GD GL GN GU HA HI HR HU HY IA Code 6565 6566 6570 6577 6582 6583 6589 6590 6665 6669 6671 6672 6673 6678 6679 6682 6765 6779 - Alpine INE-S920HD | Owner's Manual (english) - Page 92
6786 6788 6789 6790 6869 6874 6875 Country Abbreviation Andorra DM United Arab Emirates DO Afghanistan DZ Antigua and Barbuda EC Anguilla EE GH Bahrain GI Burundi GL Benin GM Bermuda GN Brunei Darussalam GP Bolivia GQ Brazil GR Bahamas GS Bhutan Bouvet Island GT - Alpine INE-S920HD | Owner's Manual (english) - Page 93
8673 8678 8685 8770 8783 8969 8984 8985 9065 9077 9087 Country Taiwan, Province of China Tanzania, United Republic of Ukraine Uganda United States Minor Outlying Islands United States Uruguay Uzbekistan Holy See (Vatican City State) Saint Vincent and the Grenadines Venezuela Virgin Island, British - Alpine INE-S920HD | Owner's Manual (english) - Page 94
control sensor setting of "Remote Sensor Setting" (page 43) is not set to this unit ("Front"). - Set for "Front." Radio Unable to receive stations. • No antenna, or open connection in the antenna cable. - Make sure the antenna is properly connected; replace the antenna or cable if necessary. 94-EN - Alpine INE-S920HD | Owner's Manual (english) - Page 95
play back non-copy-protected files. • A sampling rate/bit rate not supported by the unit is used. - Use a sampling rate/bit rate supported by the unit. BLUETOOTH Please check BLUETOOTH audio device. • The BLUETOOTH audio device was not connected correctly. - Check the settings for INE-S920HD/INE-NAV - Alpine INE-S920HD | Owner's Manual (english) - Page 96
with a supported audio format. SiriusXM Check Tuner • The SiriusXM Tuner is disconnected or the unit is having trouble communicating with the Tuner. - Connect the Tuner or check the Tuner connection to the back of the unit. Check Antenna • The SiriusXM Satellite Radio antenna or cable is either - Alpine INE-S920HD | Owner's Manual (english) - Page 97
For INE-S920HD/INE-NAV-30 BLUETOOTH SECTION BLUETOOTH Specification Output Power Profile Bluetooth V2.1+EDR +4 dBm Max. (Power class 2) HFP (Hands-Free Profile) OPP (Object Push Profile) PBAP (Phone Book Access Profile) A2DP (Advanced Audio Distribution Profile) AVRCP (Audio/Video Remote - Alpine INE-S920HD | Owner's Manual (english) - Page 98
dB max. BLUETOOTH SECTION BLUETOOTH Specification Output Power Profile Bluetooth V2.1+EDR +4 dBm Max. (Power class 2) HFP (Hands-Free Profile) OPP (Object Push Profile) PBAP (Phone Book Access Profile) A2DP (Advanced Audio Distribution Profile) AVRCP (Audio/Video Remote Control Profile) GENERAL - Alpine INE-S920HD | Owner's Manual (english) - Page 99
ALPINE FOR INSTRUCTIONS RECEIVED updates, supplements, add-on components, or Internet - base service components of the SOFTWARE after the date you obtain your initial copy of the SOFTWARE ("Supplemental Components"). • If ALPINE installed on the DEVICE. UPGRADES. If the SOFTWARE is provided by ALPINE - Alpine INE-S920HD | Owner's Manual (english) - Page 100
(including but not limited to any images, photographs, animations, video, audio, music, text and "applets," incorporated into the SOFTWARE), the any trademarks or service marks of ALPINE, MS, Microsoft Corporation, their affiliates or suppliers. PRODUCT SUPPORT. Product support for the SOFTWARE - Alpine INE-S920HD | Owner's Manual (english) - Page 101
sure to disconnect the cable from the (-) battery post before installing your INE-S920HD/INE-NAV-30/INE-Z928HD/INENAV-38. This will reduce any chance of damage to the unit in case of a short-circuit. • Be sure to connect the color coded leads according to the diagram. Incorrect connections may cause - Alpine INE-S920HD | Owner's Manual (english) - Page 102
purchased installation kit for each car type. Caution Do not block the unit's fan or heat sink, thus preventing air circulation. If blocked, heat will accumulate inside the unit and may cause a fire. Air ventilation hole Heat sink Rear of the Unit 3 Mounting the GPS Antenna inside - Alpine INE-S920HD | Owner's Manual (english) - Page 103
. Connect all the leads of the INE-S920HD/INE-NAV-30 according to details described in the CONNECTION section. Hex Nut (M5) Screw *2 Bolt Stud Cable clamp (Sold separately) Microphone For INE-S920HD/INE-NAV-30 5 Remove the mounting sleeve from the main unit (see "Removal" on page 103). Slide - Alpine INE-S920HD | Owner's Manual (english) - Page 104
plate is located on the bottom of the unit. SERIAL NUMBER: INSTALLATION DATE: INSTALLATION TECHNICIAN: PLACE OF PURCHASE: To prevent external noise from entering the audio system. • Locate the unit and route the leads at least 10 cm away from the car harness. • Keep the battery power leads as far - Alpine INE-S920HD | Owner's Manual (english) - Page 105
Connections For INE-S920HD/INE-NAV-30 REMOTE OUT (Brown) REMOTE IN (Brown) (Green/White) SPEED SENSOR CAMERA1 CAMERA2 CAMERA SW (Yellow) (Red) (White) (Yellow) (Red) (White) REMOTE TURN-ON (Blue/White) REVERSE (Orange/White) POWER ANT (Blue) PARKING BRAKE (Yellow/Blue) FOOT BRAKE (Yellow/Black) - Alpine INE-S920HD | Owner's Manual (english) - Page 106
Connector To steering remote control interface box. For details about connections, consult your nearest Alpine dealer. GPS antenna Receptacle Connect to separately sold GPS antenna (included). iPod VIDEO Input Connector Input the iPod/ iPhone video signal or AUX video/audio signal. • Set "AUX3 - Alpine INE-S920HD | Owner's Manual (english) - Page 107
To Video Input terminal To Audio Input terminals (R, L) Amplifier Rear Left Rear Right Amplifier Front Left Front Right Amplifier Subwoofers To amplifier or equalizer To plus side of the back lamp signal lead of the car To power antenna To the parking brake signal lead To the foot brake cord - Alpine INE-S920HD | Owner's Manual (english) - Page 108
. Subwoofer RCA Connectors RED is right and WHITE is left. RCA Extension Cable (sold separately) GPS antenna Receptacle Connect to separately sold GPS antenna (included). iPod VIDEO Input Connector Input the iPod/ iPhone video signal or AUX video/audio signal. • Set "AUX3 In Sel." (page 57) to "iPod - Alpine INE-S920HD | Owner's Manual (english) - Page 109
Connection kit KCU-461iV (INE-S920HD/INE-NAV-30: Sold separately) iPod VIDEO AV extension cable*1 (INE-Z928HD/INE-NAV-38: Included) USB extension cable (Included) iPod/iPhone connection cable (INE-Z928HD/INE-NAV-38: Included) *1 If iPod VIDEO is supported, use the iPod VIDEO extension cable. • Do - Alpine INE-S920HD | Owner's Manual (english) - Page 110
REMOTE IN (Brown) Camera cable AUX/PRE OUT Connector To Video Output terminal DVD Changer (Sold separately) To Audio Output terminal To Video Input terminal Rear monitor (Sold separately) REMOTE OUT (Brown) To Audio Input terminal REMOTE OUT (White/Brown) REMOTE IN (White/Brown) 1 Video/Audio - Alpine INE-S920HD | Owner's Manual (english) - Page 111
) Mobile Digital TV Receiver (Sold separately) DVD Changer (Sold separately) REMOTE OUT (Brown) Camera cable To Audio Output Terminal REMOTE IN (White/Brown) To Audio Input Terminal REMOTE OUT (White/Brown) To Audio Output Terminal REMOTE IN (White/Brown) 1 Video/Audio Input Connectors (AUX - Alpine INE-S920HD | Owner's Manual (english) - Page 112
Connection of an External Amplifier Power Supply Connector AUX/PRE OUT Connector (Red) (White) (Red) (White) (Red) (White) REMOTE TURN-ON (Blue/White) Power cable 1 Front Output RCA Connectors RED is right and WHITE is left. 2 Rear Output RCA Connectors RED is right and WHITE is left. AUX/PRE OUT - Alpine INE-S920HD | Owner's Manual (english) - Page 113
Connection of cameras (Direct camera and AUX camera) Camera Connector CAMERA 1 CAMERA 2 Camera cable Direct rearview camera (sold separately) HCE-C117D, etc. To Video Output terminal Camera with RCA video output (sold separately) 1 Direct CAMERA Input Connector 2 Camera extension cable (Included - Alpine INE-S920HD | Owner's Manual (english) - Page 114
Lead (Orange/Black) To plus side of the back lamp signal lead of the car. Control Unit 1 Video/Audio Input Connectors (AUX INPUT) 2 RCA Extension Cable (sold separately) • When the screen switches from the front view camera image to the Navigation screen, the location of your vehicle may not be - Alpine INE-S920HD | Owner's Manual (english) - Page 115
radio frequency (RF) Exposure rules. This equipment has very low levels of RF energy that it deemed to comply without maximum permissive exposure evaluation (MPE). But it is desirable that it should be installed maintenant à l'adresse suivante : www.alpine-usa.com/registration. Recuerde que con solo - Alpine INE-S920HD | Owner's Manual (english) - Page 116
warranty stamped upon installation by the installation center. HOW TO CONTACT CUSTOMER SERVICE: Should the product require service, please call the following number for your nearest Authorized Alpine Service Center. CAR AUDIO 1-800-ALPINE-1 (1-800-257-4631) NAVIGATION 1-888-NAV-HELP (1-888-628
-
 1
1 -
 2
2 -
 3
3 -
 4
4 -
 5
5 -
 6
6 -
 7
7 -
8
-
9
-
10
-
11
-
12
-
13
-
14
-
15
-
16
-
17
-
18
-
19
-
20
-
21
-
22
-
23
-
24
-
25
-
26
-
27
-
28
-
29
-
30
-
31
-
32
-
33
-
34
-
35
-
36
-
37
-
38
-
39
-
40
-
41
-
42
-
43
-
44
-
45
-
46
-
47
-
48
-
49
-
50
-
51
-
52
-
53
-
54
-
55
-
56
-
57
-
58
-
59
-
60
-
61
-
62
-
63
-
64
-
65
-
66
-
67
-
68
-
69
-
70
-
71
-
72
-
73
-
74
-
75
-
76
-
77
-
78
-
79
-
80
-
81
-
82
-
83
-
84
-
85
-
86
-
87
-
88
-
89
-
90
-
91
-
92
-
93
-
94
-
95
-
96
-
97
-
98
-
99
-
100
-
101
-
102
-
103
-
104
-
105
-
106
-
107
-
108
-
109
-
110
-
111
-
112
-
113
-
114
-
115
-
116
 |
 |
Designed by ALPINE Japan
68-21057Z27-A
EN
FR
ES
Thank you for purchasing this Alpine product. Please take a moment to protect your purchase by
registering your product now at the following address: www.alpine-usa.com/registration
.
You will be informed of product and software updates (if applicable), special promotions, news about
Alpine, and entered for a chance to win prizes.
Merci d’avoir acheté ce produit Alpine. Nous vous invitons à consacrer un moment à la protection de
votre achat en enregistrant votre produit dès maintenant à l’adresse suivante :
www.alpine-usa.com/registration
.
Vous serez tenu informé des mises à jour des produits et des logiciels (le cas échéant), des promotions
spéciales, de l’actualité d’Alpine, et vous aurez une chance de remporter des prix.
Gracias por adquirir este producto Alpine. Con solo unos pocos pasos podrá proteger su producto,
registrándolo a través de la siguiente dirección: www.alpine-usa.com/registration
.
Recibirá información sobre nuevos productos y software, promociones especiales, novedades sobre
Alpine y participará en el sorteo de premios.
IN-DASH GPS NAVIGATION RECEIVER
INE-S920HD
INE-NAV-30
8-INCH IN-DASH GPS NAVIGATION RECEIVER
INE-Z928HD
INE-NAV-38
•
OWNER’S MANUAL
Please read before using this equipment.
•
MANUAL DE OPERACIÓN
Léalo antes de utilizar este equipo.
•
MODE D’EMPLOI
Veuillez lire avant d’utiliser cet appareil.
R
This HD Radio receiver enables: