Brother International HL-3075CW Network Users Manual - English - Page 27
Using Web Based Management (web browser) to change the print server settings
 |
View all Brother International HL-3075CW manuals
Add to My Manuals
Save this manual to your list of manuals |
Page 27 highlights
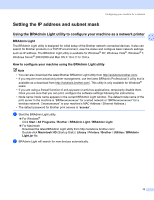
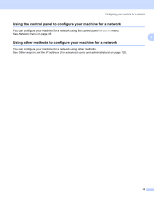
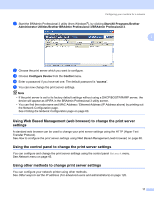
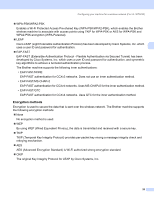
Configuring your machine for a network a Start the BRAdmin Professional 3 utility (from Windows®), by clicking Start/All Programs/Brother Administrator Utilities/Brother BRAdmin Professional 3/BRAdmin Professional 3. 2 b Choose the print server which you want to configure. c Choose Configure Device from the Control menu. d Enter a password if you have set one. The default password is "access". e You can now change the print server settings. Note • If the print server is set to its factory default settings without using a DHCP/BOOTP/RARP server, the device will appear as APIPA in the BRAdmin Professional 3 utility screen. • You can find the node name and MAC Address / Ethernet Address (IP Address above) by printing out the Network Configuration page. See Printing the Network Configuration page on page 60. Using Web Based Management (web browser) to change the print server settings 2 A standard web browser can be used to change your print server settings using the HTTP (Hyper Text Transfer Protocol). See How to configure the print server settings using Web Based Management (web browser) on page 68. Using the control panel to change the print server settings 2 You can configure and change the print server settings using the control panel Network menu. See Network menu on page 45. Using other methods to change print server settings 2 You can configure your network printer using other methods. See Other ways to set the IP address (For advanced users and administrators) on page 120. 17
-
 1
1 -
2
-
3
-
4
-
5
-
6
-
7
-
8
-
9
-
10
-
11
-
12
-
13
-
14
-
15
-
16
-
17
-
18
-
19
-
20
-
21
-
 22
22 -
 23
23 -
 24
24 -
 25
25 -
 26
26 -
 27
27 -
 28
28 -
 29
29 -
 30
30 -
 31
31 -
 32
32 -
33
-
34
-
35
-
36
-
37
-
38
-
39
-
40
-
41
-
42
-
43
-
44
-
45
-
46
-
47
-
48
-
49
-
50
-
51
-
52
-
53
-
54
-
55
-
56
-
57
-
58
-
59
-
60
-
61
-
62
-
63
-
64
-
65
-
66
-
67
-
68
-
69
-
70
-
71
-
72
-
73
-
74
-
75
-
76
-
77
-
78
-
79
-
80
-
81
-
82
-
83
-
84
-
85
-
86
-
87
-
88
-
89
-
90
-
91
-
92
-
93
-
94
-
95
-
96
-
97
-
98
-
99
-
100
-
101
-
102
-
103
-
104
-
105
-
106
-
107
-
108
-
109
-
110
-
111
-
112
-
113
-
114
-
115
-
116
-
117
-
118
-
119
-
120
-
121
-
122
-
123
-
124
-
125
-
126
-
127
-
128
-
129
-
130
-
131
-
132
-
133
-
134
-
135
-
136
-
137
-
138
-
139
-
140
-
141
-
142
-
143
 |
 |
