Brother International HL-3075CW Network Users Manual - English - Page 47
Devices and Printers, You have completed the wireless setup. To install the printer driver, Go to step - manual for
 |
View all Brother International HL-3075CW manuals
Add to My Manuals
Save this manual to your list of manuals |
Page 47 highlights
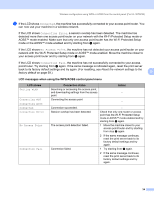
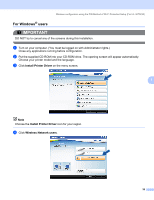
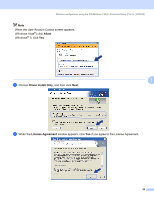
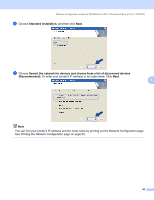
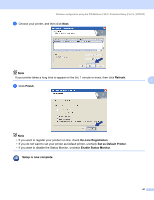
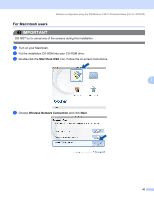
Wireless configuration using the PIN Method of Wi-Fi Protected Setup (For HL-3075CW) h Using a computer that is on the network, type "http://access point's IP address/" into your browser. (Where "access point's IP address" is the IP address of the device that is used as the Registrar 1.) Go to the WPS (Wi-Fi Protected Setup) setting page and input the PIN which the LCD shows in g to the Registrar and follow the on-screen instruction. 1 The Registrar is normally the access point/router. Note The setting page is different, depending on the brand of access point/router. See the instruction manual that came with your access point/router. If you are using your Windows Vista® and Windows® 7 computer as a Registrar, follow the instructions below. Note To use a Windows Vista® and Windows® 7 computer as a Registrar, you need to register it to your network in advance. See the instruction manual that came with your access point/router. 1 (Windows Vista®) 7 Click the button and then Network. (Windows® 7) Click the button and then Devices and Printers. 2 (Windows Vista®) Click Add a wireless device. (Windows® 7) Click Add a device. 3 Choose your machine and click Next. 4 Input the PIN from the printed page and then click Next. 5 Choose your network that you want to connect to, and then click Next. 6 Click Close. i If the LCD shows Connected, the machine has successfully connected to your access point/router. You can now use your machine in a wireless network. If the LCD shows Connection Fail, the machine has not successfully connected to your access point/router, or the entered PIN code is invalid. Make sure you enter the correct PIN code, and try starting from f again. If the same message is indicated again, reset the print server back to its factory default settings and try again. For resetting, see Reset the network settings to the factory default on page 59. If the LCD shows No Access Point, the machine has detected no access point/router on your network. Make sure you place the Brother machine as close to the network access point/router as possible with minimal obstructions, and try starting from f again. If the same message is indicated again, reset the print server back to its factory default settings and try again. For resetting, see Reset the network settings to the factory default on page 59. You have completed the wireless setup. To install the printer driver, Go to step a on page 38 for Windows® or page 42 for Macintosh. 37
-
 1
1 -
2
-
3
-
4
-
5
-
6
-
7
-
8
-
9
-
10
-
11
-
12
-
13
-
14
-
15
-
16
-
17
-
18
-
19
-
20
-
21
-
22
-
23
-
24
-
25
-
26
-
27
-
28
-
29
-
30
-
31
-
32
-
33
-
34
-
35
-
36
-
37
-
38
-
39
-
40
-
41
-
 42
42 -
 43
43 -
 44
44 -
 45
45 -
 46
46 -
 47
47 -
 48
48 -
 49
49 -
 50
50 -
 51
51 -
 52
52 -
53
-
54
-
55
-
56
-
57
-
58
-
59
-
60
-
61
-
62
-
63
-
64
-
65
-
66
-
67
-
68
-
69
-
70
-
71
-
72
-
73
-
74
-
75
-
76
-
77
-
78
-
79
-
80
-
81
-
82
-
83
-
84
-
85
-
86
-
87
-
88
-
89
-
90
-
91
-
92
-
93
-
94
-
95
-
96
-
97
-
98
-
99
-
100
-
101
-
102
-
103
-
104
-
105
-
106
-
107
-
108
-
109
-
110
-
111
-
112
-
113
-
114
-
115
-
116
-
117
-
118
-
119
-
120
-
121
-
122
-
123
-
124
-
125
-
126
-
127
-
128
-
129
-
130
-
131
-
132
-
133
-
134
-
135
-
136
-
137
-
138
-
139
-
140
-
141
-
142
-
143
 |
 |
