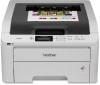
Brother International HL-3075CW Network Users Manual - English - Page 57
IP Address, For HL-3075CW
 |
View all Brother International HL-3075CW manuals
Add to My Manuals
Save this manual to your list of manuals |
Page 57 highlights
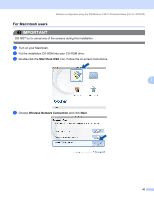
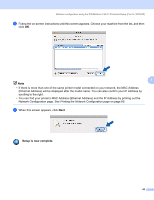
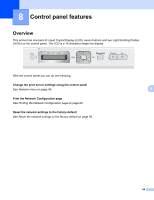
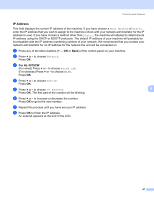
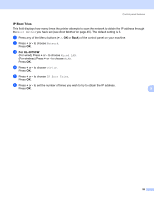
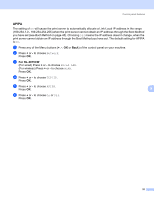
Control panel features IP Address 8 This field displays the current IP address of the machine. If you have chosen a Boot Method of Static, enter the IP address that you wish to assign to the machine (check with your network administrator for the IP address to use). If you have chosen a method other than Static, the machine will attempt to determine its IP address using the DHCP or BOOTP protocols. The default IP address of your machine will probably be incompatible with the IP address numbering scheme of your network. We recommend that you contact your network administrator for an IP address for the network the unit will be connected on. a Press any of the Menu buttons (+, -, OK or Back) of the control panel on your machine. b Press + or - to choose Network. Press OK. c For HL-3075CW (For wired) Press + or - to choose Wired LAN. (For wireless) Press + or - to choose WLAN. Press OK. d Press + or - to choose TCP/IP. Press OK. e Press + or - to choose IP Address. 8 Press OK. The first part of the number will be blinking. f Press + or - to increase or decrease the number. Press OK to go to the next number. g Repeat this process until you have set your IP address. h Press OK to finish the IP address. An asterisk appears at the end of the LCD. 47
-
 1
1 -
2
-
3
-
4
-
5
-
6
-
7
-
8
-
9
-
10
-
11
-
12
-
13
-
14
-
15
-
16
-
17
-
18
-
19
-
20
-
21
-
22
-
23
-
24
-
25
-
26
-
27
-
28
-
29
-
30
-
31
-
32
-
33
-
34
-
35
-
36
-
37
-
38
-
39
-
40
-
41
-
42
-
43
-
44
-
45
-
46
-
47
-
48
-
49
-
50
-
51
-
 52
52 -
 53
53 -
 54
54 -
 55
55 -
 56
56 -
 57
57 -
 58
58 -
 59
59 -
 60
60 -
 61
61 -
 62
62 -
63
-
64
-
65
-
66
-
67
-
68
-
69
-
70
-
71
-
72
-
73
-
74
-
75
-
76
-
77
-
78
-
79
-
80
-
81
-
82
-
83
-
84
-
85
-
86
-
87
-
88
-
89
-
90
-
91
-
92
-
93
-
94
-
95
-
96
-
97
-
98
-
99
-
100
-
101
-
102
-
103
-
104
-
105
-
106
-
107
-
108
-
109
-
110
-
111
-
112
-
113
-
114
-
115
-
116
-
117
-
118
-
119
-
120
-
121
-
122
-
123
-
124
-
125
-
126
-
127
-
128
-
129
-
130
-
131
-
132
-
133
-
134
-
135
-
136
-
137
-
138
-
139
-
140
-
141
-
142
-
143
 |
 |
