Canon PIXMA MP530 User's Guide
Canon PIXMA MP530 Manual
 |
View all Canon PIXMA MP530 manuals
Add to My Manuals
Save this manual to your list of manuals |
Canon PIXMA MP530 manual content summary:
- Canon PIXMA MP530 | User's Guide - Page 1
Office All-in-One User's Guide ENG QT5-0210-V02 - Canon PIXMA MP530 | User's Guide - Page 2
self-help in an intuitively guided interactive troubleshooting environment, the place to start is our helpful tech support web site. In addition, the latest driver downloads, answers to frequently asked questions, product information, and "where to buy" instructions are found here. 2. Email Tech - Canon PIXMA MP530 | User's Guide - Page 3
122 Paper Jams 127 Document Jams 130 Cannot Print Properly from the Digital Camera 133 Cannot Install the MP Drivers 135 Cannot Connect to Computer Properly ...... 137 Problems Receiving Faxes 138 Problems Sending Faxes 140 Telephone Problems 141 Problems Scanning 141 An Error Message - Canon PIXMA MP530 | User's Guide - Page 4
Customer Technical Supports 167 Users in New Zealand 168 Index 169 2 - Canon PIXMA MP530 | User's Guide - Page 5
Canon MP530 User's Guide Copyright This manual is copyrighted by Canon Inc. with all rights reserved. Under the copyright laws, this manual may not be reproduced in any form, in whole or in part, without the prior written consent of Canon Inc. © 2006 Canon Inc. Disclaimer Canon Inc. has reviewed - Canon PIXMA MP530 | User's Guide - Page 6
photo printing from selected digital cameras, copying, faxing, and scanning. Refer to these guides as needed for full instructions on some of the more advanced features. Printer Driver Guide Refer to this guide for full instructions on setting the printer driver. Scan Guide Refer to this guide for - Canon PIXMA MP530 | User's Guide - Page 7
with electrical parts inside the machine guide. If further servicing is required, contact the Canon Customer Care Center. When storing the machine, choose a location where the machine is not exposed to dust. Dust accumulation may prevent the machine from operating properly. Use a damp cloth to clean - Canon PIXMA MP530 | User's Guide - Page 8
the noise emitted by the fluorescent lighting. When turning OFF the power, be sure to press [ON/OFF] and confirm that the Alarm Lamp has shut off. If you pull the power plug out of the wall outlet while the Alarm Lamp is lit or flashing, the Print Head is not protected, and you may - Canon PIXMA MP530 | User's Guide - Page 9
guides included with your machine. z If the machine does not operate normally when you have followed the instructions provided in "Troubleshooting" on page 111. z If the machine has been dropped or damaged. z If the machine exhibits a distinct change in performance, indicating a need for servicing - Canon PIXMA MP530 | User's Guide - Page 10
paper jammed in the machine, be careful not to get ink on your hands or clothing. If ink gets on your hands or clothing, wash them soon in running water. If you use hot water, the ink may adhere and become difficult to remove. After printing, do not touch the electrical contacts of the Print Head - Canon PIXMA MP530 | User's Guide - Page 11
of small children. If a child ingests any ink, consult a doctor immediately. Do not shake print heads or ink tanks. Ink may leak out and stain clothing or the surrounding area. Never touch the Print Head. IMPORTANT SAFETY INSTRUCTIONS When using your telephone equipment, basic safety precautions - Canon PIXMA MP530 | User's Guide - Page 12
of symbols used in this guide. The following symbols are used to indicate important instructions. Be sure to obey these instructions. Warning Indicates a warning concerning Read this when the machine is connected to a Windows® system. Read this when the machine is connected to a Macintosh® - Canon PIXMA MP530 | User's Guide - Page 13
of Images It may be unlawful to make copies of, scan, print or use reproductions of the following documents. The list provided is non-exhaustive. When in doubt, check with a legal representative in your jurisdiction. z Paper money z Money orders z Certificates of deposit z Postage stamps (canceled - Canon PIXMA MP530 | User's Guide - Page 14
) (11) (10) (9) (8) (1) ADF (Auto Document Feeder) Automatically scans in documents loaded in the Document Tray. (2) Feeder Cover Open this cover when clearing jammed documents. (3) Document Guides Adjust these guides to match the document width. (4) Paper Support Supports paper loaded on the tray - Canon PIXMA MP530 | User's Guide - Page 15
compatible with PictBridge or Canon Bubble Jet Direct. See "Printing Photographs Directly from a Compliant Device" on page 53. (12) Paper Press this button to open the Paper Output Tray. (16) Cassette Load paper to be used regularly here. Paper feeds automatically, one sheet at a time. Photo Stickers - Canon PIXMA MP530 | User's Guide - Page 16
check the status of each ink tank according to the way its lamp flashes. See "Ink Lamps" on page 15. (19) Print Head Holder Used to install a Print Head. (20) Scanning Unit (Printer Cover) This is the unit used to scan documents. Open this unit when replacing the ink tanks, or clearing jammed paper - Canon PIXMA MP530 | User's Guide - Page 17
jammed paper. (25) USB Port This is the connector used to connect the machine to a computer using a USB cable. Important While the machine is printing from or scanning the Print Head and ink tanks, refer to the Easy Setup Instructions. Ink Lamps z You can check the status of each ink tank according - Canon PIXMA MP530 | User's Guide - Page 18
to a computer (Refer to the Scan Guide). (6) Alarm Lamp Lights or flashes orange, when an error occurs, or when paper or ink has run out. (7) [Exposure as well as fax/telephone numbers and characters. (12) [Redial/Pause] Redials the last dialed number using numeric buttons. Also enters pauses between - Canon PIXMA MP530 | User's Guide - Page 19
. (15) [OK] Finalizes your selection for the menu or setting item. Restores the machine to normal operation after a printing error was resolved, or if paper jams are cleared. Ejects documents remaining in the ADF. (16) [(-) ] and [ (+)] Scrolls through menu selections, and increases or decreases - Canon PIXMA MP530 | User's Guide - Page 20
that the Print Head and ink tanks are set into place. Note If preparatory operations above are not yet finished, follow the Easy Setup Instructions to complete them. 1 To turn on the machine, press [ON/OFF]. [COPY] flashes green for a while, and then turns on. Note z If the Alarm Lamp lights or - Canon PIXMA MP530 | User's Guide - Page 21
Press [Stop/Reset]. Document paper), up to 2 mm in height z 1 sheet for sizes other than these 0.002" to 0.005" / 0.06 to 0.13 mm - 13 to 24 lb / 50 to 90 gsm „ Loading Documents Load documents that you want to copy, fax, or scan on the Platen Glass or in the ADF. Chapter 1 Before Printing - Canon PIXMA MP530 | User's Guide - Page 22
ink, correction fluid, or the like is completely dry before loading the document. z Remove all staples, paper corner of the Platen Glass. Note z The machine cannot scan the area within about 0.08" / 2 mm from left edge of the Platen Glass. z You can also scan in originals that are up to 0.39" / 10 - Canon PIXMA MP530 | User's Guide - Page 23
edge of document cannot be printed since the machine cannot scan it. z Do not load the following types of documents in the ADF. They will jam. - Wrinkled or creased paper - Curled paper - Torn paper - Paper with holes - Carbon paper or carbon-backed paper - Surface treated paper - Onion skin or thin - Canon PIXMA MP530 | User's Guide - Page 24
printing without a computer, see the table in "Changing the Page Size and Media Type" on page 37. Media Type Plain Paper Model*1 Paper Support Load Limit Auto Sheet Feeder Cassette - 0.51" / 13 mm 0.51" / 13 mm Printer Driver mm) [Glossy Photo Paper] Matte Photo Paper MP-101 10 sheets (A4 - Canon PIXMA MP530 | User's Guide - Page 25
plain paper (17 lb / 64 gsm), up to 150 sheets (0.51" / 13 mm in height) can be loaded in the Auto Sheet Feeder and Cassette respectively. Select [Plain Paper] from [Media Type] in the printer driver. For a detailed description of printing media types, refer to the Printer Driver Guide. z Media - Canon PIXMA MP530 | User's Guide - Page 26
area is traced with a highlight pen or paint-stick or stained with water or sweat, ink may blur depending on the paper. z Photo Paper Pro Guidelines z Do not touch the print surface until the ink is dry (approx. 30 minutes). Colors in dark images may appear indistinct at first, but will become - Canon PIXMA MP530 | User's Guide - Page 27
whenever you print. Note z For information on page size, media type, and paper support load limit for Auto Sheet Feeder or Cassette, see "Recommended Paper and Requirements" on page 22. z For information on the printer driver settings, refer to the Printer Driver Guide. (A) (B) (C) (A) Auto Sheet - Canon PIXMA MP530 | User's Guide - Page 28
to switch the paper source automatically. AUTO FEED SWITCH W OFF ON: Switches the paper source automatically. OFF: Switches the paper source by pressing [Feed Switch] on the Operation Panel. 6 Press [OK]. 7 Press [Stop/Reset]. „ Changing the Paper Source Before printing, confirm that the - Canon PIXMA MP530 | User's Guide - Page 29
the computer. For details, refer to the Printer Driver Guide. „ Loading the Print Media in the Auto Sheet Feeder Important Load plain paper (A4-, letter-, or legal-size) when receiving faxes. z Loading Paper Note For detailed information on the specialty media Canon provides for use with its various - Canon PIXMA MP530 | User's Guide - Page 30
can also select the paper source with the printer driver. For details, refer to the Printer Driver Guide. 3 Load the paper. (1) Load the paper into the Auto Sheet Feeder with the print side face up. (2) Align the paper stack to the Cover Guide on the right side of the Paper Support. Important Ensure - Canon PIXMA MP530 | User's Guide - Page 31
to the Printer Driver Guide. 1 Load the envelope against the Cover Guide on the right side of the Paper Support with the front face up, and the rear flaps down on the left. Important Ensure that the Cover Guide stands when you load paper in the Auto Sheet Feeder. Chapter 1 Before Printing 29 - Canon PIXMA MP530 | User's Guide - Page 32
[Page Size]. For information on the printer driver settings, refer to the Printer Driver Guide. (A) 1 2 3 (B) Note z Fold the envelope flap shut (A). z Printing direction (B). z Loading Other Small-Sized Paper in the Auto Sheet Feeder Important Cutting plain paper to 4" x 6" / 101.6 x 152.4 mm - Canon PIXMA MP530 | User's Guide - Page 33
the printer driver settings, see "Printing with Windows" on page 84, or "Printing with Macintosh" on page 86. 1 2 3 Important Always load paper in portrait orientation (A). Loading paper in landscape orientation (B) can cause the paper to be jammed. (A) (B) Note We recommend using genuine Canon - Canon PIXMA MP530 | User's Guide - Page 34
Canon provides for use with its various printers, refer to "Recommended Paper and Requirements" on page 22. 1 Flatten the four corners of the paper before loading it. Note z Align the edges of paper neatly before loading. Loading paper without aligning the edges may cause paper jams. z When paper - Canon PIXMA MP530 | User's Guide - Page 35
to 150 sheets of plain paper (17 lb / 64 gsm, 0.51" / 13 mm in height) in the Cassette. However, do not stack more than 50 sheets in the Paper Output Tray. z Do not touch the printed surfaces until the ink dries. For specific drying times, refer to the instructions packaged with your media. 4 Insert - Canon PIXMA MP530 | User's Guide - Page 36
hollow on its front side. (3) Press [Feed Switch] so that the Cassette Lamp (A) lights. (3) (A) (2) (1) Note You can also select the paper source with the printer driver. For details, refer to the Printer Driver Guide. z Loading Envelopes Use either European DL or US Comm. Env. #10 size envelopes - Canon PIXMA MP530 | User's Guide - Page 37
Cassette Lamp lights. 3 (B) Note Printing direction (B). 4 Select [Envelope] in [Media Type], and then select [DL Env.] or [Comm. Env. #10] in [Page Size]. For information on the printer driver settings, refer to the Printer Driver Guide. z Loading 4" x 6"- or 5" x 7"-Sized Paper in the Cassette - Canon PIXMA MP530 | User's Guide - Page 38
] in the printer driver. For a detailed description of the printer driver settings, see "Printing with Windows" on page 84, or "Printing with Macintosh" on page 86. Important Always load paper in portrait orientation (A). Loading paper in landscape orientation (B) can cause the paper to be jammed - Canon PIXMA MP530 | User's Guide - Page 39
to load into the Auto Sheet Feeder and Cassette. z Recommended Paper and Requirements Media Type Plain Paper Model*1 Paper Support Load Limit Auto Sheet Feeder Cassette - 0.51" / 13 mm 0.51" / 13 mm Machine Settings / (LTR) Chapter 1 Before Printing 37 - Canon PIXMA MP530 | User's Guide - Page 40
Paper Model*1 Paper Support Load Limit Auto Photo Paper MP- Canon branded paper depending on your country. *1 Paper is not sold in the US by Model Number. Purchase paper by the name. *2 When loading a stack of paper, the printed side may be marked when it is fed in. If this happens, load paper one - Canon PIXMA MP530 | User's Guide - Page 41
Note z Regarding the printer driver setting for media type, see "Recommended Paper and Requirements" on page 22. z When using plain paper (17 lb / 64 gsm), up to 150 sheets (0.51" / 13 mm in height) can be loaded in the Auto Sheet Feeder and Cassette respectively. Chapter 1 Before Printing 39 - Canon PIXMA MP530 | User's Guide - Page 42
paper in the Auto Sheet Feeder and the Cassette Lamp lights when loading paper in the Cassette. (5) Load the document on the Platen Glass or in the ADF. Note For information on the types and conditions of documents which you can copy, see "Loading Documents" on page 19. 2 Start copying. (1) Check - Canon PIXMA MP530 | User's Guide - Page 43
copying. Note z To cancel copying, press [Stop/Reset]. z The machine can also receive faxes in copy methods: Preset copy ratios: You can select one of the preset ratios to reduce or enlarge Press and hold down [ ] or [ ] to quickly advance through the ratios. 4 Press [OK]. z Using Custom Copy - Canon PIXMA MP530 | User's Guide - Page 44
. ENLARGE/REDUCE W FIT-TO-PAGE X Note When is selected, the document loaded in the ADF cannot be scanned. 3 Press [OK]. The message appears on the LCD. Note If the document is not properly reduced or enlarged to fit the page size, use preset or custom - Canon PIXMA MP530 | User's Guide - Page 45
A4 STD A PLAIN Note When is selected, the document loaded in the ADF cannot be scanned. „ Adjusting Image Quality You can Copying onto Both Sides of the Paper (Two-sided copy) You can copy two document pages onto the sides of a single sheet of paper. (A) (B) (A) Long-side - Canon PIXMA MP530 | User's Guide - Page 46
one sheet of document is scanned in. Note z The ADF is not available for scanning two-sided documents at a stretch. z This function cannot be used in conjunction with under or other copy functions. z If you perform black & white copying for two-sided copy, print - Canon PIXMA MP530 | User's Guide - Page 47
you to copy two documents (A) and (B) onto a single sheet (C) of paper by reducing each image. (A) (B) (C) Note z This function cannot be conjunction with other functions. z If appears on the LCD when scanning, set the image quality to or and try copying again. - Canon PIXMA MP530 | User's Guide - Page 48
scanned, the message below is displayed. SCAN NEXT [START] START PRINT [OK] If you have another sheet of document to scan one sheet of document is scanned in. „ Copying Four Pages to Fit onto a Single Page (4-on-1 copy) This feature enables you to copy four documents onto a single sheet of paper - Canon PIXMA MP530 | User's Guide - Page 49
, the message below is displayed. SCAN NEXT [START] START PRINT [OK] If you have another sheet of document to scan, load it on the Platen Glass and press [Start]. If you do not need more scanning, press [OK]. Note When you copy more than one sheet of document, press the same [Start] button - Canon PIXMA MP530 | User's Guide - Page 50
the ADF cannot be scanned. 3 Use [ ] or [ ] to select , then press [OK]. 4 Use [ ] or [ ] to select . You can only print in the 4 x stickers in the Auto Sheet Feeder when using this function. z You can only load one sheet of stickers at a time in the Auto Sheet Feeder when - Canon PIXMA MP530 | User's Guide - Page 51
2 Load the document on the Platen Glass. Note The document loaded in the ADF cannot be scanned. 3 Use [ ] or [ ] to select , then press [OK]. 4 (215 x 279). z You can use this feature only when the paper is set to , , , or . z - Canon PIXMA MP530 | User's Guide - Page 52
press [OK]. 4 Use [ ] or [ ] to select or . If you selected and pressed [OK], go to step 8. If you selected and pressed [OK], go to step 5. Note When is selected, the document loaded in the ADF cannot be scanned. 5 Use [ ] or [ ] to set the vertical repeats - Canon PIXMA MP530 | User's Guide - Page 53
be no larger than one division of the paper. For example, if you copy four documents at the same size, their sizes must be one-fourth of the page , print without using collation. z The number of sheets you can load depends on the document type. z If is displayed when scanning, - Canon PIXMA MP530 | User's Guide - Page 54
37. 5 Specify the necessary items. See "Changing the Copy Settings" on page 41. Note You cannot select as the copy ratio and as the intensity. 6 Press [Color] for color copying, or [Black] for black & white copying. 52 Copying Chapter 2 - Canon PIXMA MP530 | User's Guide - Page 55
, use the USB cable supplied with the device. Caution Do not connect any equipment other than PictBridge compliant devices or Canon Bubble Jet Direct compatible digital cameras to the Direct Print Port of the machine. If you do so, electric shock, fire, or damage to the device could result. Chapter - Canon PIXMA MP530 | User's Guide - Page 56
Important Do not connect PictBridge compliant devices or Canon Bubble Jet Direct compatible digital cameras to the machine while copying, scanning, faxing or printing is in progress. Note When printing photos with the digital device connected to the machine, it is advisable to use the AC adapter - Canon PIXMA MP530 | User's Guide - Page 57
Direct compatible digital camera. Note If neither of these icons appear, see "Cannot Print Properly from the Digital Camera" on page 133. Printing Photographs Directly from a PictBridge Compliant Device When operating the device, be sure to follow the instructions given in the instruction manual - Canon PIXMA MP530 | User's Guide - Page 58
used. * Names of settings that are displayed on Canon PictBridge compliant device are used in the description given Printing This machine accepts images* taken with a camera compatible with the Design rule for Camera File System and PNG files. * Exif 2.21 compliant „ About "Paper size" and "Paper - Canon PIXMA MP530 | User's Guide - Page 59
Glossy Photo Paper Photo Paper Pro Glossy Photo Paper "Everyday Use" Glossy Photo Paper *1 This paper is exclusively used to print photo stickers. When printing on sticker paper, select 4" x 6" / 10 x 15 cm in "Paper size". *2 This size can be selected only for Canon PictBridge compatible devices - Canon PIXMA MP530 | User's Guide - Page 60
device and machine, follow the instructions given in the device's instruction manual. z Controls of the device cannot be used for the following: - Print quality setting - Machine maintenance Printing Photographs Directly from a Canon Bubble Jet Direct Compatible Digital Camera The following is - Canon PIXMA MP530 | User's Guide - Page 61
A4 Media Type Photo Paper Pro A4 Photo Paper Plus Glossy A4 Photo Paper Plus Semi-gloss A4 Glossy Photo Paper A4 Glossy Photo Paper "Everyday Use" A4 Note z For the digital camera operation method and troubleshooting, refer to your digital camera's manual. z For print error messages, see "Cannot - Canon PIXMA MP530 | User's Guide - Page 62
Line (C) Splitter (D) ADSL modem (splitter may be built-in to the modem) (E) Computer For details on ADSL connection and settings, see the manual supplied with your ADSL modem. The illustrated connection is an example and is not guaranteed to suit every connecting condition. 60 Faxing Chapter 4 - Canon PIXMA MP530 | User's Guide - Page 63
port (I) Computer For details on ISDN connection and settings, see the manuals supplied with your terminal adapter or dial-up router. z Connecting Telephone or Answering Machine Directly (L) (L) Telephone or answering machine For Users In The UK If the connector of the external device cannot be - Canon PIXMA MP530 | User's Guide - Page 64
company or service provider to confirm your line type. Note You can print the USER'S DATA LIST to check the current setting (See "Printing the USER'S DATA TONE>. You cannot use . 5 Press [Stop/Reset]. „ Registering Sender Information You can register sender information (Transmit - Canon PIXMA MP530 | User's Guide - Page 65
printed in front of the number (See "TX TERMINAL ID" on page 94). (C) Your name is printed. (D) The recipient's name is printed when sending from coded date and time will be reset when you disconnect the power MP driver installed. 1 Press [FAX], then press [Menu]. 2 Use [ ] or [ ] to select - Canon PIXMA MP530 | User's Guide - Page 66
], then press [Menu]. 2 Use [ ] or [ ] to select , then press [OK]. 3 Use [ ] or [ ] to select Letters, and Symbols" on page 68. 6 Press [OK]. USER SETTINGS W UNIT NAME X 7 Press [OK]. UNIT NAME :A /Reset]. Note You can print the USER'S DATA LIST to confirm the sender - Canon PIXMA MP530 | User's Guide - Page 67
CODED DIAL REGIST>, then press [OK]. CODED DIAL REGIST 00= 3 Use [ ] or [ ] to select a coded speed dialing code recipient's name is not printed. z Press [Redial/Pause] to enter a CODED DIAL REGIST> screen is displayed to enter the next number. z If you continue registering coded speed dialing codes - Canon PIXMA MP530 | User's Guide - Page 68
to delete the registered number. (3) Press [OK]. (4) Press [Stop/Reset]. The name will automatically be deleted when you delete the number. „ Printing the CODED SPEED DIAL TELEPHONE NO. LIST You can print a list of the recipients registered for coded speed dialing. You may want to keep the list near - Canon PIXMA MP530 | User's Guide - Page 69
name (DESTINATION ID) in alphabetical order. NO : Prints the list with the numerical order in ascending order in some countries and regions. 1 Press [FAX], then press [Menu]. 2 Use [ ] or [ ] to select , then press [OK]. 3 Use [ ] or [ ] to select , then press [OK]. - Canon PIXMA MP530 | User's Guide - Page 70
to enter the time (in 24-hour format) when summer time ends. Precede single digit with a zero. 21 Press [OK]. 22 Press [Stop/Reset]. „ Guidelines for Entering Numbers, Letters, and Symbols 1 Press [ ] to switch to uppercase letter mode (:A), lowercase letter mode (:a), or number mode (:1). You can - Canon PIXMA MP530 | User's Guide - Page 71
NAME :A Note Lowercase letter mode (:a) may not be available, depending on the country of purchase. 2 Use the numeric buttons to enter a character. Press the button repeatedly until the character you want appears. z To enter successive characters from the same numeric button: Press the numeric - Canon PIXMA MP530 | User's Guide - Page 72
. You can also manually set the machine to print it. See "ACTIVITY REPORT" on page 70. CODED SPEED DIAL TELEPHONE NO. LIST Lists the destination numbers and names registered for coded dial speed dialing. See "Printing the CODED SPEED DIAL TELEPHONE NO. LIST" on page 66. USER'S DATA LIST Lists - Canon PIXMA MP530 | User's Guide - Page 73
Use [ ] or [ ] to select - Canon PIXMA MP530 | User's Guide - Page 74
Platen Glass or in the ADF. Step 2 Adjust the fax resolution and scan contrast (See "Before Sending Faxes" on page 72). Step 3 Dial the recipient's number using the numeric buttons or coded speed dialing (See "How to Use Coded Speed Dialing" on page 75). Step 4 When using the Platen Glass : Press - Canon PIXMA MP530 | User's Guide - Page 75
. FINE: Suitable for fine-print documents. PHOTO: Suitable for photographs. Note When sending color faxes, selecting has the same effect as selecting . 3 Press [OK]. z Adjusting the Scan Contrast Contrast is the degree of difference between light and dark. Increasing the contrast - Canon PIXMA MP530 | User's Guide - Page 76
after the document is scanned in. Important Color sending is available only when the recipient's fax machine supports color faxing. Note z To cancel sending before sending a fax, press [Stop/Reset]. z To cancel memory sending while sending a fax, follow any instructions on the LCD after - Canon PIXMA MP530 | User's Guide - Page 77
the scan contrast, see "Adjusting the Scan supports color faxing. Note To cancel manual sending, press [Stop/Reset]. z Sending Faxes from Your Computer With your machine connected to your computer, you can send faxes from the computer. For details, refer to the FAX Driver Guide. „ How to Use Coded - Canon PIXMA MP530 | User's Guide - Page 78
settings to suit your needs. z To cancel automatic redialing, wait until the machine starts redialing, then press [Stop/ Reset]. Follow the instructions on the LCD. z You can also delete the document from memory. For details, see "Printing or Deleting a Document in Memory" on page 77. Customizing - Canon PIXMA MP530 | User's Guide - Page 79
branch-step 2, or to finish deleting, go to step 5. 5 Press [Stop/Reset]. z Checking a Document's Details in Memory If the machine was not able to print a received fax, as when paper or ink has run out or a paper jam has occurred, the fax is automatically stored in memory. When selecting a document - Canon PIXMA MP530 | User's Guide - Page 80
, print the MEMORY LIST (See "Printing the Error Correction Mode). Checking the sending and receiving condition at the sending end and the receiving end respectively, ECM automatically corrects errors caused by telephone line trouble. Note z If the sender's or receiver's fax is not ECM-compatible - Canon PIXMA MP530 | User's Guide - Page 81
under [Feed Switch], only one sheet of the loaded paper is printed and is displayed. Replace the paper loaded in the specified paper source with A4, 8.5 x 11 or 8.5 x 14 then press [OK]. z The auto feed function can be applied when the paper size for both paper sources is set to - Canon PIXMA MP530 | User's Guide - Page 82
scan mode (when [SCAN] is pressed). However, when the machine received faxes in other than fax mode, they will not be printed immediately after received but printed Calls and Sometimes Faxes, or You Want to Receive Faxes Manually: z Select . z When you receive a fax call: The - Canon PIXMA MP530 | User's Guide - Page 83
(See "MAN/AUTO SWITCH" on page telephone), the security code for this function may security code (See "REMOTE RX" on page 96). z If the paper is not MAN/AUTO SWITCH" on page 96). z If You : z Select . z When you receive ). Customizing FAX/TEL AUTO SW You can customize this - Canon PIXMA MP530 | User's Guide - Page 84
varies depending upon a country. The typical example is as follows: Australia: NET SWITCH New Zealand: FAX ABILITY Finland: Own Ringing z To use this feature, you need to subscribe to a compatible service provided by your telephone company. Contact your telephone company for details. „ Setting - Canon PIXMA MP530 | User's Guide - Page 85
MANUAL MODE: ANS.MACHINE MODE: FAX/TEL AUTO Pattern Detection (DRPD) Service with Your Telephone Reset] and follow any instructions on the LCD. „ Memory Receiving If ink has run out while receiving a fax, if ink ink tank is replaced or the paper size setting is corrected, the stored fax is printed - Canon PIXMA MP530 | User's Guide - Page 86
this section are for printing in Windows XP Service Pack 2 (hereafter, called Windows XP SP2). z If your machine is connected to a computer, you can send faxes using the fax driver from any application software that has a printing function. For details, refer to the FAX Driver Guide. 1 Press [ON/OFF - Canon PIXMA MP530 | User's Guide - Page 87
in the machine. (2) Ensure that [Paper Feed Switch] is selected from [Paper Source]. (3) Specify the print quality and other settings in [Print Quality] or [Color/Intensity]. Note For print settings, refer to the Printer Driver Guide. (4) Click [OK]. The [Printing Preferences] screen is closed - Canon PIXMA MP530 | User's Guide - Page 88
Paper Source] settings, refer to the Printer Driver Guide. z For details about other printer driver functions, click [Instructions] or [Help] to view the Printer Driver Guide. [Instructions] is only displayed when the Printer Driver Guide is installed. z Selecting the [Preview before printing] check - Canon PIXMA MP530 | User's Guide - Page 89
Press [Feed Switch] so that the Auto Sheet Feeder Lamp lights when loading paper in the Auto Sheet Feeder and the Cassette Lamp lights when loading paper in the Cassette. 4 Create a document or open a file to print from the application software. 5 Select the paper size. (1) Select [Page Setup] from - Canon PIXMA MP530 | User's Guide - Page 90
Driver Guide. If the Printer Driver Guide is not installed, the Printer Driver Guide is not displayed even if is clicked. z Clicking [Preview] displays a preview screen that allows you to confirm the selected printing effects and how your document will look when printed. Some application softwares - Canon PIXMA MP530 | User's Guide - Page 91
software to convert scanned paper documents to text data. „ Before Scanning Before scanning images, confirm as follows: z Are the necessary software (MP Drivers and MP Navigator) installed? If the software is not yet installed, refer to the Easy Setup Instructions. z Does the document to be scanned - Canon PIXMA MP530 | User's Guide - Page 92
again to install them. z ScanSoft OmniPage SE does not support Windows 98 first edition. z You can also open the MP Navigator from the Operation Panel. For details on using the MP Navigator, refer to the Scan Guide. „ Scanning from an Application Software You can scan an image from TWAIN- or WIA - Canon PIXMA MP530 | User's Guide - Page 93
>. 3 Select the menu. (1) Use [ ] or [ ] to select the setting item, then press [OK]. Example: select . The setting screen for the selected item is displayed. PRINT SETTINGS QUIET MODE X (2) Use [ ] or [ ] to select the menu, then press [OK]. Example: select - Canon PIXMA MP530 | User's Guide - Page 94
to the other one. Important z This function only works when both paper sources are loaded with paper of the same size and type. z When printing from a computer, you need to set this feature with the printer driver. For details, refer to the Printer Driver Guide. z When printing from a computer, this - Canon PIXMA MP530 | User's Guide - Page 95
the list with the numerical order (00-39) in ascending order. z USER'S DATA LIST Prints the USER'S DATA LIST. z MEMORY LIST Prints the MEMORY LIST. „ CODED DIAL REGIST z CODED DIAL REGIST Registers coded speed dialing. „ USER SETTINGS z DATE/TIME SETTING Sets the current date and time. z DATE - Canon PIXMA MP530 | User's Guide - Page 96
(Automatically set inside the image area for color faxes). Selects the mark to appear before the fax/telephone number printed on faxes you send. z OFFHOOK ALARM Enables/disables the alarm that alerts you if the handset of the telephone connected to the machine is not hung up properly. z VOLUME - Canon PIXMA MP530 | User's Guide - Page 97
Error Correction Mode (ECM) sending. z PAUSE TIME Selects the pause length when you press [Redial/Pause]. z AUTO REDIAL Enables/disables automatic redialing. REDIAL TIMES: REDIAL INTERVAL: If you select as , enables setting the number of redialings. If you select as - Canon PIXMA MP530 | User's Guide - Page 98
fit the paper loaded. PRINT ERROR ONLY> or , prints a reception report only when a print error occurred or every time you receive a fax. OTHERS „ AUDIBLE TONES Selects the volume. z KEYPAD VOLUME Selects the beep volume when pressing the buttons on the Operation Panel. z ALARM - Canon PIXMA MP530 | User's Guide - Page 99
SAVE CONFIG Saves the settings for the Settings screen. LOAD CONFIG Loads the settings for the Settings screen that were saved. Chapter 7 Changing the Machine Settings 97 - Canon PIXMA MP530 | User's Guide - Page 100
by the ink lamp display. Open the Scanning Unit (Printer Cover) of the machine and check the ink lamp. When the ink level is low: The ink lamp flashes slowly (about three seconds). Prepare a new ink tank. ...Repeats When ink has run out: The ink lamp flashes fast (about one second). Replace it with - Canon PIXMA MP530 | User's Guide - Page 101
white or grayscale printing is specified. Color ink is consumed in the head cleaning and deep cleaning, which are necessary to maintain the machine's capabilities. z Do not replace ink tanks during scanning in documents. If you open the Scanning Unit (Printer Cover) during scanning in, documents may - Canon PIXMA MP530 | User's Guide - Page 102
Button to open the Paper Output Tray if it does not open automatically. Important If the Scanning Unit (Printer Cover) is left open for more than 10 minutes, the Print Head Holder moves to the right. Close and reopen the Scanning Unit (Printer Cover) to return the Print Head Holder to the center - Canon PIXMA MP530 | User's Guide - Page 103
according to the local laws and regulations regarding disposal of consumables. Note Be sure to replace ink tanks one by one when replacing more than one ink tank. 5 Prepare a replacement tank. (1) Remove the new ink tank from its packaging, then pull the orange tape (A) toward the arrow so that the - Canon PIXMA MP530 | User's Guide - Page 104
remains a part of the orange tape, ink may not be ejected correctly. 6 Install the ink tank. (1) Install the ink tank into the Print Head. (2) Press on the mark on the ink tank until the ink tank snaps firmly into place. (3) Ensure that the ink tank clicks into place and then its lamp lights red - Canon PIXMA MP530 | User's Guide - Page 105
check pattern or cleaning the Print Head, check the following; - Open the Scanning Unit (Printer Cover), and make sure that all the ink tanks click into place and then their lamps light red. - If any one of the lamps is flashing, the associated ink tank is empty or running low. See "Replacing Ink - Canon PIXMA MP530 | User's Guide - Page 106
If [Print Head Deep Cleaning] does not resolve the problem, contact the Canon Customer Care Center. z If the ruled lines are shifted Step 1 See "Aligning the Print Head Automatically" on page 106 Printing the Nozzle Check Pattern Print the nozzle check pattern to determine whether the ink ejects - Canon PIXMA MP530 | User's Guide - Page 107
check pattern is not printed correctly. Replace the relevant ink tank (See "Replacing an Ink Tank" on page 98). (A) z If the lines are broken (1), or white lines are present (2) in the pattern (A), clean the print head (See "Print Head Cleaning" on page 105). (1) (2) Print Head Cleaning Clean - Canon PIXMA MP530 | User's Guide - Page 108
of the Print Head. (1) Print the nozzle check pattern to verify that the Print Head nozzles are clean. See "Printing the Nozzle Check Pattern" on page 104. When one specific color only does not print, see "Replacing an Ink Tank" on page 98. (2) If the problem remains, make sure that ink remains in - Canon PIXMA MP530 | User's Guide - Page 109
and disconnect the power cord before cleaning the machine. z Do not use tissue paper, paper towels, or similar materials for cleaning. Paper tissue powders or fine threads may remain inside the machine and cause problems such as a blocked Print Head and poor printing results. Use a soft cloth to - Canon PIXMA MP530 | User's Guide - Page 110
from the inside of the Feeder Cover as illustrated by gray colored part, with a soft, clean, lint-free and dry cloth. „ Cleaning the Roller (Roller Cleaning) Clean the paper feed rollers if paper is not fed properly. Cleaning the paper feed rollers will wear the rollers, so perform this only when - Canon PIXMA MP530 | User's Guide - Page 111
after performing three times, contact the Canon Customer Care Center. „ Cleaning the Interior of the Machine (Bottom Plate Cleaning) This section describes how to clean the interior of the machine. If the interior of the machine becomes dirty, paper printed onto by the machine may get dirty - Canon PIXMA MP530 | User's Guide - Page 112
the printed paper is smudged, clean the inside of the machine again. If the problem remains after performing cleaning again, the protrusions inside the machine may be stained. Clean them up. See "Cleaning the ADF" on page 108. Important z Even if the Cassette is selected as the paper source, paper - Canon PIXMA MP530 | User's Guide - Page 113
z "Back of Paper is Smudged/Paper Does Not Feed Properly/Printed Surface is Scratched" on page 122 z "Paper Curls/Ink Blots" on page 126 z "Paper Jams" on page 127 z "Document Jams" on page 130 z "Cannot Print Properly from the Digital Camera" on page 133 z "Cannot Install the MP Drivers" on page - Canon PIXMA MP530 | User's Guide - Page 114
z "Error No.: 1851 is Displayed" on page 148 z "Error No.: 1856 is Displayed" on page 148 z "Error No.: 2001 is Displayed" on page 149 z "Error No.: 2500 is Displayed" on page 149 z "For Windows Users" on page 149 If an error occurs when the machine is connected to a computer 112 Troubleshooting - Canon PIXMA MP530 | User's Guide - Page 115
When an error occurs in printing such as the printer is out of paper or paper jams, a troubleshooting message is displayed automatically. Take the appropriate action described in the message. The message may vary depending on the version of your Windows operating system. If the Power Disconnects - Canon PIXMA MP530 | User's Guide - Page 116
is installed. Replace the ink tank. Printing under the situation may damage the Print Head. Canon shall not be liable for any machine malfunction or damage caused by refilled ink tanks. If you want to continue printing with the refilled ink tank installed, press and hold the [Stop/Reset] for at - Canon PIXMA MP530 | User's Guide - Page 117
] to resolve the error. Print the nozzle check pattern to check the status of the Print Head. z The Paper Output Slot has been exposed to a strong light source preventing current Print Head alignment. Press the [OK] to resolve the error. Adjust the printer position so the Paper Output Slot will not - Canon PIXMA MP530 | User's Guide - Page 118
CAMERA CABLE INK LOW INNER COVER IS OPEN LOAD PAPER MEMORY IS FULL PAPER JAMMED PRESS [BLACK] PRESS [COLOR] SCANNER ERROR WASTE INK NEAR FULL Action Disconnect the camera cable, and reconnect it. Depending on the model or brand of your device, you may have to select a print mode compliant - Canon PIXMA MP530 | User's Guide - Page 119
Note Adjusting the Print Head Manually If the Automatic Print Head Alignment does not work or if you wish to adjust the print heads manually, follow the procedure below. 1. Press [ON/OFF] to turn on the machine, and then load two sheets of A4/Letter-sized plain paper in the Auto Sheet Feeder or - Canon PIXMA MP530 | User's Guide - Page 120
(after all automatic redialing attempts). Contact the recipient and have them check their fax machine. paper size setting or replace the ink tank. See "Replacing an Ink Tank" on page 98. The recipient's fax machine is not color-compatible. Press [Black] to resend the faxes. You pressed [Stop/Reset - Canon PIXMA MP530 | User's Guide - Page 121
inserted. Action If the ink lamp is flashing, ink is empty. Replace the ink tank, and close the Scanning Unit (Printer Cover). If printing is not finished yet, just press the [OK] on the machine to continue printing in the "no ink" state. Replace the ink tank with a new one as soon as possible - Canon PIXMA MP530 | User's Guide - Page 122
paper loaded. Open the Scanning Unit (Printer Cover) and check if all ink lamps light red. Print the nozzle check pattern to check for uneven ink output. See "Printing the Nozzle Check Pattern" on page 104. z Ink supply is uneven. See "Print Head Cleaning" on page 105. See "Print Head Deep Cleaning - Canon PIXMA MP530 | User's Guide - Page 123
the size of the paper loaded. z Check [Page Size] on the [Page Setup] tab in the printer properties dialog box of the printer driver (Windows) or the [Page Setup] dialog box of the printer driver (Macintosh) to ensure that it matches the size of the paper loaded. Chapter 9 Troubleshooting 121 - Canon PIXMA MP530 | User's Guide - Page 124
. z This is useful when a part of straight lines or data is lost for page layout printing. Performing automatic duplex printing Select [Use reduced printing] in the printer driver. It may solve the problem. 1. Open the printer properties dialog box. 2. Click [Print Area Setup] in the [Page Setup - Canon PIXMA MP530 | User's Guide - Page 125
is dirty. Action If the inside of the machine is dirty, printed paper may be smudged. Follow the steps described below to clean the inside of the machine. 1. Press [ON/OFF] to turn on the machine, then remove any paper from the Auto Sheet Feeder. See "Turning on the Machine" on page 18. 2. Press - Canon PIXMA MP530 | User's Guide - Page 126
curled. See "Media Types You cannot Use" on page 23. z Note that smudging may occur at the top and bottom edges of the paper when using Borderless Printing. Ensure that the paper you are using is compatible with Borderless Printing. Refer to the Printer Driver Guide. 124 Troubleshooting Chapter 9 - Canon PIXMA MP530 | User's Guide - Page 127
up menu. 3. Select [Prevent paper abrasion.]. Note Clear the [Prevent paper abrasion] check box once printing is complete. When [Prevent paper abrasion] is selected in the printer properties dialog box (Windows) or selected from [Custom Settings] in the Canon IJ Printer Utility dialog box (Macintosh - Canon PIXMA MP530 | User's Guide - Page 128
the Canon IJ Printer Utility pop-up menu and place a check in [Prevent paper abrasion.]. Load in the portrait orientation regardless of the print direction of the Auto Sheet Feeder or Cassette. Ensure that paper is loaded correctly. Slide the Paper Guides against the paper stack. The paper cannot - Canon PIXMA MP530 | User's Guide - Page 129
1, you will need to retry printing, because this operation cancels any print jobs in progress. If you cannot remove the paper or the paper tears inside the machine, or if the paper jam error continues after removing the paper, contact the Canon Customer Care Center. Chapter 9 Troubleshooting 127 - Canon PIXMA MP530 | User's Guide - Page 130
you will need to retry printing, because this operation cancels any print jobs in progress. If you cannot remove the paper or if the paper tears inside the machine, or if the paper jam error continues after removing the paper, contact the Canon Customer Care Center. 128 Troubleshooting Chapter 9 - Canon PIXMA MP530 | User's Guide - Page 131
. Reload paper in the Auto Sheet Feeder, if necessary. 5. Insert the Cassette into the machine. 6. Press the [OK] on the machine. If you cannot remove the paper or if the paper tears inside the machine, or if the paper jam error continues after removing the paper, contact the Canon Customer Care - Canon PIXMA MP530 | User's Guide - Page 132
ejected. If you cannot remove the jammed paper or the error still persists, contact the Canon Customer Care Center. Document Jams Cause Document jams in the ADF (Document Tray). Action Remove the document according to the following procedure. 1. Press [Stop/Reset]. 2. If a multi-page document is - Canon PIXMA MP530 | User's Guide - Page 133
then remove the jammed page from under the roller to the Feeder Cover side. (A) 5. Pull out the jammed document from the ADF. If the document cannot be pulled out with ease, follow the procedure from step 2 under "Document jams in the ADF (inner side)." on page 132. Chapter 9 Troubleshooting 131 - Canon PIXMA MP530 | User's Guide - Page 134
rescanning the document after clearing the error, rescan it from the first page. If you cannot remove the document or the document tears inside the machine, or if the document jam error continues after removing the document, contact the Canon Customer Care Centor. 132 Troubleshooting Chapter 9 - Canon PIXMA MP530 | User's Guide - Page 135
the instruction manuals supplied with your PictBridge compatible device and take the necessary steps before connection. z The print head nozzles may be clogged if printing becomes faint or colors are incorrect. See "When Printing Becomes Faint or Colors are Incorrect" on page 103. z If the paper is - Canon PIXMA MP530 | User's Guide - Page 136
jammed paper, load new paper, and press the [OK] on the machine and retry printing. Printer cover open Close the Scanning Unit (Printer Cover) on the machine. No print head The Print Head is defective or not installed. Install a Print Head according to the Easy Setup Instructions. If the Print - Canon PIXMA MP530 | User's Guide - Page 137
be compatible with this machine. Install the appropriate ink tank. See "Replacing an Ink Tank" on page 98. Ink error/No ink Hardware Error/No ink Printer error When the ink lamp flashes fast (about one second): z The ink has run out. Replace the ink tank, and close the Scanning Unit (Printer Cover - Canon PIXMA MP530 | User's Guide - Page 138
anti-virus software) are running in the background. 9. Carefully follow the procedures described in the Easy Setup Instructions and reinstall the MP Drivers. Click [Start], select [My Computer] and then double-click the CD-ROM icon. For non-Windows XP users, open the [My Computer] window and then - Canon PIXMA MP530 | User's Guide - Page 139
is not fully compatible with USB 2.0 Hi-Speed, the printer will operate at a lower speed provided under USB 1.1. In this case, the machine operates properly but printing speed may slow down due to communication speed. Check the following to ensure that your computer environment supports USB 2.0 Hi - Canon PIXMA MP530 | User's Guide - Page 140
in the configured paper source, incoming faxes are not printed and are stored in memory. Change the paper in the configured paper source to A4, LTR or LGL* size, then press [OK] on the machine. Load legal-size paper in the Auto Sheet Feeder. The receive mode is incorrect. Check the receive mode - Canon PIXMA MP530 | User's Guide - Page 141
TEL AUTO SW>. If the receive mode is , connect an answering machine to the machine (see the Easy Setup Instructions) and check that compatible, the fax will be sent/received in the standard mode. z Reduce the reception start speed. See "RX START SPEED" on page 96. „ Repeated Errors - Canon PIXMA MP530 | User's Guide - Page 142
finishes sending it. There was a printer error. Resolve the printer error. If you are out of paper, set the paper. If you are in a hurry, you can send the fax before resolving the printer error by pressing [Stop/Reset]. In this case, be sure to press [FAX] to print the faxes stored in memory once - Canon PIXMA MP530 | User's Guide - Page 143
modem) are connected securely. Problems Scanning „ Scanner Won't Work Cause The machine is not recognized by the computer. Action Restart the computer. This may enable the computer to recognize the machine. „ ScanGear MP Won't Start Cause Scanner driver (ScanGear MP) not installed. Action Set - Canon PIXMA MP530 | User's Guide - Page 144
[Select TWAIN-compliant device] instead of [Select Source]. The Feature of the application software does not support TWAIN. Start ScanGear MP from within a TWAIN compatible software. An error message appears and the ScanGear MP window fails to appear. z Reattaching the USB cable. Be sure to use - Canon PIXMA MP530 | User's Guide - Page 145
, refer to the Scan Guide. Some application software does not display the image clearly if the image is too small. Set the view mode to 100%. Set [Descreen] to [ON] in the [Image Settings] section of the Advanced Mode of ScanGear MP. Note Moiré may appear when you scan digital photo prints. Set your - Canon PIXMA MP530 | User's Guide - Page 146
the scan area manually. Refer to the Scan Guide for details on manual scan area specification. „ Trouble Scanning with Multi-Scan or Multi-Crop Function Cause The original is positioned outside the supported area. Error arising from application software specifications. Action Check the position - Canon PIXMA MP530 | User's Guide - Page 147
extension when saving the image. Refer to the on-screen manual for each application software for the detailed procedures. „ Trouble scanning with MP Navigator Cause The original may not be scanned correctly when [Document Size] is set to [Auto Detect]. Action Set the [Document Size] to the actual - Canon PIXMA MP530 | User's Guide - Page 148
Message Appears on the Screen „ Service Error 5100 is Displayed Cause Movement of the Print Head Holder is blocked. Action Clear the paper jam or foreign object that is preventing the Print Head Holder from moving, cancel printing from your computer, then turn off the machine and turn it back - Canon PIXMA MP530 | User's Guide - Page 149
Instructions and reinstall the MP Drivers. „ When an Error is Displayed Regarding Automatic Duplex Printing Cause The correct media size is not selected in the printer driver. Action Check the page size setting from within your application software to ensure that it matches the size of the paper - Canon PIXMA MP530 | User's Guide - Page 150
click [+] to add a printer. If [MP530] is not displayed, install the MP Drivers again referring to the Easy Setup Instructions for the operation. „ Error No.: 1700 is Displayed Cause The waste ink absorber is almost full. Action Ink used for cleaning is absorbed in a waste ink absorber placed in - Canon PIXMA MP530 | User's Guide - Page 151
or digital video camcorder compatible with this machine. „ Error No.: 2500 is Displayed Cause Auto head align has failed. Action See "HEAD ALIGNMENT ERROR" on page 115. „ For Windows Users Cause The [Instructions] button is not displayed on the printer driver screen. Scan Guide is not displayed - Canon PIXMA MP530 | User's Guide - Page 152
solve the problem, and what happened Note If the machine emits any unusual sound, smoke, or odor, turn it off immediately. Unplug the power cord from the outlet and contact the Canon Customer Care Center. Never attempt to repair or disassemble the machine yourself. 150 Troubleshooting Chapter 9 - Canon PIXMA MP530 | User's Guide - Page 153
PR-101, Glossy Photo Paper GP-401, Glossy Photo Paper "Everyday Use" GP-501, Photo Paper Plus Glossy PP-101, Photo Paper Plus Double Sided PP-101D, Photo Paper Plus Semi-gloss SG-101, and Matte Photo Paper MP-101 selection of "Borderless Printing" enables you to make prints with no margins. However - Canon PIXMA MP530 | User's Guide - Page 154
mm Note When printing on Photo Paper Pro PR-101, Glossy Photo Paper GP-401, Photo Paper Plus Glossy PP-101, Photo Paper Plus Double Sided PP-101D, Photo Paper Plus Semi-gloss SG101, and Matte Photo Paper MP-101 selection of "Borderless Printing" enables you to make prints with no margins. However - Canon PIXMA MP530 | User's Guide - Page 155
manuals along with the MP driver and application softwares. z Select "On-screen Manual" from "Custom Install" to install the on-screen manuals. Browser: Windows the [Start], and select [All Programs] (or [Programs]), [Canon MP530 Manual], and then [Uninstall]. 2 Click [OK] when the confirmation - Canon PIXMA MP530 | User's Guide - Page 156
Printer Driver Guide The Printer Driver Guide is deleted when the printer driver is deleted. z Deleting the User's Guide and the Photo Application Guide (1) Select [Applications] from the [Go] menu. (2) Double-click the [Canon Utilities] folder, and then the [IJ Manual] folder. (3) Drag the [MP530 - Canon PIXMA MP530 | User's Guide - Page 157
Approx. 22 W Standby: Approx. 3.9 W OFF: Approx. 0.9 W Dimensions (with the Paper Support and Paper Output Tray retracted) Weight 18.4 (W) x 18.4 (D) x 10.4 (H) inches 468 (W) x 467 (D) x 263 (H) mm 12.8 kg (28.2 lb) Print Head Black (PGI-5BK): 320 (160 x 2) nozzles Cyan, Magenta, Yellow, Black - Canon PIXMA MP530 | User's Guide - Page 158
Public Switched Telephone Network (PSTN) Compatibility G3 / Super G3 (Mono memory (Based on Canon COLOR FAX TEST SHEET.) Scanning image processing Memory Halftones Coded speed dialing (40 destinations) Regular dialing (with numeric buttons) Automatic redialing Manual redialing (with [Redial/ - Canon PIXMA MP530 | User's Guide - Page 159
x 8.6 cm / Credit Card (Glossy Photo Paper Card Size) *1 Canon-brand sticker. Printing on this paper is available only when the Layout function on your camera has a 16-up option. See "Recommended Paper and Requirements" on page 22. *2 If using a Canon PictBridge-compatible camera, you can select it - Canon PIXMA MP530 | User's Guide - Page 160
or Glossy Photo Paper "Everyday Use" A4 size) Layout print Standard: Borderless/with border Effect ExifPrint DPOF functions Ver. 1.00 compatible (number of copies, select images, print special characters (date)) Compatibility Scan Specifications (Platen Glass) TWAIN/WIA (Windows XP) Maximum - Canon PIXMA MP530 | User's Guide - Page 161
2000, Me or 98. *3 Including compatible processors. *4 ScanSoft OmniPage SE (OCR software) does not support Windows 98 first edition. z CD-ROM drive z Display : SVGA 65,000 colors Additional System Requirements for On-screen Manuals z Browser: Windows HTML Help Viewer * Microsoft Internet Explorer - Canon PIXMA MP530 | User's Guide - Page 162
Users in the U.S.A. Pre-Installation Requirements for MP530 A. individual telephones for ringing and special codes, which may cause a fax error. C. Power Requirements This machine wiring using a compatible modular jack which is Part 68 compliant. See Installation instructions for details. This - Canon PIXMA MP530 | User's Guide - Page 163
ON until the problem is completely resolved. Users should contact their local authorized Canon Facsimile Service Dealer for the servicing of equipment. time, and date. FCC Notice Model Number: K10269 This device complies with Part 15 of the FCC Rules. Operation is subject to the following two - Canon PIXMA MP530 | User's Guide - Page 164
and used in accordance with the instructions, may cause harmful interference to and on, the user is encouraged to try to correct the interference by one or more of the Part 15 of the FCC Rules. Warning Do not make any changes or modifications to the equipment unless otherwise specified in this guide - Canon PIXMA MP530 | User's Guide - Page 165
the user's manual or other documentation for the Product. (b) Use of parts, media, software or supplies (other than those sold by Canon USA), including nonCanon ink cartridges or refilled ink cartridges, that cause damage to the Product or cause abnormally frequent service calls or service problems - Canon PIXMA MP530 | User's Guide - Page 166
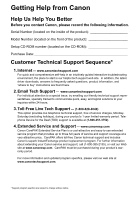
WHOM IT WAS PURCHASED AS A GIFT, AND STATES YOUR EXCLUSIVE REMEDY. Canon USA offers a range of customer technical support* options: z Interactive troubleshooting, e-mail technical support, the latest driver downloads and answers to frequently asked questions (www.canontechsupport.com) z Toll-free - Canon PIXMA MP530 | User's Guide - Page 167
also have other rights, which vary from state to state. * Support program specifics are subject to change without notice. ** InstantExchange warranty service is subject to the availability of refurbished or new replacement units. Canon U.S.A., Inc. One Canon Plaza Lake Success, NY 11042 USA ©2006 - Canon PIXMA MP530 | User's Guide - Page 168
Users in Canada Pre-Installation Requirements for Canon line or an equivalent one. Use one line per machine. special codes, which may cause a fax error. C. Power Requirements The power outlet should be a two-prong grounded receptacle (Single or Duplex). It should be independent from copiers - Canon PIXMA MP530 | User's Guide - Page 169
troubleshooting, e-mail technical support, the latest driver downloads and answers to frequently asked questions (www.canon.ca) z Free live technical support Mon - Fri 9am-8pm EST (excluding holidays) for products still under warranty (1-800-OK-CANON) z The location of the authorized service - Canon PIXMA MP530 | User's Guide - Page 170
Users in New Zealand The grant model, nor does it imply that any product is compatible with all of Telecom's network services. Telepermitted equipment only may be connected to the auxiliary . If this occurs, the problem should not be referred to the Telecom Faults Service. 168 Appendix Chapter 10 - Canon PIXMA MP530 | User's Guide - Page 171
print settings 91 pwr save setting 96 restore default 96 save config 97 Changing the Page Size and Media Type 37 Recommended Paper and Requirements 37 Cleaning 8Y Yellow 98 Coded Dial button 16 Color button 17 Components 12 COPY button 16 Copying 40 2-on-1 copy 45 4-on-1 copy 46, 47 auto adjust 42 - Canon PIXMA MP530 | User's Guide - Page 172
P Paper button 17 Paper Guide 12 Paper Output Tray 13 Paper Support 12 PGI-5BK Black 98 Platen Glass 13 Power Cord Connection 15 Power save setting 96 Print Head adjusting the print head manually 117 aligning print head automatically 106 cleaning 105 deep cleaning 106 Print Head Holder 14 Print Head - Canon PIXMA MP530 | User's Guide - Page 173
TX (Transmission) REPORT 70 printing 71 U USB Port 15 USER'S DATA LIST 70 printing 71 Index 171 - Canon PIXMA MP530 | User's Guide - Page 174
are duplicated in all such forms and that any documentation, advertising materials, and other materials related to such distribution and use acknowledge that the software was developed at Cygnus Support, Inc. Cygnus Support, Inc. may not be used to endorse or promote products derived from this - Canon PIXMA MP530 | User's Guide - Page 175
and order numbers. Description Order # Ink Tanks CLI-8 BK CLI-8 C CLI-8 M CLI-8 Y PGI-5 BK 0620B002 0621B002 0622B002 0623B002 0628B002 Canon Specialty Papers Photo Paper Plus Glossy (4" x 6"/20 sheets) Photo Paper Plus Glossy (4" x 6"/50 sheets) Photo Paper Plus Glossy (4" x 6"/120 sheets - Canon PIXMA MP530 | User's Guide - Page 176
Pisos 15, 16 y 17, Colonia Lomas de Chapultepec Delegación Miguel Hidalgo, CP 11000, Mexico D.F. The following ink tanks are compatible with this machine. For details on ink tank replacement, refer to "Replacing Ink Tanks" in this guide. QT5-0210-V02 XXXXXXXX ©CANON INC.2006 PRINTED IN THAILAND
-
 1
1 -
 2
2 -
 3
3 -
 4
4 -
 5
5 -
 6
6 -
 7
7 -
8
-
9
-
10
-
11
-
12
-
13
-
14
-
15
-
16
-
17
-
18
-
19
-
20
-
21
-
22
-
23
-
24
-
25
-
26
-
27
-
28
-
29
-
30
-
31
-
32
-
33
-
34
-
35
-
36
-
37
-
38
-
39
-
40
-
41
-
42
-
43
-
44
-
45
-
46
-
47
-
48
-
49
-
50
-
51
-
52
-
53
-
54
-
55
-
56
-
57
-
58
-
59
-
60
-
61
-
62
-
63
-
64
-
65
-
66
-
67
-
68
-
69
-
70
-
71
-
72
-
73
-
74
-
75
-
76
-
77
-
78
-
79
-
80
-
81
-
82
-
83
-
84
-
85
-
86
-
87
-
88
-
89
-
90
-
91
-
92
-
93
-
94
-
95
-
96
-
97
-
98
-
99
-
100
-
101
-
102
-
103
-
104
-
105
-
106
-
107
-
108
-
109
-
110
-
111
-
112
-
113
-
114
-
115
-
116
-
117
-
118
-
119
-
120
-
121
-
122
-
123
-
124
-
125
-
126
-
127
-
128
-
129
-
130
-
131
-
132
-
133
-
134
-
135
-
136
-
137
-
138
-
139
-
140
-
141
-
142
-
143
-
144
-
145
-
146
-
147
-
148
-
149
-
150
-
151
-
152
-
153
-
154
-
155
-
156
-
157
-
158
-
159
-
160
-
161
-
162
-
163
-
164
-
165
-
166
-
167
-
168
-
169
-
170
-
171
-
172
-
173
-
174
-
175
-
176
 |
 |
User’s Guide
QT5-0210-V02
ENG
Office All-in-One