Canon VIXIA HF20 VIXIA HF20 / HF200 Manual - Page 79
Using Headphones
 |
View all Canon VIXIA HF20 manuals
Add to My Manuals
Save this manual to your list of manuals |
Page 79 highlights
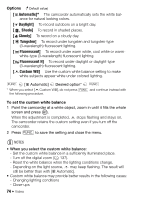
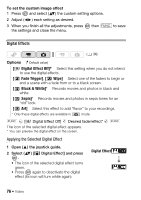
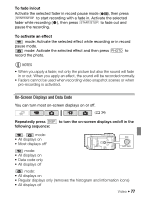
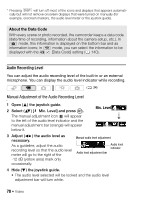
• Press twice to return the camcorder to automatic adjustment of the audio recording level. To display the audio level indicator Usually, the audio level indicator will be displayed only after activating the manual adjustment of the audio recording level. You can choose to display it also when the audio level is adjusted automatically. FUNC. [ Menu] FUNC. [Audio Level Indicator] [On] NOTES • When the audio level meter reaches the red point (0 dB mark), the sound may be distorted. • If the audio level is too high and the sound gets distorted, activate the microphone attenuator ( 139). • We recommend using headphones ( 79) to check the sound level while adjusting the audio recording level or when the microphone attenuator is activated. Using Headphones Use headphones for playback or to check the audio level while recording. The headphones are connected to the AV OUT/ terminal, which is used for both the headphones and the audio/video output. Before connecting the headphones, follow the procedure below to change the function of the terminal from AV output to (headphones) output. * ( 34) * Headphones can be used also in mode but the function of the terminal can- not be changed. Change the setting in advance in mode or mode. FUNC. [ Menu] [Headphones] appears. [AV/Headphones] FUNC. Video Š 79
-
 1
1 -
2
-
3
-
4
-
5
-
6
-
7
-
8
-
9
-
10
-
11
-
12
-
13
-
14
-
15
-
16
-
17
-
18
-
19
-
20
-
21
-
22
-
23
-
24
-
25
-
26
-
27
-
28
-
29
-
30
-
31
-
32
-
33
-
34
-
35
-
36
-
37
-
38
-
39
-
40
-
41
-
42
-
43
-
44
-
45
-
46
-
47
-
48
-
49
-
50
-
51
-
52
-
53
-
54
-
55
-
56
-
57
-
58
-
59
-
60
-
61
-
62
-
63
-
64
-
65
-
66
-
67
-
68
-
69
-
70
-
71
-
72
-
73
-
 74
74 -
 75
75 -
 76
76 -
 77
77 -
 78
78 -
 79
79 -
 80
80 -
 81
81 -
 82
82 -
 83
83 -
 84
84 -
85
-
86
-
87
-
88
-
89
-
90
-
91
-
92
-
93
-
94
-
95
-
96
-
97
-
98
-
99
-
100
-
101
-
102
-
103
-
104
-
105
-
106
-
107
-
108
-
109
-
110
-
111
-
112
-
113
-
114
-
115
-
116
-
117
-
118
-
119
-
120
-
121
-
122
-
123
-
124
-
125
-
126
-
127
-
128
-
129
-
130
-
131
-
132
-
133
-
134
-
135
-
136
-
137
-
138
-
139
-
140
-
141
-
142
-
143
-
144
-
145
-
146
-
147
-
148
-
149
-
150
-
151
-
152
-
153
-
154
-
155
-
156
-
157
-
158
-
159
-
160
-
161
-
162
-
163
-
164
-
165
-
166
-
167
-
168
-
169
-
170
-
171
-
172
-
173
-
174
-
175
-
176
-
177
-
178
-
179
-
180
-
181
-
182
-
183
-
184
-
185
-
186
 |
 |