Cisco WS-C3560E-48PD-SF Hardware Installation Guide - Page 76
Rotate the Bushing Clockwise, Insert the Securing Clip, Getting Started with Cisco
 |
View all Cisco WS-C3560E-48PD-SF manuals
Add to My Manuals
Save this manual to your list of manuals |
Page 76 highlights
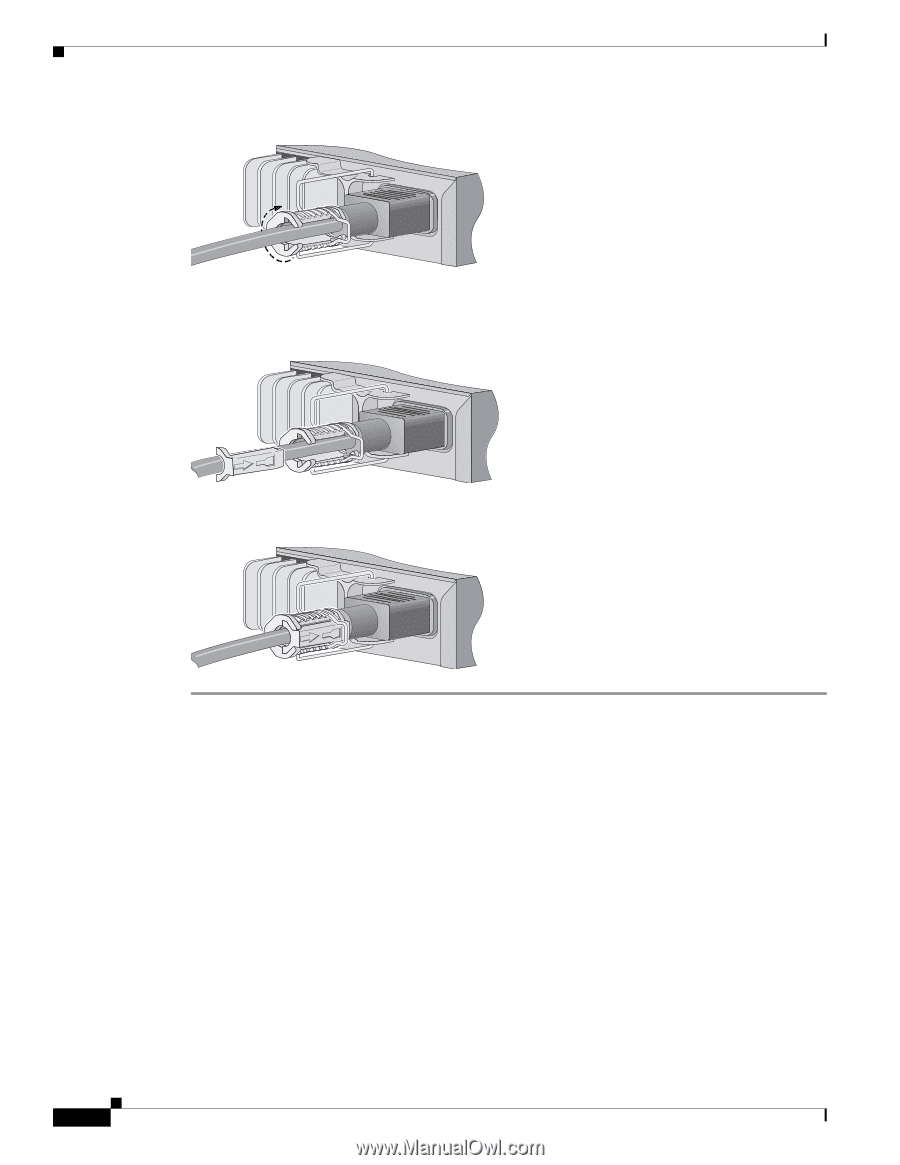
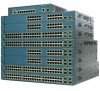
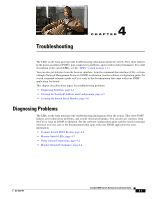
Where to Go Next Chapter 3 Switch Installation (8- and 12-Port Switches) Figure 3-14 Rotate the Bushing Clockwise 250522 Step 6 Insert the securing clip in the opening of the bushing (see Figure 3-15). Figure 3-15 Insert the Securing Clip 250523 After the power cord is correctly secured, it looks like this: 250524 Where to Go Next If the default configuration is satisfactory, the switch does not need further configuration. You can use any of these management options to change the default configuration: • Start the device manager, which is in the switch memory, to manage individual switches. The device manager is a web interface that offers quick configuration and monitoring. You can access the device manager from anywhere in your network through a web browser. For more information, see the device manager online help. • Start the Network Assistant application, which is described in the Getting Started with Cisco Network Assistant guide. Through this GUI, you can configure and monitor a switch cluster or an individual switch. • Use the CLI from the console to configure the switch as a member of a cluster or as an individual switch. See the Catalyst 3560 Switch Software Configuration Guide and the Catalyst 3560 Switch Command Reference on Cisco.com for information on using the CLI with a Catalyst 3560 switch. • Start an SNMP application such as the CiscoView application. 3-20 Catalyst 3560 Switch Hardware Installation Guide OL-6337-07
-
 1
1 -
2
-
3
-
4
-
5
-
6
-
7
-
8
-
9
-
10
-
11
-
12
-
13
-
14
-
15
-
16
-
17
-
18
-
19
-
20
-
21
-
22
-
23
-
24
-
25
-
26
-
27
-
28
-
29
-
30
-
31
-
32
-
33
-
34
-
35
-
36
-
37
-
38
-
39
-
40
-
41
-
42
-
43
-
44
-
45
-
46
-
47
-
48
-
49
-
50
-
51
-
52
-
53
-
54
-
55
-
56
-
57
-
58
-
59
-
60
-
61
-
62
-
63
-
64
-
65
-
66
-
67
-
68
-
69
-
70
-
 71
71 -
 72
72 -
 73
73 -
 74
74 -
 75
75 -
 76
76 -
 77
77 -
 78
78 -
 79
79 -
 80
80 -
 81
81 -
82
-
83
-
84
-
85
-
86
-
87
-
88
-
89
-
90
-
91
-
92
-
93
-
94
-
95
-
96
-
97
-
98
-
99
-
100
-
101
-
102
-
103
-
104
-
105
-
106
-
107
-
108
-
109
-
110
-
111
-
112
-
113
-
114
-
115
-
116
-
117
-
118
-
119
-
120
 |
 |