Dell Inspiron 7000 Dell Inspiron 7000 Reference and Troubleshooting Guide - Page 71
Turn off the computer and disconnect it from the AC adapter. Then disconnect - updates
 |
View all Dell Inspiron 7000 manuals
Add to My Manuals
Save this manual to your list of manuals |
Page 71 highlights
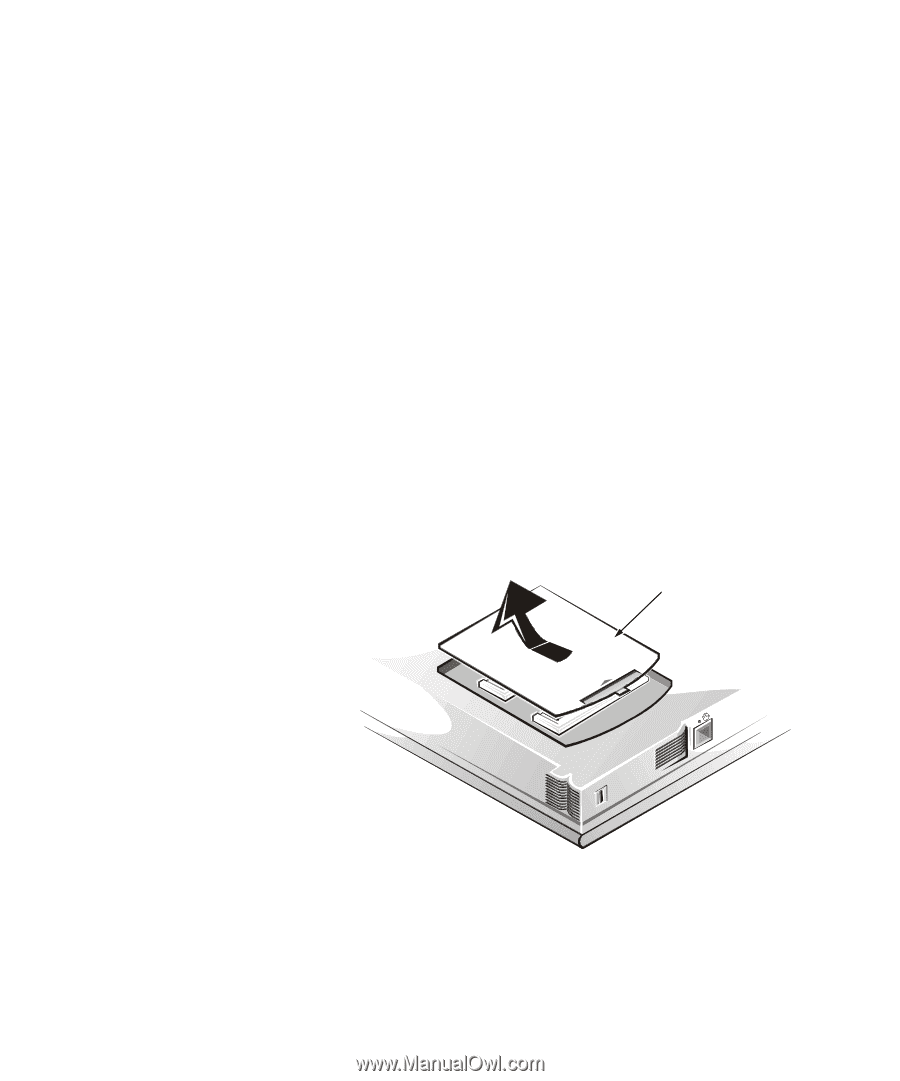
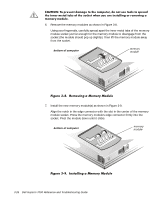
During POST, the computer checks the computer's memory, and then writes to and reads from the number of available bytes to ensure proper operation. If the memory count displayed is less than the amount installed, make a copy of the Diagnostics Checklist found in Chapter 5 and fill it out as you complete the following procedure: 1. Reboot the computer. Does the random-access memory (RAM) count displayed correctly match the actual amount of memory installed in the computer? Yes. The computer needed to update the memory; the memory check phase is OK now. No. Go to step 2. 2. Save all your work, exit any open application programs, and remove any installed batteries. 3. Turn off the computer and disconnect it from the AC adapter. Then disconnect the AC adapter from AC power. Turn off any attached peripherals, and disconnect them from their power sources and then from the computer. 4. Ground yourself by touching one of the metal connectors on the back of the computer. 5. Turn the computer over and remove the memory module cover as shown in Figure 3-7. Slide the memory module cover as far as it will go in the direction of the arrow, and then lift it away from the computer. bottom of computer memory module cover Troubleshooting Your Computer 3-25
-
 1
1 -
2
-
3
-
4
-
5
-
6
-
7
-
8
-
9
-
10
-
11
-
12
-
13
-
14
-
15
-
16
-
17
-
18
-
19
-
20
-
21
-
22
-
23
-
24
-
25
-
26
-
27
-
28
-
29
-
30
-
31
-
32
-
33
-
34
-
35
-
36
-
37
-
38
-
39
-
40
-
41
-
42
-
43
-
44
-
45
-
46
-
47
-
48
-
49
-
50
-
51
-
52
-
53
-
54
-
55
-
56
-
57
-
58
-
59
-
60
-
61
-
62
-
63
-
64
-
65
-
 66
66 -
 67
67 -
 68
68 -
 69
69 -
 70
70 -
 71
71 -
 72
72 -
 73
73 -
 74
74 -
 75
75 -
 76
76 -
77
-
78
-
79
-
80
-
81
-
82
-
83
-
84
-
85
-
86
-
87
-
88
-
89
-
90
-
91
-
92
-
93
-
94
-
95
-
96
-
97
-
98
-
99
-
100
-
101
-
102
-
103
-
104
-
105
-
106
-
107
-
108
-
109
-
110
-
111
-
112
-
113
-
114
-
115
-
116
-
117
-
118
-
119
-
120
-
121
-
122
-
123
-
124
-
125
-
126
-
127
-
128
-
129
-
130
-
131
-
132
-
133
-
134
-
135
-
136
-
137
-
138
-
139
-
140
-
141
-
142
-
143
-
144
-
145
-
146
-
147
-
148
-
149
-
150
-
151
-
152
-
153
-
154
-
155
-
156
-
157
-
158
-
159
-
160
-
161
 |
 |