HP Color LaserJet 4730 HP LaserJet MFP - Analog Fax Accessory Guide - Page 18
Installing/replacing the fax accessory in the HP LaserJet M4345 MFP,
 |
View all HP Color LaserJet 4730 manuals
Add to My Manuals
Save this manual to your list of manuals |
Page 18 highlights
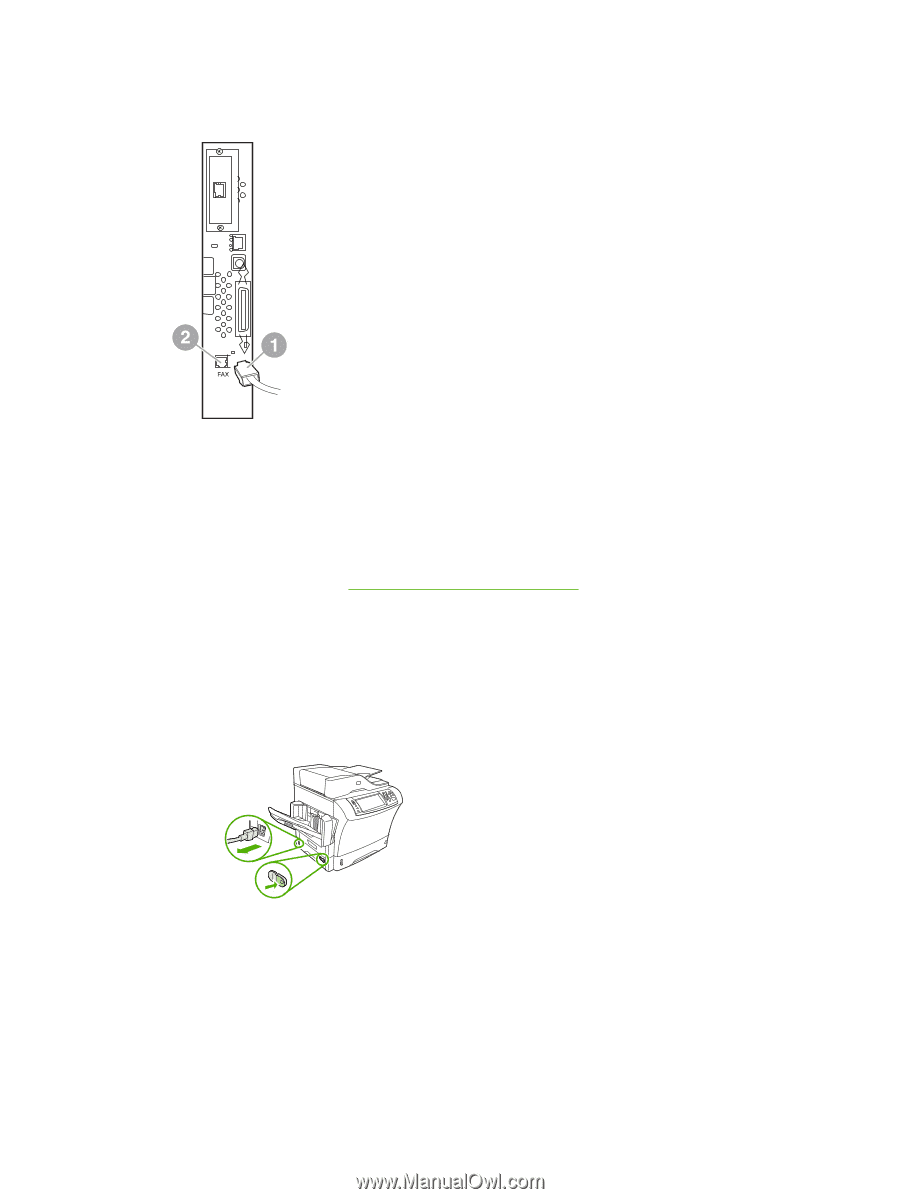
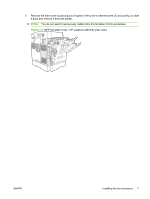
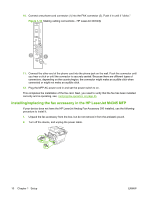
10. Connect one phone cord connector (1) into the FAX connector (2). Push it in until it "clicks." Figure 1-10 Making cabling connections - HP LaserJet 4345mfp 11. Connect the other end of the phone cord into the phone jack on the wall. Push the connector until you hear a click or until the connector is securely seated. Because there are different types of connectors, depending on the country/region, the connector might make an audible click when connected or might not make an audible click. 12. Plug the MFP AC power cord in and set the power switch to on. This completes the installation of the fax card. Next, you need to verify that the fax has been installed correctly and is operating, see, Verifying fax operation on page 35. Installing/replacing the fax accessory in the HP LaserJet M4345 MFP If your device does not have the HP LaserJet Analog Fax Accessory 300 installed, use the following procedure to install it. 1. Unpack the fax accessory from the box, but do not remove it from the antistatic pouch. 2. Turn off the device, and unplug the power cable. 10 Chapter 1 Setup ENWW
-
 1
1 -
2
-
3
-
4
-
5
-
6
-
7
-
8
-
9
-
10
-
11
-
12
-
 13
13 -
 14
14 -
 15
15 -
 16
16 -
 17
17 -
 18
18 -
 19
19 -
 20
20 -
 21
21 -
 22
22 -
 23
23 -
24
-
25
-
26
-
27
-
28
-
29
-
30
-
31
-
32
-
33
-
34
-
35
-
36
-
37
-
38
-
39
-
40
-
41
-
42
-
43
-
44
-
45
-
46
-
47
-
48
-
49
-
50
-
51
-
52
-
53
-
54
-
55
-
56
-
57
-
58
-
59
-
60
-
61
-
62
-
63
-
64
-
65
-
66
-
67
-
68
-
69
-
70
-
71
-
72
-
73
-
74
-
75
-
76
-
77
-
78
-
79
-
80
-
81
-
82
-
83
-
84
-
85
-
86
-
87
-
88
-
89
-
90
-
91
-
92
-
93
-
94
-
95
-
96
-
97
-
98
-
99
-
100
-
101
-
102
-
103
-
104
-
105
-
106
-
107
-
108
-
109
-
110
-
111
-
112
-
113
-
114
-
115
-
116
-
117
-
118
-
119
-
120
-
121
-
122
-
123
-
124
-
125
-
126
-
127
-
128
-
129
-
130
-
131
-
132
-
133
-
134
-
135
-
136
-
137
-
138
-
139
-
140
-
141
-
142
-
143
-
144
-
145
-
146
-
147
-
148
 |
 |