HP Designjet 2000/3000cp HP DesignJet ColorPro - User's Guide - Page 29
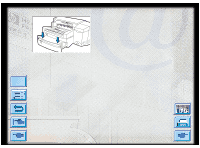
Remove the damaged printhead by lifting it out
 |
View all HP Designjet 2000/3000cp manuals
Add to My Manuals
Save this manual to your list of manuals |
Page 29 highlights
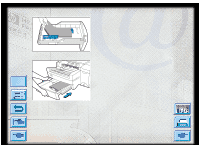
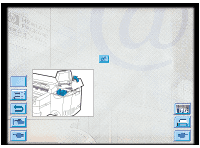
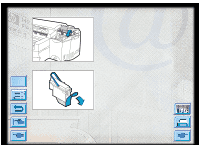
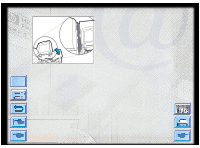
Menu Replacing Printheads 4. Release the printhead latch by pulling it towards you to unhook. Once unhooked, bring the latch towards the back of the printer. 5. Remove the damaged printhead by lifting it out of its socket. 6. Remove the new printhead from its package. 7. Remove the protective tape from the printhead. HP DesignJet ColorPro Series: User's Guide (version 1) page 29 of 64
-
 1
1 -
2
-
3
-
4
-
5
-
6
-
7
-
8
-
9
-
10
-
11
-
12
-
13
-
14
-
15
-
16
-
17
-
18
-
19
-
20
-
21
-
22
-
23
-
 24
24 -
 25
25 -
 26
26 -
 27
27 -
 28
28 -
 29
29 -
 30
30 -
 31
31 -
 32
32 -
 33
33 -
 34
34 -
35
-
36
-
37
-
38
-
39
-
40
-
41
-
42
-
43
-
44
-
45
-
46
-
47
-
48
-
49
-
50
-
51
-
52
-
53
-
54
-
55
-
56
-
57
-
58
-
59
-
60
-
61
-
62
-
63
-
64
 |
 |
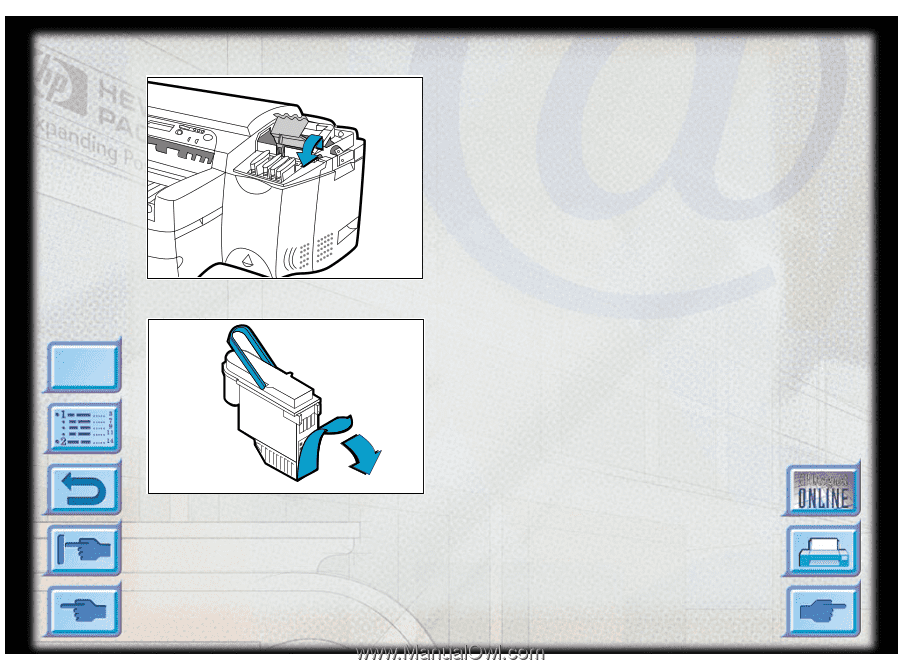
Replacing Printheads
HP DesignJet ColorPro Series: User’s Guide (version 1) page 29 of 64
Menu
4.
Release the printhead latch by pulling it
towards you to unhook.
Once unhooked, bring
the latch towards the back of the printer.
5.
Remove the damaged printhead by lifting it out
of its socket.
6.
Remove the new printhead from its package.
7.
Remove the protective tape from the printhead.