HP ProLiant BL660c HP ProLiant and Integrity Firmware Management Best Practice - Page 43
HP SPP, Mixed HP ProLiant and HP Integrity environments, Adding components to the HP SPP
 |
View all HP ProLiant BL660c manuals
Add to My Manuals
Save this manual to your list of manuals |
Page 43 highlights
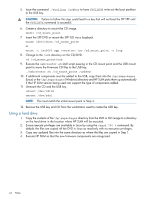
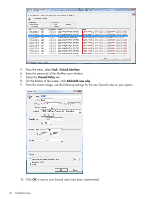
NOTE: Generally, you can tell when your support period ends by the version number of the release. For example, if you have installed the content of SPP 2011.09.0, your support period should end the last day of September, 2012 based on version 2011=year, 09= month, 0=release ID number. HP SPP 1 How do I add updated components to the HP SPP? For more information about adding components, see "Adding components to the HP SPP" (page 43). 2 What order of update should be followed when updating a blade enclosure? For information on how to update a blade enclosure using the HP SPP, see "OA Installation order" (page 34). Mixed HP ProLiant and HP Integrity environments 1 Can I update a mixed HP ProLiant and HP Integrity environment at the same time? Yes. For more information on updating a mixed environment, see "Updating mixed ProLiant and Integrity environments" (page 12). Adding components to the HP SPP Using a USB Key 1. Insert a USB key containing the SPP ISO image created. If the blade server supports the SUV cable, use the HP USB Key Creator for Windows utility in the SUV cable attached to the blade that is selected for update. 2. For Windows, download the HP USB Key Creator for Windows utility from the HP website and install it on a workstation. Once installed, the utility places a shortcut in the Programs start menu folder of the HP System Tools. Follow these steps to make your drive key bootable and copy the contents of the CD. 1. Place your HP USB drive key in an available USB port. 2. Select the HP USB Key Utility shortcut in the HP System Tools folder. 3. Complete each step presented by the application. NOTE: The HP USB Key Creator formats the USB key so that any files on the key are lost. Be sure to use a USB key that is at least 1 GB and does not contain any valuable files. For Linux, you can manually create the USB key by following these steps. 1. Obtain SYSLINUX 3.2 or higher http://syslinux.zytor.com from and download to a Linux workstation. 2. Install the SYSLINUX RPM obtained in Step 1. 3. Create a directory for the USB key mountpoint if one does not already exist. (For example, mkdir /usbkey.) 4. Insert the USB key and mount it (mount /dev/sda1 /usbkey). NOTE: The device mountpoint can vary depending on whether other SCSI drives are also installed on the server. Thus, the device mountpoint can be sdb1, sdc1, etc). HP SPP 43
-
 1
1 -
2
-
3
-
4
-
5
-
6
-
7
-
8
-
9
-
10
-
11
-
12
-
13
-
14
-
15
-
16
-
17
-
18
-
19
-
20
-
21
-
22
-
23
-
24
-
25
-
26
-
27
-
28
-
29
-
30
-
31
-
32
-
33
-
34
-
35
-
36
-
37
-
 38
38 -
 39
39 -
 40
40 -
 41
41 -
 42
42 -
 43
43 -
 44
44 -
 45
45 -
 46
46 -
 47
47 -
 48
48 -
49
-
50
-
51
-
52
-
53
-
54
-
55
-
56
-
57
 |
 |