HP R80xi HP OfficeJet R Series All-in-One - (English) Setup Guide and Faxing O - Page 30
Setting the Fax Header
 |
UPC - 088698680193
View all HP R80xi manuals
Add to My Manuals
Save this manual to your list of manuals |
Page 30 highlights
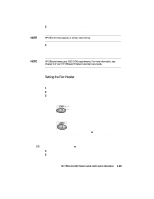
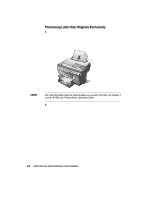
3 After "1. Set Date/Time" appears, press Enter/Save. A series of prompts asks for the date and time. NOTE HP OfficeJet only supports a 12-hour clock format. NOTE 4 Make each entry from the telephone keypad (that is, the set of numbers on the right side of the lid) using the following guidelines: x Press Enter/Save after completing each prompt. x Use only the last two digits for the year. HP OfficeJet meets year 2000 (Y2K) requirements. For more information, see Chapter 5 of your HP OfficeJet R Series Customer Care Guide. After you are done, the date and time appear on the display. Setting the Fax Header Federal Communications Commission (FCC) regulations require that you enter header information. 1 On the fax panel, press Fax Menu. 2 Press 4 and then press 2. 3 Enter your name using the following guidelines: x Press the keypad numbers that correspond to the letters of your name. DEF 3 These letters correspond to this number, etc. x Press a button multiple times to see its letters first in lowercase and then in uppercase. ABC 2 To get this character: a b c A B C 2 Press 2 this many times: 1 2 3 4 5 6 7 x After the correct letter appears, press f, and then press the number that corresponds to the next letter in your name. Again, press multiple times until the correct letter appears. x After you finish entering your first name, press Space (#) to insert a space before your last name. TIP If you make a mistake, press e to clear it, and then make the correct entry. 4 After you finish entering your name, press Enter/Save. 5 Using the keypad, enter your fax number. HP OfficeJet R80 Setup Guide and Faxing Operation 1-23
-
 1
1 -
2
-
3
-
4
-
5
-
6
-
7
-
8
-
9
-
10
-
11
-
12
-
13
-
14
-
15
-
16
-
17
-
18
-
19
-
20
-
21
-
22
-
23
-
24
-
 25
25 -
 26
26 -
 27
27 -
 28
28 -
 29
29 -
 30
30 -
 31
31 -
 32
32 -
 33
33 -
 34
34 -
 35
35 -
36
-
37
-
38
-
39
-
40
-
41
-
42
-
43
-
44
-
45
-
46
-
47
-
48
-
49
-
50
-
51
-
52
-
53
-
54
-
55
-
56
-
57
-
58
-
59
-
60
-
61
-
62
-
63
 |
 |