Invacare 3GAR Owners Manual 2 - Page 117
Ventilator Tray
 |
View all Invacare 3GAR manuals
Add to My Manuals
Save this manual to your list of manuals |
Page 117 highlights
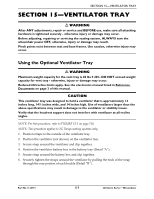
SECTION 15-VENTILATOR TRAY SECTION 15-VENTILATOR TRAY ƽ WARNING After ANY adjustments, repair or service and BEFORE use, make sure all attaching hardware is tightened securely - otherwise injury or damage may occur. Before adjusting, repairing or servicing the seating system, ALWAYS turn the wheelchair power OFF, otherwise, injury or damage may result. Pinch points exist between seat and base frames. Use caution, otherwise injury may occur. Using the Optional Ventilator Tray ƽ WARNING Maximum weight capacity for the vent tray is 40 lbs ± 20%. DO NOT exceed weight capacity for vent tray - otherwise, injury or damage may occur. Reduced tilt/recline limits apply. See the electronics manual listed in Reference Documents on page 2 of this manual. CAUTION This ventilator tray was designed to hold a ventilator that is approximately 13 inches long, 14½ inches wide, and 14 inches high. Use of ventilators larger than the above specifications may result in damage to the ventilator or stability issues. Verify that the headrest support does not interfere with ventilator at all recline angles. NOTE: For this procedure, refer to FIGURE 15.1 on page 118. NOTE: This procedure applies to 2G Tarsys seating systems only. 1. Position straps to the outside of the ventilator tray. 2. Position the ventilator (not shown) on the ventilator tray. 3. Secure strap around the ventilator and clip together. 4. Position the ventilator battery box in the battery tray (Detail "A"). 5. Secure strap around the battery box and clip together. 6. Securely tighten the straps around the ventilator by pulling the ends of the strap through the rear portion of each buckle (Detail "B"). Part No 1134791 117 3G Storm Series® Wheelchairs
-
 1
1 -
2
-
3
-
4
-
5
-
6
-
7
-
8
-
9
-
10
-
11
-
12
-
13
-
14
-
15
-
16
-
17
-
18
-
19
-
20
-
21
-
22
-
23
-
24
-
25
-
26
-
27
-
28
-
29
-
30
-
31
-
32
-
33
-
34
-
35
-
36
-
37
-
38
-
39
-
40
-
41
-
42
-
43
-
44
-
45
-
46
-
47
-
48
-
49
-
50
-
51
-
52
-
53
-
54
-
55
-
56
-
57
-
58
-
59
-
60
-
61
-
62
-
63
-
64
-
65
-
66
-
67
-
68
-
69
-
70
-
71
-
72
-
73
-
74
-
75
-
76
-
77
-
78
-
79
-
80
-
81
-
82
-
83
-
84
-
85
-
86
-
87
-
88
-
89
-
90
-
91
-
92
-
93
-
94
-
95
-
96
-
97
-
98
-
99
-
100
-
101
-
102
-
103
-
104
-
105
-
106
-
107
-
108
-
109
-
110
-
111
-
 112
112 -
 113
113 -
 114
114 -
 115
115 -
 116
116 -
 117
117 -
 118
118 -
 119
119 -
 120
120 -
 121
121 -
 122
122 -
123
-
124
-
125
-
126
-
127
-
128
-
129
-
130
-
131
-
132
 |
 |
