Invacare 3GAR Owners Manual 2 - Page 119
Anti-tippers
 |
View all Invacare 3GAR manuals
Add to My Manuals
Save this manual to your list of manuals |
Page 119 highlights
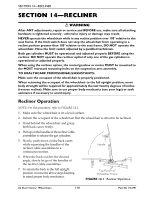
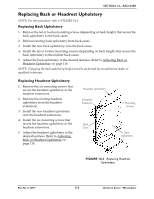
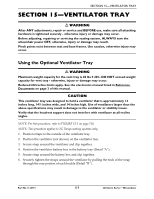
SECTION 16-ANTI-TIPPERS SECTION 16-ANTI-TIPPERS ƽ WARNING After ANY adjustments, repair or service and BEFORE use, make sure all attaching hardware is tightened securely - otherwise injury or damage may occur. Before adjusting, repairing or servicing the seating system, ALWAYS turn the wheelchair power OFF, otherwise, injury or damage may result. Pinch points exist between seat and base frames. Use caution, otherwise injury may occur. Anti-Tippers must be used at all times. When outdoors on wet, soft ground or on gravel surfaces, anti-tippers may not provide the same level of protection against tip over. Extra caution must be observed when traversing such surfaces. Adjusting the Extended Active Anti-Tippers ƽ WARNING Wheelchairs equipped with ventilator tray MUST have extended active anti-tippers installed, otherwise, injury or damage may occur. Wheelchairs that are NOT equipped with optional ventilator tray MUST have either the standard anti-tippers or the optional extended active anti-tippers installed, otherwise, injury or damage may occur. Refer to Detail "A" and Detail "B" in FIGURE 16.1. NOTE: For this procedure, refer to FIGURE 16.1 on page 120. NOTE: This procedure applies to 2G Tarsys seating systems only. NOTE: The extended active anti-tippers are standard when the wheelchair is equipped with a ventilatory tray. NOTE: The recommended height requirement for the anti-tippers, which is factory preset, is ¼inch off the ground/floor. 1. Loosen locknuts A, B and C. 2. Lift anti-tipper and place ¼-inch block underneath the wheel. 3. Tighten locknut A upward against the bearing. 4. Tighten locknut B upward against locknut A. 5. Tighten locknut C downward against bearing inside anti-tip assembly. 6. Remove ¼-inch block. 7. Repeat STEPS 1-6 for the remaining anti-tip assembly. 8. Install the dust cover onto each anti-tip assembly. Part No 1134791 119 3G Storm Series® Wheelchairs
-
 1
1 -
2
-
3
-
4
-
5
-
6
-
7
-
8
-
9
-
10
-
11
-
12
-
13
-
14
-
15
-
16
-
17
-
18
-
19
-
20
-
21
-
22
-
23
-
24
-
25
-
26
-
27
-
28
-
29
-
30
-
31
-
32
-
33
-
34
-
35
-
36
-
37
-
38
-
39
-
40
-
41
-
42
-
43
-
44
-
45
-
46
-
47
-
48
-
49
-
50
-
51
-
52
-
53
-
54
-
55
-
56
-
57
-
58
-
59
-
60
-
61
-
62
-
63
-
64
-
65
-
66
-
67
-
68
-
69
-
70
-
71
-
72
-
73
-
74
-
75
-
76
-
77
-
78
-
79
-
80
-
81
-
82
-
83
-
84
-
85
-
86
-
87
-
88
-
89
-
90
-
91
-
92
-
93
-
94
-
95
-
96
-
97
-
98
-
99
-
100
-
101
-
102
-
103
-
104
-
105
-
106
-
107
-
108
-
109
-
110
-
111
-
112
-
113
-
 114
114 -
 115
115 -
 116
116 -
 117
117 -
 118
118 -
 119
119 -
 120
120 -
 121
121 -
 122
122 -
 123
123 -
 124
124 -
125
-
126
-
127
-
128
-
129
-
130
-
131
-
132
 |
 |
