Konica Minolta bizhub C552 bizhub C452/C552/C552DS/C652/C652DS Fax Driver Oper - Page 16
RAW port number/IPP setting of this machine, Installing - drivers for windows 8
 |
View all Konica Minolta bizhub C552 manuals
Add to My Manuals
Save this manual to your list of manuals |
Page 16 highlights
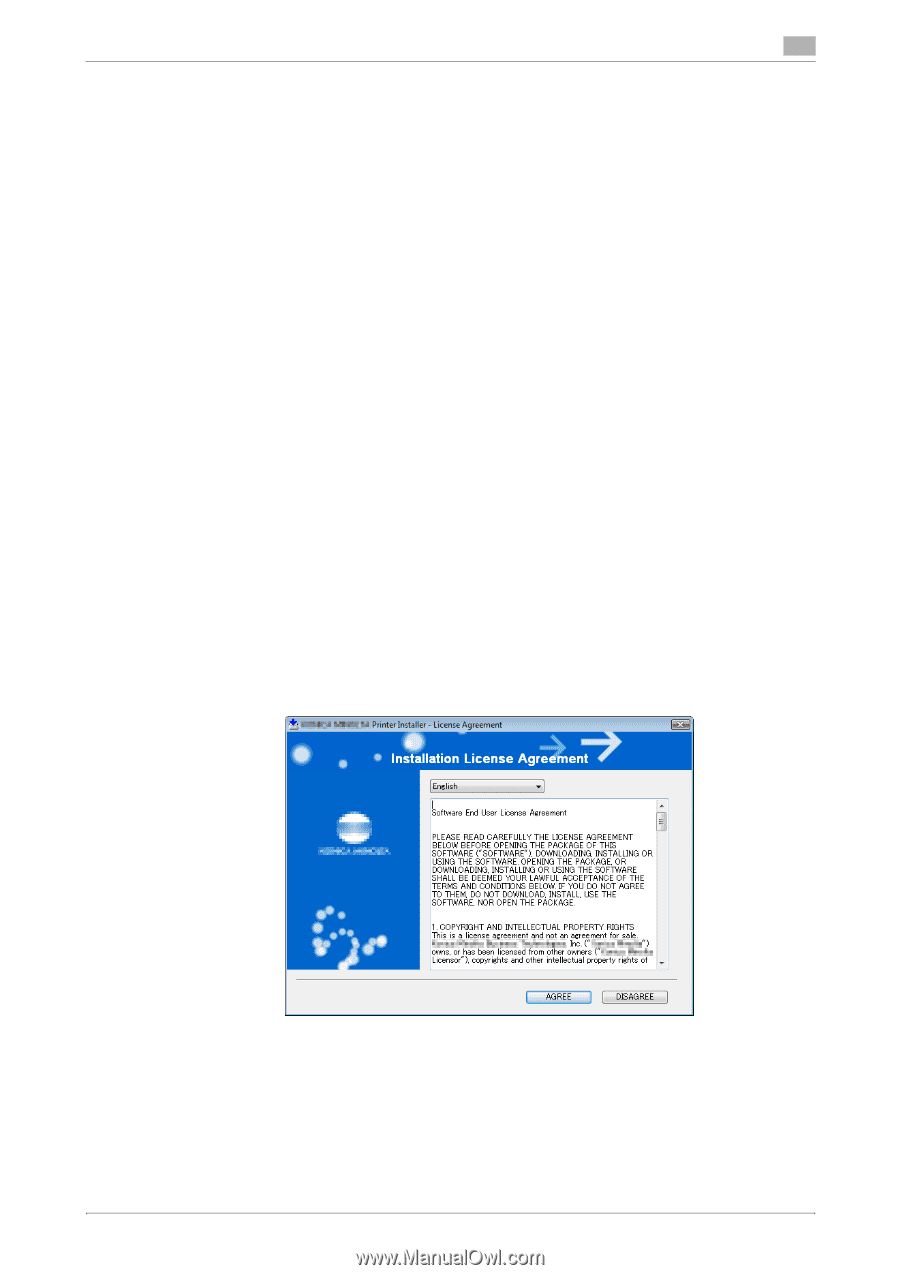
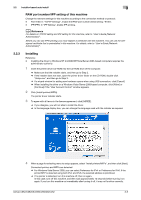
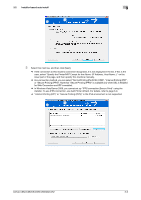
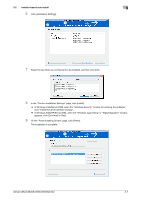
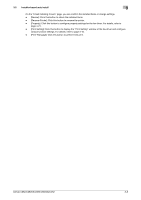
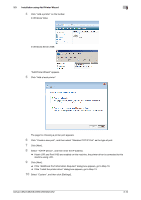
3.2 Installer-based auto install 3 RAW port number/IPP setting of this machine Change the network settings for this machine according to the connection method or protocol. - Port 9100: In "TCP/IP Settings", enable the RAW port number (initial setting: "9100"). - IPP/IPPS: In "IPP Setting", enable IPP printing. d Reference For details on TCP/IP setting and IPP setting for this machine, refer to "User's Guide [Network Administrator]". Before you can use IPPS printing, you must register a certificate with this machine. You can use the selfsigned certificate that is preinstalled in this machine. For details, refer to "User's Guide [Network Administrator]". 3.2.3 Installing Reference - Installing the driver to Windows NT 4.0/2000/XP/Vista/Server 2003-based computers requires the administrator authority. 1 Insert the printer driver CD-ROM into the CD-ROM drive of the computer. % Make sure that the installer starts, and then go to Step 2. % If the installer does not start, open the printer driver folder on the CD-ROM, double-click "Setup.exe", and then go to Step 3. % If a wizard window for adding new hardware opens when using USB connection, click [Cancel]. % When installing the driver on a Windows Vista-/Server 2008-based computer, click [Allow] or [Continue] if the "User Account Control" window appears. 2 Click [Install printers/MFPs]. The printer driver installer starts. 3 To agree with all terms in the license agreement, click [AGREE]. % If you disagree, you will not able to install the driver. % In the language display box, you can change the language used with the installer as required. 4 When a page for selecting menu to setup appears, select "Install printers/MFPs", and then click [Next]. Connected printers and MFPs are detected. % For Windows Vista/Server 2008, you can select Preference for IPv4 or Preference for IPv6. If the printer/MFP is detected using both IPv4 and IPv6, the selected address is prioritized. % If no printer is detected, turn this machine off, then on again. In this case, turn off this machine, and then wait approximately 10 seconds before turning it on again. If you turn this machine on immediately after turning it off, it may not function correctly. bizhub C652/C652DS/C552/C552DS/C452 3-5
-
 1
1 -
2
-
3
-
4
-
5
-
6
-
7
-
8
-
9
-
10
-
 11
11 -
 12
12 -
 13
13 -
 14
14 -
 15
15 -
 16
16 -
 17
17 -
 18
18 -
 19
19 -
 20
20 -
 21
21 -
22
-
23
-
24
-
25
-
26
-
27
-
28
-
29
-
30
-
31
-
32
-
33
-
34
-
35
-
36
-
37
-
38
-
39
-
40
-
41
-
42
-
43
-
44
-
45
-
46
-
47
-
48
-
49
-
50
-
51
-
52
-
53
-
54
-
55
-
56
-
57
-
58
-
59
-
60
-
61
-
62
-
63
-
64
-
65
-
66
-
67
-
68
-
69
-
70
-
71
-
72
-
73
 |
 |