Konica Minolta bizhub C552 bizhub C452/C552/C552DS/C652/C652DS Fax Driver Oper - Page 46
Configuring user authentication settings
 |
View all Konica Minolta bizhub C552 manuals
Add to My Manuals
Save this manual to your list of manuals |
Page 46 highlights
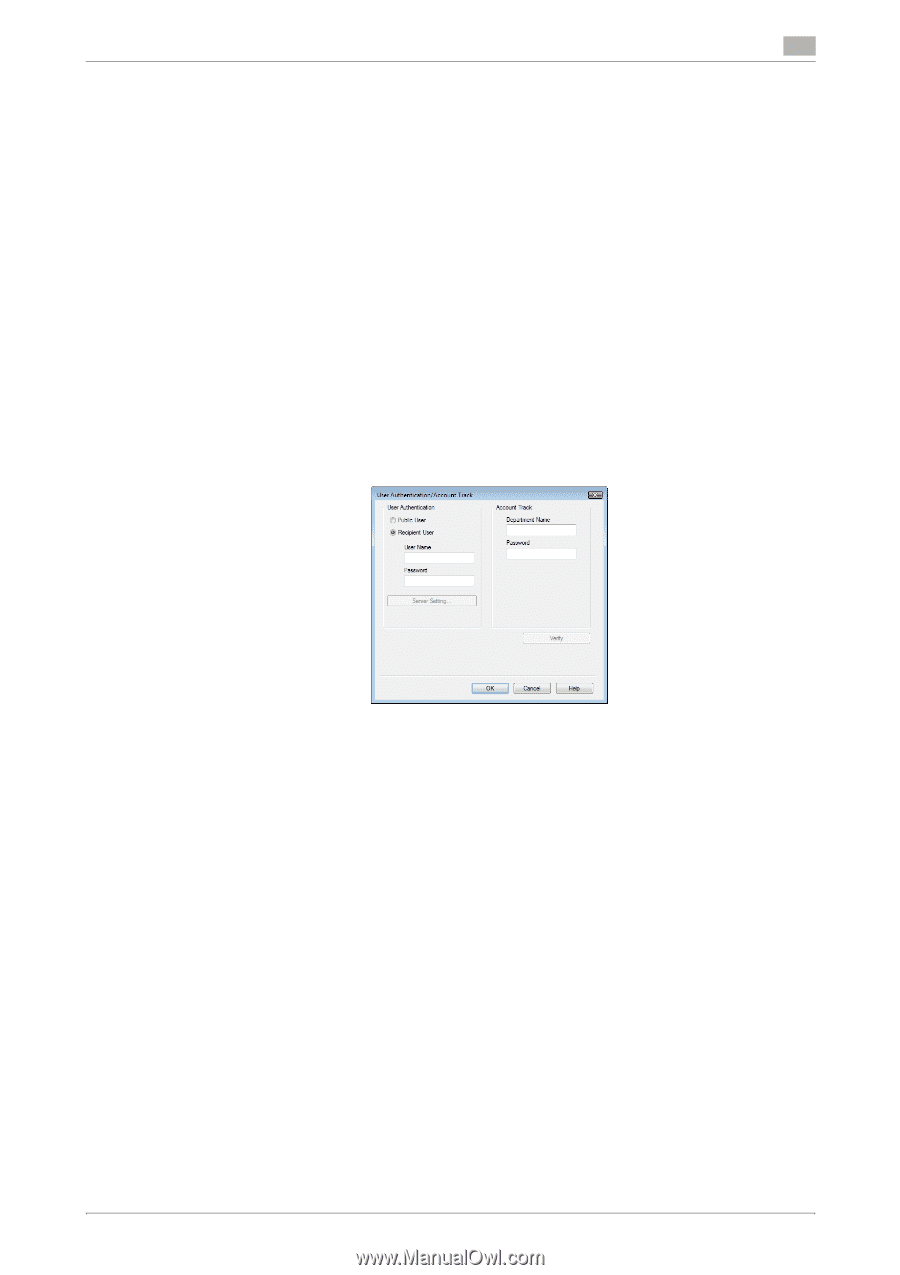
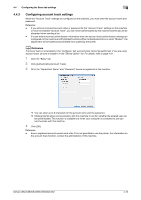
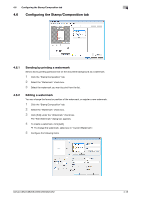
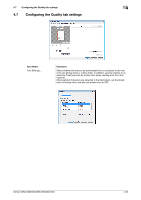
4.4 Configuring the Basic tab settings 4 4.4.2 Configuring user authentication settings When the authentication mode is configured on this machine, enter the user name and password. Reference - If you enter an incorrect user name or password for the user authentication settings of this machine or have not enabled "User Authentication", you will not be authenticated by this machine and the job will be discarded when sending a fax. - If a user enters incorrect authentication information when the user authentication settings are configured on this machine and Prohibited Functions When Authentication Error is set to Mode 2, the user will be locked and prohibited from accessing the printer. d Reference If user authentication is not enabled in the "Configure" tab, user authentication will not be performed. If you are using the user authentication, be sure to enable it in the "Device Option" list. For details, refer to page 4-21. 1 Click the "Basic" tab. 2 Click [Authentication/Account Track]. 3 Select "Recipient User", and then fill in the "User Name" and "Password" boxes as registered in this machine. % You can enter up to 64 characters for the user name, and up to 64 characters for the password. % If public user access is allowed on this machine , the printer can be used by selecting "Public User". % It is necessary to configure server settings when user authentication is performed with the server. Click [Server Setting], and then select a server. % Clicking [Verify] allows communication with this machine to confirm whether the entered user can be authenticated. This function is available only when your computer is connected to and can communicate with this machine. % When user authentication is performed with the relay server, you must enter the user information specified by the server administrator. The windows and input items that appear vary according to the settings. For details, contact your server administrator. % When authentication is performed using the relay server, in the Administrator Settings of this machine, set [System Connection] - [OpenAPI Settings] - [Authentication] to "OFF". For details, refer to the "User's Guide [Print Operations]". 4 Click [OK]. Reference - Even a registered user cannot send a fax if the user is not allowed to use the printer. For user authentication, contact the administrator of this machine. - When using an optional authentication unit for user authentication, fill in the "User Name" and "Password" boxes in Step 3. For details, refer to the "User's Guide [Copy Operations]". bizhub C652/C652DS/C552/C552DS/C452 4-15
-
 1
1 -
2
-
3
-
4
-
5
-
6
-
7
-
8
-
9
-
10
-
11
-
12
-
13
-
14
-
15
-
16
-
17
-
18
-
19
-
20
-
21
-
22
-
23
-
24
-
25
-
26
-
27
-
28
-
29
-
30
-
31
-
32
-
33
-
34
-
35
-
36
-
37
-
38
-
39
-
40
-
 41
41 -
 42
42 -
 43
43 -
 44
44 -
 45
45 -
 46
46 -
 47
47 -
 48
48 -
 49
49 -
 50
50 -
 51
51 -
52
-
53
-
54
-
55
-
56
-
57
-
58
-
59
-
60
-
61
-
62
-
63
-
64
-
65
-
66
-
67
-
68
-
69
-
70
-
71
-
72
-
73
 |
 |