Konica Minolta bizhub C552 bizhub C452/C552/C552DS/C652/C652DS Fax Driver Oper - Page 43
Quality tab, Con tab, Settings tab - drivers download
 |
View all Konica Minolta bizhub C552 manuals
Add to My Manuals
Save this manual to your list of manuals |
Page 43 highlights
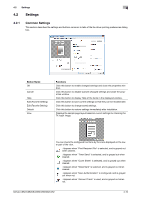
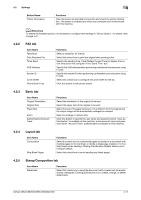
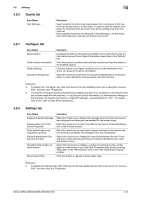
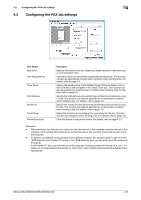
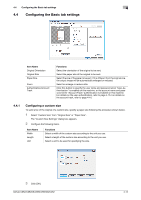
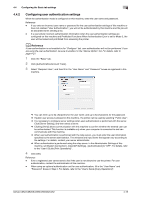
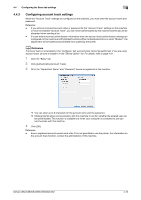
4.2 Settings 4.2.6 Quality tab Item Name Font Settings... 4 Functions Select whether the fonts to be downloaded from a computer to this machine are bitmap fonts or outline fonts. In addition, specify whether to replace the TrueType fonts by printer fonts when sending a fax from this machine. When garbled characters are detected in the destination, set download fonts to bitmap fonts, and also set printer fonts to OFF. 4.2.7 Configure tab Item Name Device Option Obtain Device Information Obtain Settings Encryption Passphrase Functions Configure the status of the options installed on this machine and user authentication/account track. Specify the status of each item in the "Setting" box. Click this button to communicate with this machine and load the status of the installed options. Click this button to configure conditions such as the destination from which you acquire the device information. Select this check box and enter the encryption passphrase in the text box when it is user-defined for communication with this machine. Reference - To display the "Configure" tab, right-click the icon for the installed printer with a name like "xxxxxxx FAX", and then click "Properties". - The function of [Acquire Device Information] is available only when your computer is connected to and can communicate with this machine. To use [Acquire Device Information], in Administrator Settings of this machine, set [System Connection] - [OpenAPI Settings] - [Authentication] to "OFF". For details, refer to the "User's Guide [Print Operations]". 4.2.8 Settings tab Item Name Display Constraint Message Display paper set in Print Server Properties Verify Authentication settings before printing Popup Authentication Dialog when printing Reconfirm FAX number entered directly Save Custom Size Functions Select this check box to display the message when functions that cannot be configured simultaneously are enabled for the printer driver. Select this check box to use forms added in the [Server Properties] dialog box of the Printers window. Select this check box to verify authentication settings for this machine before printing, and display the message if they are not satisfied. Select this check box to display the User Authentication/Account Track dialog box when specifying printing, prompting entering the user name and account name. Select this check box to display a window for entering the fax number again for confirmation if you click [Add Recipients] after directly entering information in the "FAX Number" box in the "FAX Transmission Popup" window. Click this button to register custom paper sizes. Reference - To display the Settings tab, right-click the icon for the installed printer with a name such as "xxxxxxx FAX", and then click the "Properties". bizhub C652/C652DS/C552/C552DS/C452 4-12
-
 1
1 -
2
-
3
-
4
-
5
-
6
-
7
-
8
-
9
-
10
-
11
-
12
-
13
-
14
-
15
-
16
-
17
-
18
-
19
-
20
-
21
-
22
-
23
-
24
-
25
-
26
-
27
-
28
-
29
-
30
-
31
-
32
-
33
-
34
-
35
-
36
-
37
-
 38
38 -
 39
39 -
 40
40 -
 41
41 -
 42
42 -
 43
43 -
 44
44 -
 45
45 -
 46
46 -
 47
47 -
 48
48 -
49
-
50
-
51
-
52
-
53
-
54
-
55
-
56
-
57
-
58
-
59
-
60
-
61
-
62
-
63
-
64
-
65
-
66
-
67
-
68
-
69
-
70
-
71
-
72
-
73
 |
 |