Konica Minolta bizhub C650 bizhub C650 PageScope Web Connections Operations Us - Page 54
Registering a group destination, User mode, In the Group List
 |
View all Konica Minolta bizhub C650 manuals
Add to My Manuals
Save this manual to your list of manuals |
Page 54 highlights
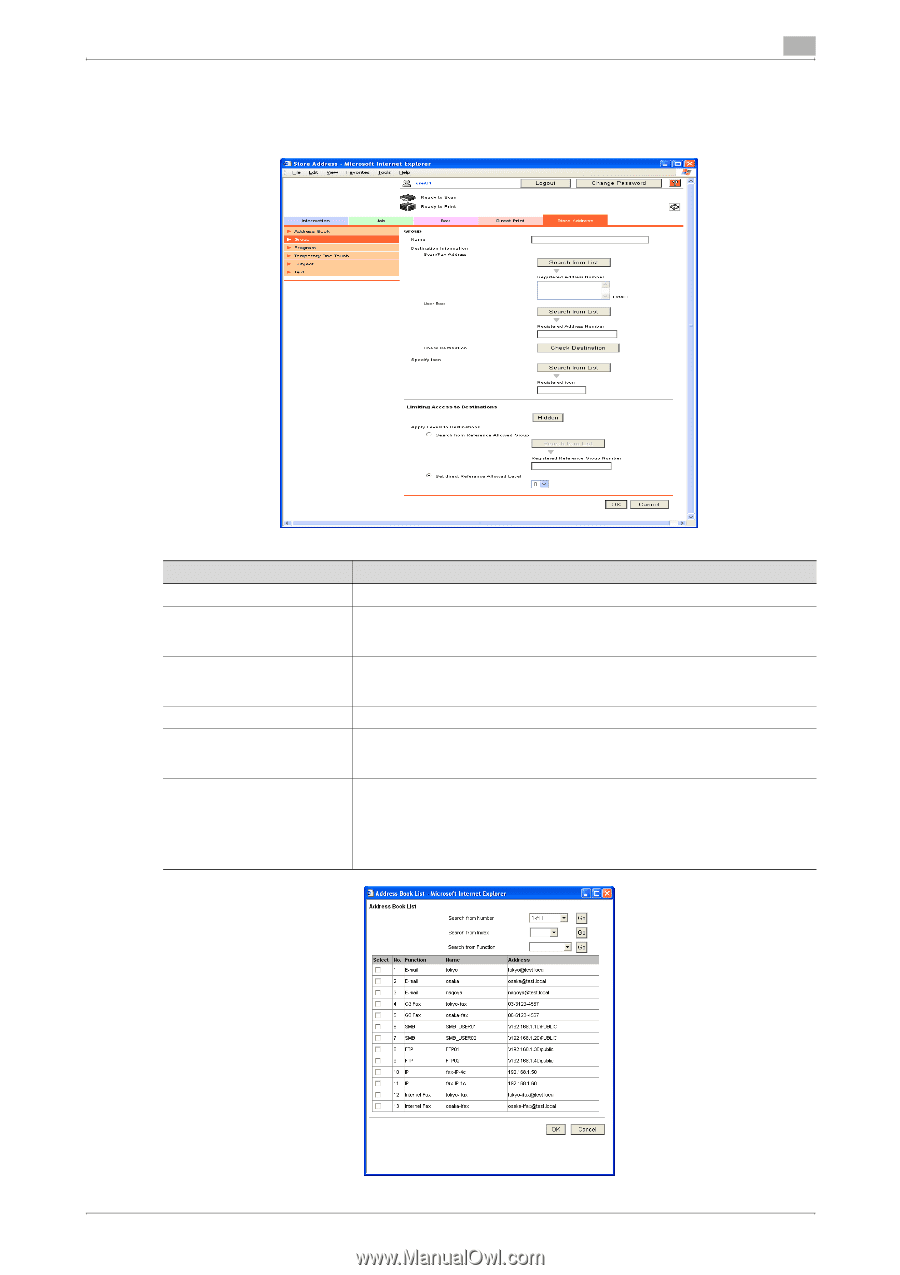
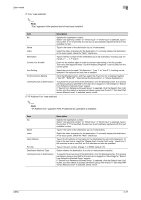
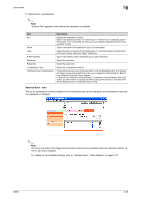
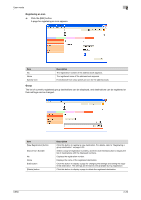
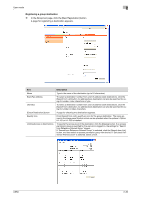
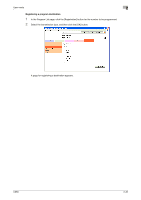
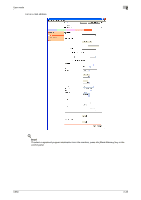
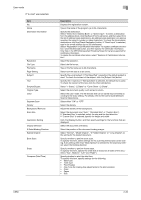
User mode 2 Registering a group destination % In the Group List page, click the [New Registration] button. A page for registering a destination appears. Item Name Scan/Fax Address User Box [Check Destination] button Specify Icon Limiting Access to Destinations Description Type in the name of the destination (up to 24 characters). To select a destination number from a list of address book destinations, click the [Search from List] button. An address book destination can also be searched for using its number, index characters or type. To select a destination number from a list of address book destinations, click the [Search from List] button. An address book destination can also be searched for using its number or index characters. A page for checking the destinations appears. From [Search from List], specify an icon for the group destination. The icons are used in the image panel function which can be operated when the optional i-Option LK-101 or LK-103 is installed. To specify the access level of the destination, click the [Display] button. If an access permission group is specified for the user who is logged on, the settings for "Search from Reference Allowed Group" appear. If "Search from Reference Allowed Group" is selected, click the [Search from List] button, and then select an access permission group from the list. If "Set direct Reference Allowed Level" is selected, select a level. C650 2-30
-
 1
1 -
2
-
3
-
4
-
5
-
6
-
7
-
8
-
9
-
10
-
11
-
12
-
13
-
14
-
15
-
16
-
17
-
18
-
19
-
20
-
21
-
22
-
23
-
24
-
25
-
26
-
27
-
28
-
29
-
30
-
31
-
32
-
33
-
34
-
35
-
36
-
37
-
38
-
39
-
40
-
41
-
42
-
43
-
44
-
45
-
46
-
47
-
48
-
 49
49 -
 50
50 -
 51
51 -
 52
52 -
 53
53 -
 54
54 -
 55
55 -
 56
56 -
 57
57 -
 58
58 -
 59
59 -
60
-
61
-
62
-
63
-
64
-
65
-
66
-
67
-
68
-
69
-
70
-
71
-
72
-
73
-
74
-
75
-
76
-
77
-
78
-
79
-
80
-
81
-
82
-
83
-
84
-
85
-
86
-
87
-
88
-
89
-
90
-
91
-
92
-
93
-
94
-
95
-
96
-
97
-
98
-
99
-
100
-
101
-
102
-
103
-
104
-
105
-
106
-
107
-
108
-
109
-
110
-
111
-
112
-
113
-
114
-
115
-
116
-
117
-
118
-
119
-
120
-
121
-
122
-
123
-
124
-
125
-
126
-
127
-
128
-
129
-
130
-
131
-
132
-
133
-
134
-
135
-
136
-
137
-
138
-
139
-
140
-
141
-
142
-
143
-
144
-
145
-
146
-
147
-
148
-
149
-
150
-
151
-
152
-
153
-
154
-
155
-
156
-
157
-
158
-
159
-
160
-
161
-
162
-
163
-
164
-
165
 |
 |