Konica Minolta bizhub C650 bizhub C650 PageScope Web Connections Operations Us - Page 96
Account Track Registration, User Auth/Account Track for specifying account track settings.
 |
View all Konica Minolta bizhub C650 manuals
Add to My Manuals
Save this manual to your list of manuals |
Page 96 highlights
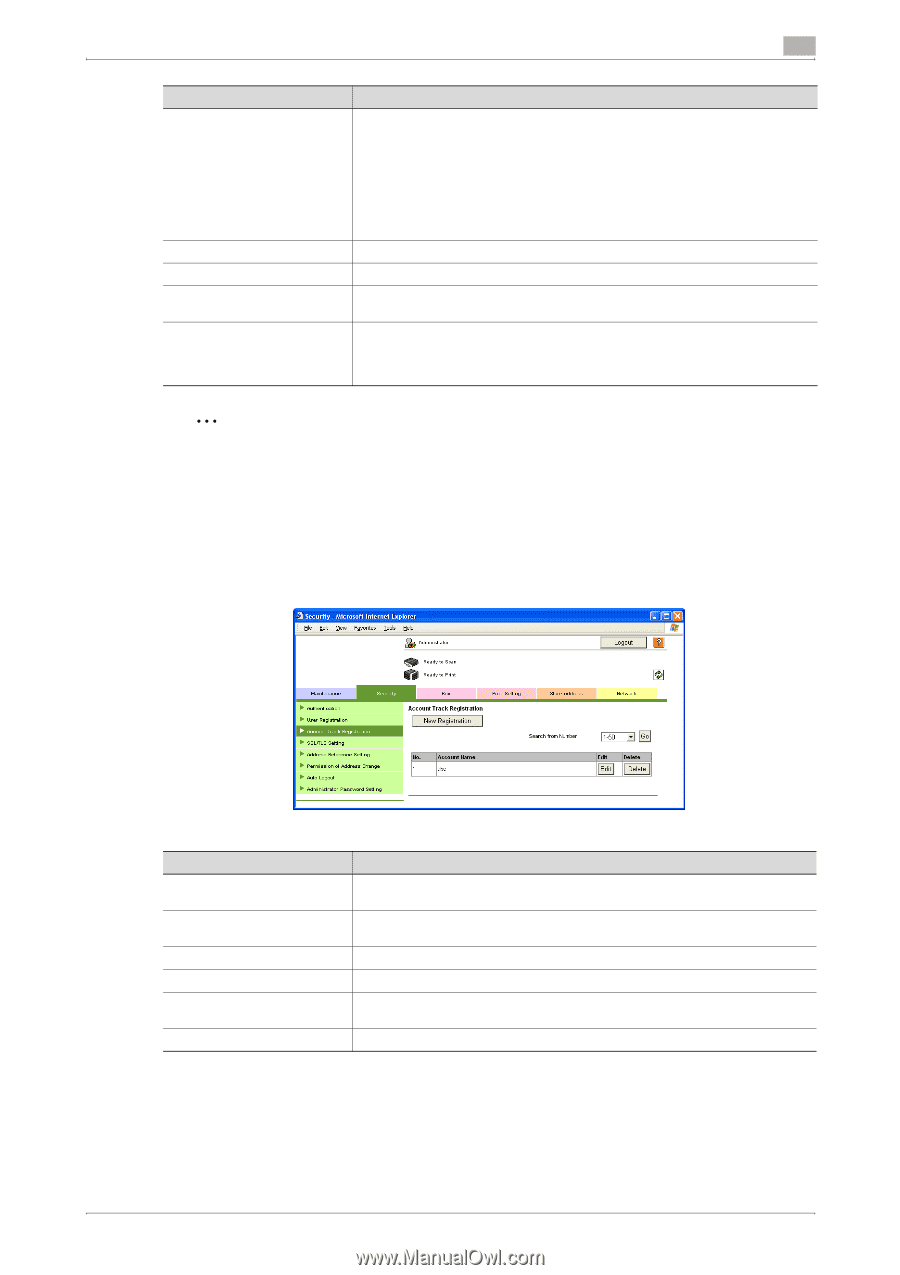
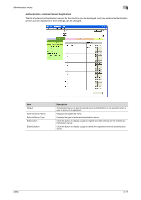
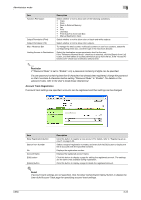
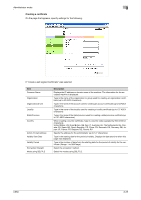
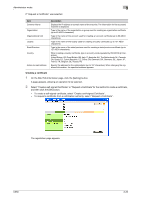
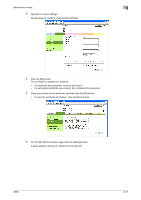
Administrator mode 3 Item Function Permission Output Permission (Print) Output Permission (TX) Max. Allowance Set Limiting Access to Destinations Description Select whether or not to allow each of the following operations. • Copy • Scan • Save to External Memory • Fax • Print • User Box • Print Scan/Fax from User Box • Manual Destination Input Select whether or not to allow color or black-and-white outputs. Select whether or not to allow color outputs. To manage the total counter, individual counters or user box counters, select the corresponding check box, and then type in the maximum allowed. Select the destination access permission level for the user. If the "Reference Allowed Group" check box is selected, click the [Search from List] button, and then select an access permission group from the list. If the "Access Allowed Level" check box is selected, select a level. 2 Reminder If "Password Rules" is set to "Enable", only a password containing 8 digits can be specified. If a user password containing less than 8 characters has already been registered, change the password so that it contains 8 characters before setting "Password Rules" to "Enable". For details on the password rules, refer to the User's Guide [Copy Operations]. Account Track Registration If account track settings are specified, accounts can be registered and their settings can be changed. Item [New Registration] button Search from Number No. Account Name [Edit] button [Delete] button Description Click this button to register a new account. For details, refer to "Registering an account" on page 3-23. Select a range of registration numbers, and then click the [Go] button to display the list of accounts with the specified numbers. Displays the registration number. Displays the registered account name. Click this button to display a page for editing the registered account. The settings are the same ones available during registration. Click this button to display a page to delete the registered account. ! Detail If account track settings are not specified, click the [User Authentication Menu] button to display the User Auth/Account Track page for specifying account track settings. C650 3-22
-
 1
1 -
2
-
3
-
4
-
5
-
6
-
7
-
8
-
9
-
10
-
11
-
12
-
13
-
14
-
15
-
16
-
17
-
18
-
19
-
20
-
21
-
22
-
23
-
24
-
25
-
26
-
27
-
28
-
29
-
30
-
31
-
32
-
33
-
34
-
35
-
36
-
37
-
38
-
39
-
40
-
41
-
42
-
43
-
44
-
45
-
46
-
47
-
48
-
49
-
50
-
51
-
52
-
53
-
54
-
55
-
56
-
57
-
58
-
59
-
60
-
61
-
62
-
63
-
64
-
65
-
66
-
67
-
68
-
69
-
70
-
71
-
72
-
73
-
74
-
75
-
76
-
77
-
78
-
79
-
80
-
81
-
82
-
83
-
84
-
85
-
86
-
87
-
88
-
89
-
90
-
 91
91 -
 92
92 -
 93
93 -
 94
94 -
 95
95 -
 96
96 -
 97
97 -
 98
98 -
 99
99 -
 100
100 -
 101
101 -
102
-
103
-
104
-
105
-
106
-
107
-
108
-
109
-
110
-
111
-
112
-
113
-
114
-
115
-
116
-
117
-
118
-
119
-
120
-
121
-
122
-
123
-
124
-
125
-
126
-
127
-
128
-
129
-
130
-
131
-
132
-
133
-
134
-
135
-
136
-
137
-
138
-
139
-
140
-
141
-
142
-
143
-
144
-
145
-
146
-
147
-
148
-
149
-
150
-
151
-
152
-
153
-
154
-
155
-
156
-
157
-
158
-
159
-
160
-
161
-
162
-
163
-
164
-
165
 |
 |