Linksys SPA922 Cisco SPA9000 Voice System Using Setup Wizard Installation and - Page 93
Default, Custom, Browse, Custom Background Image: Click - bmp
 |
UPC - 745883570836
View all Linksys SPA922 manuals
Add to My Manuals
Save this manual to your list of manuals |
Page 93 highlights
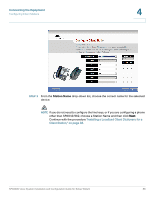
Connecting the Equipment Configuring Client Stations 4 STEP 1 Choose the background picture settings: • Background Image Enable: Choose None to use no image, Default to use the default image, or Custom to use an image that you will upload. NOTE The default image for SPA942 is a blank image. • Custom Background Image: Click Browse to upload any BMP, JPEG, TIFF, GIF or PNG file. After you complete the steps in the Wizard, a BMP version of the file will be stored in the C:\linksys\img folder. • The SPA942 can display a 128x48 image without resizing. Simple black- and-white images are recommended. Color images can be used but will be rendered with black pixels. • The SPA962 can display a 320x240 pixel image without resizing; however, the top 30 pixels of the image are covered by the date/time header. • If you upload an image that is smaller than the display space, the image will be aligned in the top left corner of the phone display. • If you upload a larger image with an aspect ratio that differs significantly from that of the LCD screen, a message appears. You can choose to crop the image or to add Pillar Box or Letter Box borders to maintain the required aspect ratio. STEP 2 Choose the screen saver settings: • Screen Saver Enable: Click Yes to enable the screen saver or click No to disable the screen saver. • Screen Saver Timer: Enter the number of seconds of inactivity that will trigger the screen saver to appear. • Screen Saver Icon: From the drop-down list, choose the type of screen saver to display when the screen saver is triggered by the timer. • Background Picture: The selected background picture appears as the screen saver. To use this option, the Background Picture field must be set to either Default or Custom. In the case of Custom, you must first upload a custom background picture as described above. • Station Time: The current time appears in black type in the center of the phone display. SPA9000 Voice System Installation and Configuration Guide for Setup Wizard 91
-
 1
1 -
2
-
3
-
4
-
5
-
6
-
7
-
8
-
9
-
10
-
11
-
12
-
13
-
14
-
15
-
16
-
17
-
18
-
19
-
20
-
21
-
22
-
23
-
24
-
25
-
26
-
27
-
28
-
29
-
30
-
31
-
32
-
33
-
34
-
35
-
36
-
37
-
38
-
39
-
40
-
41
-
42
-
43
-
44
-
45
-
46
-
47
-
48
-
49
-
50
-
51
-
52
-
53
-
54
-
55
-
56
-
57
-
58
-
59
-
60
-
61
-
62
-
63
-
64
-
65
-
66
-
67
-
68
-
69
-
70
-
71
-
72
-
73
-
74
-
75
-
76
-
77
-
78
-
79
-
80
-
81
-
82
-
83
-
84
-
85
-
86
-
87
-
 88
88 -
 89
89 -
 90
90 -
 91
91 -
 92
92 -
 93
93 -
 94
94 -
 95
95 -
 96
96 -
 97
97 -
 98
98 -
99
-
100
-
101
-
102
-
103
-
104
-
105
-
106
-
107
-
108
-
109
-
110
-
111
-
112
-
113
-
114
-
115
-
116
-
117
-
118
-
119
-
120
-
121
-
122
-
123
-
124
-
125
-
126
-
127
-
128
-
129
-
130
-
131
-
132
-
133
-
134
-
135
-
136
-
137
-
138
-
139
-
140
-
141
-
142
-
143
-
144
-
145
-
146
-
147
-
148
-
149
-
150
-
151
-
152
-
153
-
154
-
155
-
156
-
157
-
158
-
159
-
160
-
161
-
162
-
163
 |
 |
