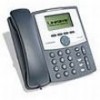
Linksys SPA922 Cisco SPA9000 Voice System Using Setup Wizard Installation and - Page 97

USB Disk, spa400vm, spa400vm\var\lib, sounds, Confirm Folder Replace, before doing any upgrades.
Page 97 highlights

Connecting the Equipment Configuring Client Stations 4 c. When the USB Disk window appears, click Open folder to view files using Windows Explorer, and then click OK. The USB drive contains the spa400vm folder. NOTE If the USB Disk window does not appear, use Windows Explorer to navigate to the USB disk drive (usually Drive E). d. Open spa400vm\var\lib. The window displays the lib contents, including the sounds folder. e. If desired, make a backup copy of the existing sounds folder. NOTE You are not overwriting any user message files in this procedure. However, it is a good practice to make a backup copy of your files before doing any upgrades. f. Move the new sounds folder into spa400vm\var\lib on the USB drive. When the Confirm Folder Replace window appears, click Yes to All. g. Safely remove the USB drive from the PC, and then insert it into the SPA400. h. Power on the SPA400. STEP 4 Place a test call to the voice mail system to confirm that the new language prompts are used. SPA9000 Voice System Installation and Configuration Guide for Setup Wizard 95

  • 1
  • 2
  • 3
  • 4
  • 5
  • 6
  • 7
  • 8
  • 9
  • 10
  • 11
  • 12
  • 13
  • 14
  • 15
  • 16
  • 17
  • 18
  • 19
  • 20
  • 21
  • 22
  • 23
  • 24
  • 25
  • 26
  • 27
  • 28
  • 29
  • 30
  • 31
  • 32
  • 33
  • 34
  • 35
  • 36
  • 37
  • 38
  • 39
  • 40
  • 41
  • 42
  • 43
  • 44
  • 45
  • 46
  • 47
  • 48
  • 49
  • 50
  • 51
  • 52
  • 53
  • 54
  • 55
  • 56
  • 57
  • 58
  • 59
  • 60
  • 61
  • 62
  • 63
  • 64
  • 65
  • 66
  • 67
  • 68
  • 69
  • 70
  • 71
  • 72
  • 73
  • 74
  • 75
  • 76
  • 77
  • 78
  • 79
  • 80
  • 81
  • 82
  • 83
  • 84
  • 85
  • 86
  • 87
  • 88
  • 89
  • 90
  • 91
  • 92
  • 93
  • 94
  • 95
  • 96
  • 97
  • 98
  • 99
  • 100
  • 101
  • 102
  • 103
  • 104
  • 105
  • 106
  • 107
  • 108
  • 109
  • 110
  • 111
  • 112
  • 113
  • 114
  • 115
  • 116
  • 117
  • 118
  • 119
  • 120
  • 121
  • 122
  • 123
  • 124
  • 125
  • 126
  • 127
  • 128
  • 129
  • 130
  • 131
  • 132
  • 133
  • 134
  • 135
  • 136
  • 137
  • 138
  • 139
  • 140
  • 141
  • 142
  • 143
  • 144
  • 145
  • 146
  • 147
  • 148
  • 149
  • 150
  • 151
  • 152
  • 153
  • 154
  • 155
  • 156
  • 157
  • 158
  • 159
  • 160
  • 161
  • 162
  • 163

Connecting the Equipment
Configuring Client Stations
SPA9000 Voice System Installation and Configuration Guide for Setup Wizard
95
4
c.
When the
USB Disk
window appears, click
Open folder to view files using
Windows Explorer
, and then click
OK
. The USB drive contains the
spa400vm
folder.
NOTE
If the
USB Disk
window does not appear, use Windows Explorer to
navigate to the USB disk drive (usually Drive E).
d.
Open
spa400vm\var\lib
. The window displays the
lib
contents, including the
sounds
folder.
e.
If desired, make a backup copy of the existing
sounds
folder.
NOTE
You are not overwriting any user message files in this procedure.
However, it is a good practice to make a backup copy of your files
before doing any upgrades.
f.
Move the new
sounds
folder into
spa400vm\var\lib
on the USB drive. When the
Confirm Folder Replace
window appears, click
Yes to All
.
g.
Safely remove the USB drive from the PC, and then insert it into the SPA400.
h.
Power on the SPA400.
STEP 4
Place a test call to the voice mail system to confirm that the new language
prompts are used.