Netgear GSM7248v1 GSM7224 Administration manual - Page 22
Using the EIA-232 Port, Properties
 |
View all Netgear GSM7248v1 manuals
Add to My Manuals
Save this manual to your list of manuals |
Page 22 highlights
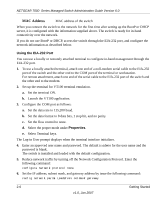
NETGEAR 7000 Series Managed Switch Administration Guide Version 6.0 MAC Address MAC address of the switch When you connect the switch to the network for the first time after setting up the BootP or DHCP server, it is configured with the information supplied above. The switch is ready for in-band connectivity over the network. If you do not use BootP or DHCP, access the switch through the EIA-232 port, and configure the network information as described below. Using the EIA-232 Port You can use a locally or remotely attached terminal to configure in-band management through the EIA-232 port. 1. To use a locally attached terminal, attach one end of a null-modem serial cable to the EIA-232 port of the switch and the other end to the COM port of the terminal or workstation. For remote attachment, attach one end of the serial cable to the EIA-232 port of the switch and the other end to the modem. 2. Set up the terminal for VT100 terminal emulation. a. Set the terminal ON. b. Launch the VT100 application. 3. Configure the COM port as follows: a. Set the data rate to 115,200 baud. b. Set the data format to 8 data bits, 1 stop bit, and no parity. c. Set the flow control to none. d. Select the proper mode under Properties. e. Select Terminal keys. The Log-in User prompt displays when the terminal interface initializes. 4. Enter an approved user name and password. The default is admin for the user name and the password is blank. The switch is installed and loaded with the default configuration. 5. Reduce network traffic by turning off the Network Configuration Protocol. Enter the following command: configure network protocol none 6. Set the IP address, subnet mask, and gateway address by issue the following command: config network parms ipaddress netmask gateway 2-6 Getting Started v1.0, Jan 2007
-
 1
1 -
2
-
3
-
4
-
5
-
6
-
7
-
8
-
9
-
10
-
11
-
12
-
13
-
14
-
15
-
16
-
 17
17 -
 18
18 -
 19
19 -
 20
20 -
 21
21 -
 22
22 -
 23
23 -
 24
24 -
 25
25 -
 26
26 -
 27
27 -
28
-
29
-
30
-
31
-
32
-
33
-
34
-
35
-
36
-
37
-
38
-
39
-
40
-
41
-
42
-
43
-
44
-
45
-
46
-
47
-
48
-
49
-
50
-
51
-
52
-
53
-
54
-
55
-
56
-
57
-
58
-
59
-
60
-
61
-
62
-
63
-
64
-
65
-
66
-
67
-
68
-
69
-
70
-
71
-
72
-
73
-
74
-
75
-
76
-
77
-
78
-
79
-
80
-
81
-
82
-
83
-
84
-
85
-
86
-
87
-
88
-
89
-
90
-
91
-
92
-
93
-
94
-
95
-
96
-
97
-
98
-
99
-
100
-
101
-
102
-
103
-
104
-
105
-
106
-
107
-
108
-
109
-
110
-
111
-
112
-
113
-
114
-
115
-
116
-
117
-
118
-
119
-
120
-
121
-
122
-
123
-
124
-
125
-
126
-
127
-
128
-
129
-
130
-
131
-
132
-
133
-
134
-
135
-
136
-
137
-
138
-
139
-
140
-
141
-
142
-
143
-
144
-
145
-
146
-
147
-
148
 |
 |
