Olympus DM-620 DM-620 Detailed Instructions (English) - Page 50
Press the, button. - battery replacement
 |
View all Olympus DM-620 manuals
Add to My Manuals
Save this manual to your list of manuals |
Page 50 highlights
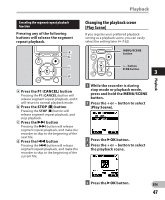
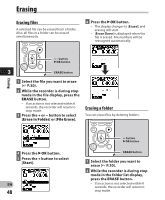
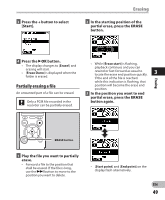
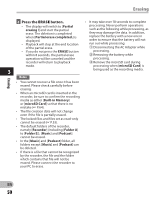
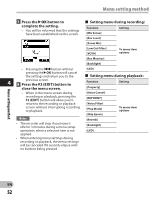
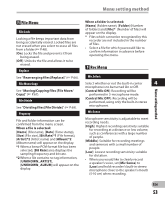
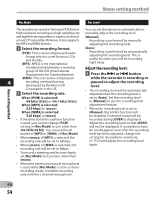
Erasing Erasing 4 Press the ERASE button. • It may take over 10 seconds to complete • The display will switch to [Partial erasing !] and start the partial erase. The deletion is completed when [Partial erase completed.] is displayed. • Playback will stop at the end location of the partial erase. processing. Never perform operations such as the following while processing, as they may damage the data. In addition, replace the battery with a new one in order to ensure that the battery will not run out while processing. 1 Disconnecting the AC Adapter while • If you do not press the ERASE button within 8 seconds, the partial erase processing. 2 Removing the battery while operation will be canceled and the processing. recorder will return to playback 3 Remove the microSD card during mode. processing when [microSD Card] is 3 being used as the recording media. Notes • You cannot recover a file once it has been erased. Please check carefully before erasing. • When an microSD card is inserted in the recorder, be sure to confirm the recording media as either [Built-in Memory] or [microSD Card] so that there is no mistake (☞ P.64). • The file creation date will not change even if the file is partially erased. • The locked files and files set as read-only cannot be erased (☞ P.53). • The default folders of the recorder, namely [Recorder] (including [Folder A] to [Folder E]), [Music] and [Podcast] cannot be erased. • In the [Music] and [Podcast] folder, all folders except [Music] and [Podcast] can be deleted. • If there is a file that cannot be recognized by the recorder, the file and the folder which contains that file will not be erased. Please connect the recorder to your PC to erase. EN 50
-
 1
1 -
2
-
3
-
4
-
5
-
6
-
7
-
8
-
9
-
10
-
11
-
12
-
13
-
14
-
15
-
16
-
17
-
18
-
19
-
20
-
21
-
22
-
23
-
24
-
25
-
26
-
27
-
28
-
29
-
30
-
31
-
32
-
33
-
34
-
35
-
36
-
37
-
38
-
39
-
40
-
41
-
42
-
43
-
44
-
 45
45 -
 46
46 -
 47
47 -
 48
48 -
 49
49 -
 50
50 -
 51
51 -
 52
52 -
 53
53 -
 54
54 -
 55
55 -
56
-
57
-
58
-
59
-
60
-
61
-
62
-
63
-
64
-
65
-
66
-
67
-
68
-
69
-
70
-
71
-
72
-
73
-
74
-
75
-
76
-
77
-
78
-
79
-
80
-
81
-
82
-
83
-
84
-
85
-
86
-
87
-
88
-
89
-
90
-
91
-
92
-
93
-
94
-
95
-
96
-
97
-
98
-
99
-
100
-
101
-
102
-
103
-
104
-
105
-
106
-
107
-
108
-
109
-
110
-
111
-
112
-
113
 |
 |
