Olympus DM-620 DM-620 Detailed Instructions (English) - Page 58
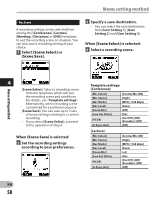
Specify a save destination., is selected, Select a recording scene., Set the recording settings,
 |
View all Olympus DM-620 manuals
Add to My Manuals
Save this manual to your list of manuals |
Page 58 highlights
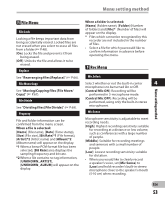
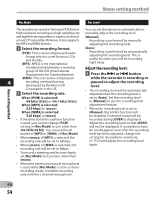
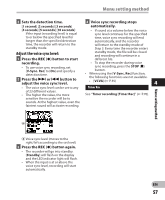
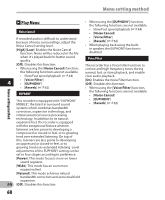
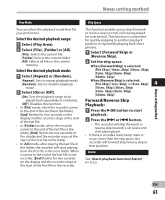
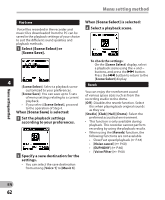
Menu setting method Rec Scene A recording setting can be selected from among the [Conference], [Lecture], [Meeting], [Dictation] or [DNS] templates to suit the recording scene or situation. You can also save a recording setting of your choice. 1 Select [Scene Select] or [Scene Save]. 3 Specify a save destination. • You can select the save destination from [User Setting 1], [User Setting 2] and [User Setting 3]. When [Scene Select] is selected: 4 Select a recording scene. Menu setting method 4 [Scene Select]: Select a recording scene from the templates which will suit the recording scene and conditions. For details, see "Template settings". Alternatively, select recording scene customized for a particular purpose. [Scene Save]: You can save up to 3 sets of menu settings relating to a current recording. • If you select [Scene Select], proceed to the operation of Step 4. When [Scene Save] is selected: 2 Set the recording settings according to your preferences. Template settings: [Conference]: [Mic Select] [Mic Sense] [Rec Mode] [Rec Level] [Zoom Mic] [Low Cut Filter] [VCVA] [V-Sync. Rec] [Central Mic ON] [High] [MP3]: [128 kbps] [Auto] [Off] [On] [On/Off]: [Off] [Standby]: [Off] [Off] [Lecture]: [Mic Select] [Mic Sense] [Rec Mode] [Rec Level] [Zoom Mic] [Low Cut Filter] [VCVA] [V-Sync. Rec] [Central Mic ON] [High] [MP3]: [128 kbps] [Auto] [+6] [On] [On/Off]: [Off] [Standby]: [Off] [Off] EN 58
-
 1
1 -
2
-
3
-
4
-
5
-
6
-
7
-
8
-
9
-
10
-
11
-
12
-
13
-
14
-
15
-
16
-
17
-
18
-
19
-
20
-
21
-
22
-
23
-
24
-
25
-
26
-
27
-
28
-
29
-
30
-
31
-
32
-
33
-
34
-
35
-
36
-
37
-
38
-
39
-
40
-
41
-
42
-
43
-
44
-
45
-
46
-
47
-
48
-
49
-
50
-
51
-
52
-
 53
53 -
 54
54 -
 55
55 -
 56
56 -
 57
57 -
 58
58 -
 59
59 -
 60
60 -
 61
61 -
 62
62 -
 63
63 -
64
-
65
-
66
-
67
-
68
-
69
-
70
-
71
-
72
-
73
-
74
-
75
-
76
-
77
-
78
-
79
-
80
-
81
-
82
-
83
-
84
-
85
-
86
-
87
-
88
-
89
-
90
-
91
-
92
-
93
-
94
-
95
-
96
-
97
-
98
-
99
-
100
-
101
-
102
-
103
-
104
-
105
-
106
-
107
-
108
-
109
-
110
-
111
-
112
-
113
 |
 |
