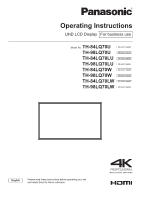
Panasonic 98 Large Format 4K Professional Display Operating Instructions - Page 3

Table of Contents

Page 3 highlights

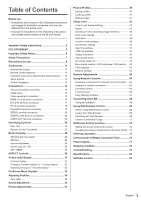
Table of Contents Before use ● Illustrations and screens in this Operating Instructions are images for illustration purposes, and may be different from the actual ones. ● Descriptive illustrations in this Operating Instructions are created mainly based on the 84-inch model. Important Safety Instructions 4 FCC STATEMENT 5 Important Safety Notice 6 Safety Precautions 7 Precautions for use 9 Accessories 11 Accessories Supply 11 Remote Control Batteries 12 Important notice when attaching the fixing brackets 12 About Eyebolt 12 Vertical Installation 13 Connections 14 AC cord connection and fixing 14 Cable fixing 14 Video equipment connection 15 HDMI 1 to 4 terminals connection 16 DVI-D IN terminal connection 17 PC IN terminal connection 18 DisplayPort terminal connection 19 SERIAL terminal connection 20 DIGITAL LINK terminal connection 22 AUDIO OUT terminal connection 23 Identifying Controls 24 Main Unit 24 Remote Control Transmitter 25 Basic Controls 26 Selecting the input signal 28 RECALL 28 Volume Adjustment 29 Sound mute On / Off 29 OFF TIMER 29 ASPECT Controls 30 4 Input multi display 31 4-screen display 31 Changing "4-screen display" to "1-screen display 31 Switching the input of "4-screen display 32 On-Screen Menu Displays 33 Adjusting Position 34 Auto setup 34 Sound Adjustment 36 Picture Adjustments 37 Picture Profiles 39 Saving profiles 40 Loading profiles 41 Editing profiles 41 Setup menu 43 4 Input multi display settings 43 Signal 43 Screensaver (For preventing image retention 46 ECO mode settings 47 Input label 49 Function button settings 49 On/Off timer settings 51 Day/Time settings 51 HDMI 4K Interface 52 Display orientation 52 High altitude mode 52 No activity power off 52 Menu display duration / OSD brightness / OSD position ····52 OSD language 53 Network settings 53 Options Adjustments 56 Using Network Function 64 Necessary environment for computers to be connected·····64 Example of network connection 64 Command control 66 PJLink protocol 66 Early Warning Software 67 Connecting with LAN 68 Computer operation 68 Using Web Browser Control 68 Before Using Web Browser Control 68 Access from Web Browser 69 Operating with Web Browser 69 Crestron Connected™ page 71 ID Remote Control Function 73 Setting the remote control's ID number 73 Cancelling the setting of remote control's ID number (ID [0])···73 Entering characters 74 Command list of Weekly Command Timer 75 Preset Signals 77 Shipping condition 78 Troubleshooting 79 Specifications 82 Software License 84 English 3

  • 1
  • 2
  • 3
  • 4
  • 5
  • 6
  • 7
  • 8
  • 9
  • 10
  • 11
  • 12
  • 13
  • 14
  • 15
  • 16
  • 17
  • 18
  • 19
  • 20
  • 21
  • 22
  • 23
  • 24
  • 25
  • 26
  • 27
  • 28
  • 29
  • 30
  • 31
  • 32
  • 33
  • 34
  • 35
  • 36
  • 37
  • 38
  • 39
  • 40
  • 41
  • 42
  • 43
  • 44
  • 45
  • 46
  • 47
  • 48
  • 49
  • 50
  • 51
  • 52
  • 53
  • 54
  • 55
  • 56
  • 57
  • 58
  • 59
  • 60
  • 61
  • 62
  • 63
  • 64
  • 65
  • 66
  • 67
  • 68
  • 69
  • 70
  • 71
  • 72
  • 73
  • 74
  • 75
  • 76
  • 77
  • 78
  • 79
  • 80
  • 81
  • 82
  • 83
  • 84
  • 85

3
English
Table of Contents
Before use
Illustrations and screens in this Operating Instructions
are images for illustration purposes, and may be
different from the actual ones.
Descriptive illustrations in this Operating Instructions
are created mainly based on the 84-inch model.
Important Safety Instructions
.....................................
4
FCC STATEMENT
.........................................................
5
Important Safety Notice
..............................................
6
Safety Precautions
......................................................
7
Precautions for use
.....................................................
9
Accessories
...............................................................
11
Accessories Supply ················································11
Remote Control Batteries ········································12
Important notice when attaching the fixing brackets ······12
About Eyebolt ·······················································12
Vertical Installation ·················································13
Connections
...............................................................
14
AC cord connection and fixing ··································14
Cable fixing ··························································14
Video equipment connection ····································15
HDMI 1 to 4 terminals connection······························16
DVI-D IN terminal connection ···································17
PC IN terminal connection ·······································18
DisplayPort terminal connection ································19
SERIAL terminal connection ····································20
DIGITAL LINK terminal connection ····························22
AUDIO OUT terminal connection ······························23
Identifying Controls
...................................................
24
Main Unit ·····························································24
Remote Control Transmitter ·····································25
Basic Controls
...........................................................
26
Selecting the input signal·········································28
RECALL ······························································28
Volume Adjustment ················································29
Sound mute On / Off ··············································29
OFF TIMER ··························································29
ASPECT Controls
......................................................
30
4 Input multi display
..................................................
31
4-screen display ····················································31
Changing “4-screen display” to “1-screen display” ········31
Switching the input of “4-screen display” ·····················32
On-Screen Menu Displays
........................................
33
Adjusting Position
.....................................................
34
Auto setup····························································34
Sound Adjustment
.....................................................
36
Picture Adjustments
..................................................
37
Picture Profiles
..........................................................
39
Saving profiles ······················································40
Loading profiles ·····················································41
Editing profiles ······················································41
Setup menu
................................................................
43
4 Input multi display settings ····································43
Signal··································································43
Screensaver (For preventing image retention) ·············46
ECO mode settings ················································47
Input label ····························································49
Function button settings ··········································49
On/Off timer settings ··············································51
Day/Time settings ··················································51
HDMI 4K Interface ·················································52
Display orientation ·················································52
High altitude mode ·················································52
No activity power off ···············································52
Menu display duration / OSD brightness / OSD position
····52
OSD language ······················································53
Network settings ····················································53
Options Adjustments
................................................
56
Using Network Function
...........................................
64
Necessary environment for computers to be connected
·····64
Example of network connection ································64
Command control ··················································66
PJLink protocol ·····················································66
Early Warning Software ··········································67
Connecting with LAN
................................................
68
Computer operation ···············································68
Using Web Browser Control
.....................................
68
Before Using Web Browser Control ···························68
Access from Web Browser·······································69
Operating with Web Browser ····································69
Crestron Connected™ page·····································71
ID Remote Control Function
.....................................
73
Setting the remote control’s ID number·······················73
Cancelling the setting of remote control’s ID number (ID [0])
···73
Entering characters
...................................................
74
Command list of Weekly Command Timer
..............
75
Preset Signals
............................................................
77
Shipping condition
....................................................
78
Troubleshooting
........................................................
79
Specifications
............................................................
82
Software License
.......................................................
84