Panasonic DMC-FX5 Digital Still Camera - Page 104
Connecting to other equipment, Connecting to a PC
 |
UPC - 037988977581
View all Panasonic DMC-FX5 manuals
Add to My Manuals
Save this manual to your list of manuals |
Page 104 highlights
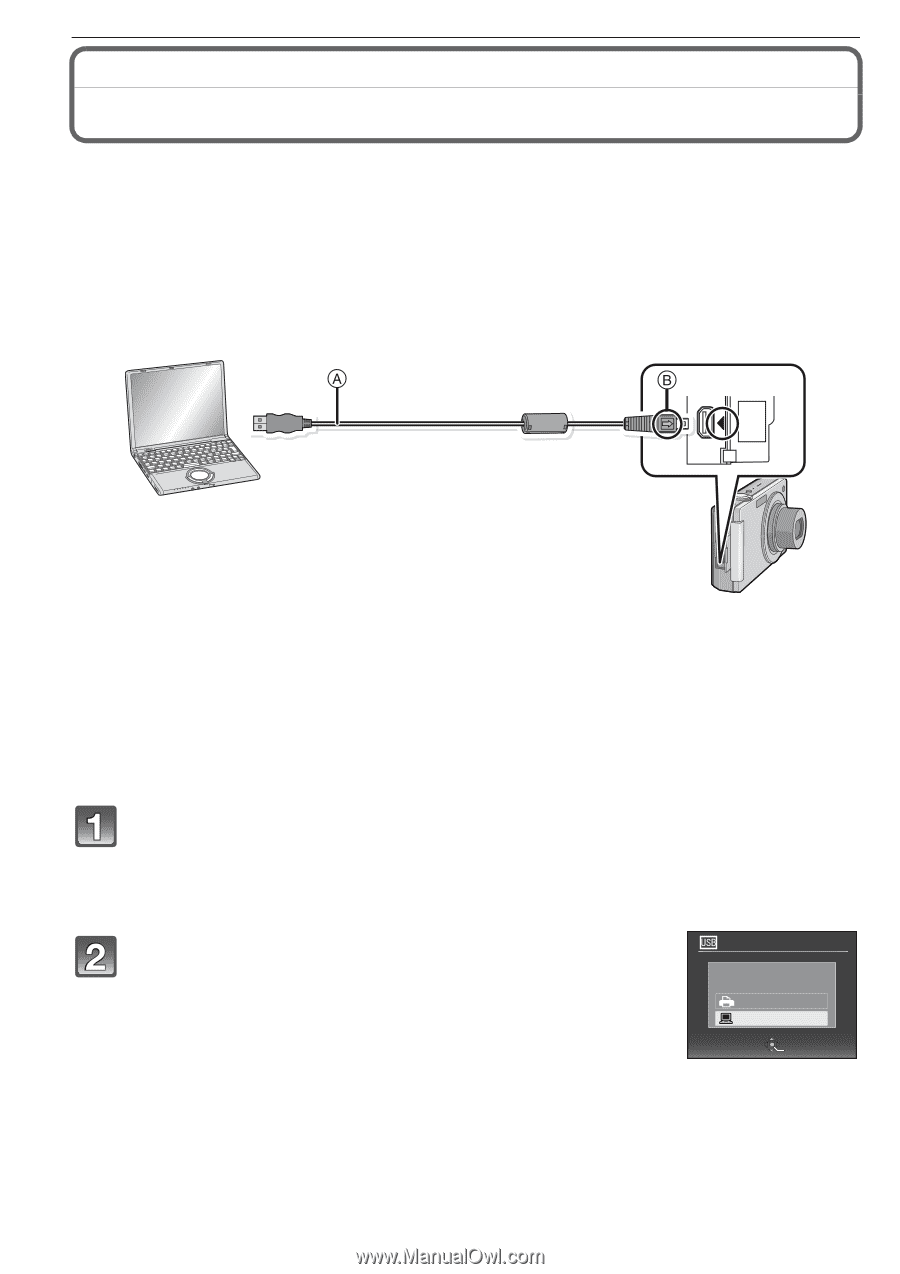
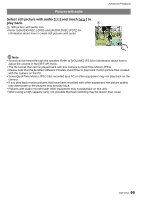
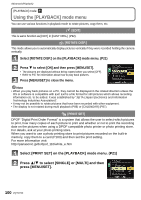
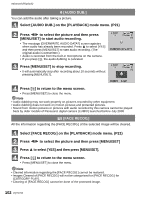
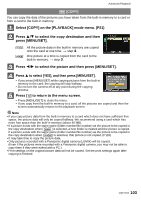
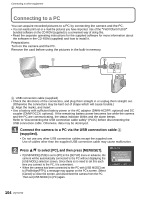
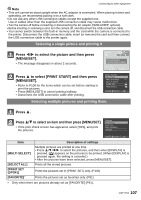
Connecting to other equipment Connecting to other equipment Connecting to a PC You can acquire recorded pictures to a PC by connecting the camera and the PC. • You can easily print out or e-mail the pictures you have imported. Use of the "PHOTOfunSTUDIO" bundled software on the CD-ROM (supplied) is a convenient way of doing this. • Read the separate operating instructions for the supplied software for more information about the software in the CD-ROM (supplied) and how to install it. Preparations: Turn on the camera and the PC. Remove the card before using the pictures in the built-in memory. AV OUT/ DIGITAL A USB connection cable (supplied) • Check the directions of the connectors, and plug them straight in or unplug them straight out. (Otherwise the connectors may be bent out of shape which will cause trouble.) B Align the marks, and insert. • Use a battery with sufficient battery power or the AC adaptor (DMW-AC5PP; optional) and DC coupler (DMW-DCC4; optional). If the remaining battery power becomes low while the camera and the PC are communicating, the status indicator blinks and the alarm beeps. Refer to "Disconnecting the USB connection cable safely" (P105) before disconnecting the USB connection cable. Otherwise, data may be destroyed. Connect the camera to a PC via the USB connection cable A (supplied). • Do not use any other USB connection cables except the supplied one. Use of cables other than the supplied USB connection cable may cause malfunction. Press 3/4 to select [PC], and then press [MENU/SET]. • If [USB MODE] (P26) is set to [PC] in the [SETUP] menu in advance, the camera will be automatically connected to the PC without displaying the [USB MODE] selection screen. Since there is no need to set this each time you connect to the PC, it is convenient. • When the camera has been connected to the PC with [USB MODE] set to [PictBridge(PTP)], a message may appear on the PC's screen. Select [Cancel] to close the screen, and disconnect the camera from the PC. Then set [USB MODE] to [PC] again. USB MODE PLEASE SELECT THE USB MODE PictBridge(PTP) PC SELECT SET 104 VQT1Y62
-
 1
1 -
2
-
3
-
4
-
5
-
6
-
7
-
8
-
9
-
10
-
11
-
12
-
13
-
14
-
15
-
16
-
17
-
18
-
19
-
20
-
21
-
22
-
23
-
24
-
25
-
26
-
27
-
28
-
29
-
30
-
31
-
32
-
33
-
34
-
35
-
36
-
37
-
38
-
39
-
40
-
41
-
42
-
43
-
44
-
45
-
46
-
47
-
48
-
49
-
50
-
51
-
52
-
53
-
54
-
55
-
56
-
57
-
58
-
59
-
60
-
61
-
62
-
63
-
64
-
65
-
66
-
67
-
68
-
69
-
70
-
71
-
72
-
73
-
74
-
75
-
76
-
77
-
78
-
79
-
80
-
81
-
82
-
83
-
84
-
85
-
86
-
87
-
88
-
89
-
90
-
91
-
92
-
93
-
94
-
95
-
96
-
97
-
98
-
 99
99 -
 100
100 -
 101
101 -
 102
102 -
 103
103 -
 104
104 -
 105
105 -
 106
106 -
 107
107 -
 108
108 -
 109
109 -
110
-
111
-
112
-
113
-
114
-
115
-
116
-
117
-
118
-
119
-
120
-
121
-
122
-
123
-
124
-
125
-
126
-
127
-
128
-
129
-
130
-
131
-
132
-
133
-
134
-
135
-
136
-
137
-
138
-
139
-
140
-
141
-
142
-
143
-
144
 |
 |