Panasonic DMC-FX5 Digital Still Camera - Page 17
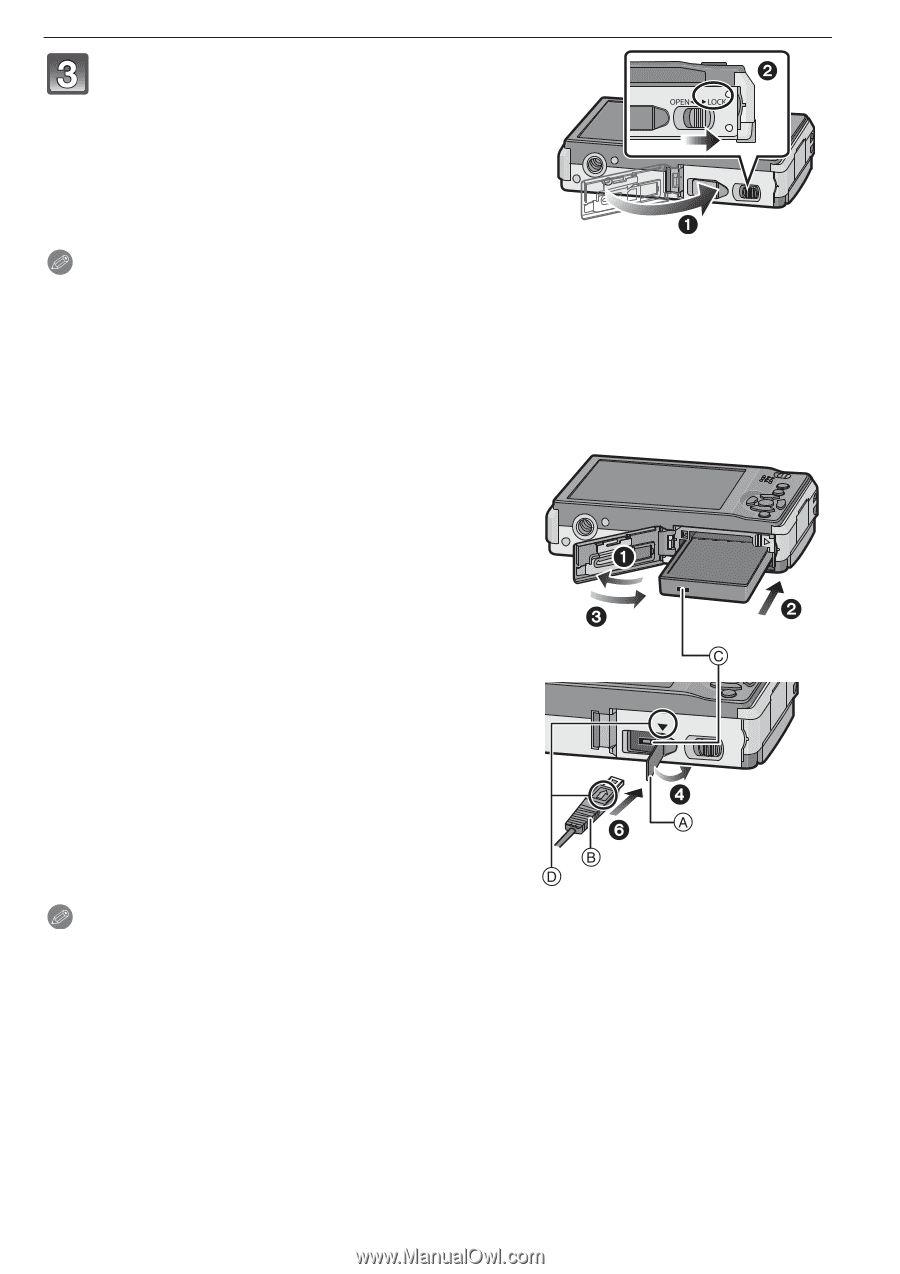
Close the card/battery door., Slide the release lever in the direction, of the arrow.
 |
UPC - 037988977581
View all Panasonic DMC-FX5 manuals
Add to My Manuals
Save this manual to your list of manuals |
Page 17 highlights
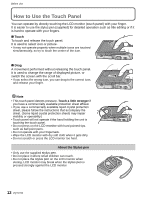
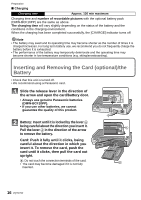
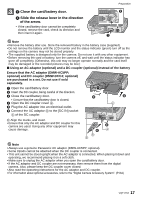
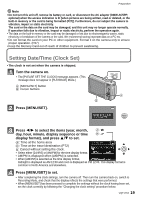
1:Close the card/battery door. 2:Slide the release lever in the direction of the arrow. • If the card/battery door cannot be completely closed, remove the card, check its direction and then insert it again. Preparation Note • Remove the battery after use. Store the removed battery in the battery case (supplied). • Do not remove the battery until the LCD monitor and the status indicator (green) turn off as the settings on the camera may not be stored properly. • The supplied battery is designed only for the camera. Do not use it with any other equipment. • Before removing the card or battery, turn the camera off, and wait until the status indicator has gone off completely. (Otherwise, this unit may no longer operate normally and the card itself may be damaged or the recorded pictures may be lost.) ∫ Using an AC adaptor (optional) and a DC coupler (optional) instead of the battery Ensure that the AC adaptor (DMW-AC5PP; optional) and DC coupler (DMW-DCC4; optional) are purchased in a set. Do not use if sold separately. 1 Open the card/battery door. 2 Insert the DC coupler, being careful of the direction. 3 Close the card/battery door. • Ensure that the card/battery door is closed. 4 Open the DC coupler cover A. 5 Plug the AC adaptor into an electrical outlet. 6 Connect the AC adaptor B to the [DC IN] socket C of the DC coupler. D Align the marks, and insert. • Ensure that only the AC adaptor and DC coupler for this camera are used. Using any other equipment may cause damage. Note • Always use a genuine Panasonic AC adaptor (DMW-AC5PP; optional). • Some tripods cannot be attached when the DC coupler is connected. • This unit cannot be stood upright when the AC adaptor is connected. When placing it down and operating, we recommend placing it on a soft cloth. • Make sure to unplug the AC adaptor when you open the card/battery door. • If the AC adaptor and DC coupler are not necessary, then remove them from the digital camera. Also, please keep the DC coupler cover closed. • Also read the operating instructions for the AC adaptor and DC coupler. • For information about optional accessories, refer to the "Digital Camera Accessory System". (P134) VQT1Y62 17
-
 1
1 -
2
-
3
-
4
-
5
-
6
-
7
-
8
-
9
-
10
-
11
-
 12
12 -
 13
13 -
 14
14 -
 15
15 -
 16
16 -
 17
17 -
 18
18 -
 19
19 -
 20
20 -
 21
21 -
 22
22 -
23
-
24
-
25
-
26
-
27
-
28
-
29
-
30
-
31
-
32
-
33
-
34
-
35
-
36
-
37
-
38
-
39
-
40
-
41
-
42
-
43
-
44
-
45
-
46
-
47
-
48
-
49
-
50
-
51
-
52
-
53
-
54
-
55
-
56
-
57
-
58
-
59
-
60
-
61
-
62
-
63
-
64
-
65
-
66
-
67
-
68
-
69
-
70
-
71
-
72
-
73
-
74
-
75
-
76
-
77
-
78
-
79
-
80
-
81
-
82
-
83
-
84
-
85
-
86
-
87
-
88
-
89
-
90
-
91
-
92
-
93
-
94
-
95
-
96
-
97
-
98
-
99
-
100
-
101
-
102
-
103
-
104
-
105
-
106
-
107
-
108
-
109
-
110
-
111
-
112
-
113
-
114
-
115
-
116
-
117
-
118
-
119
-
120
-
121
-
122
-
123
-
124
-
125
-
126
-
127
-
128
-
129
-
130
-
131
-
132
-
133
-
134
-
135
-
136
-
137
-
138
-
139
-
140
-
141
-
142
-
143
-
144
 |
 |