Panasonic DMC-FX5 Digital Still Camera - Page 33
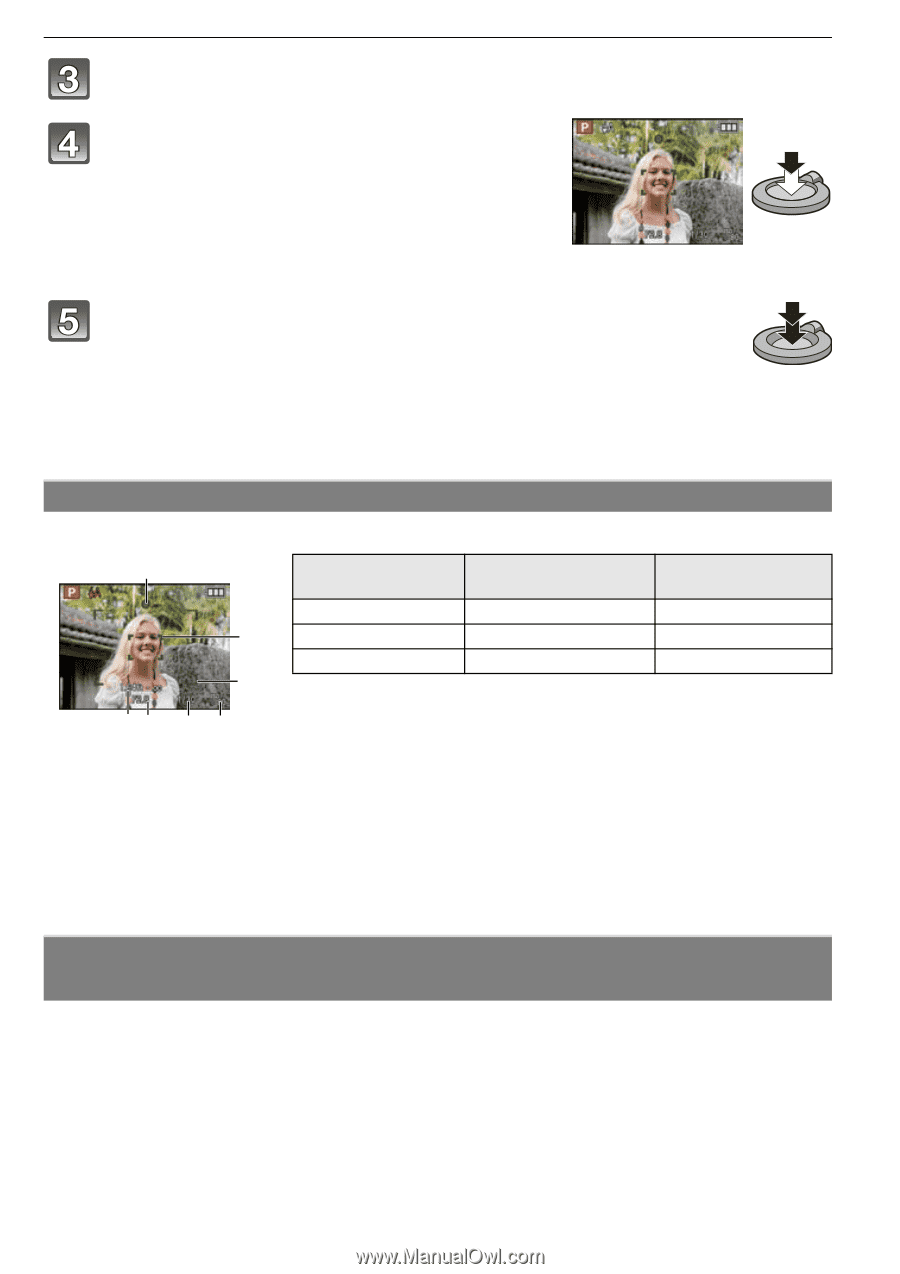
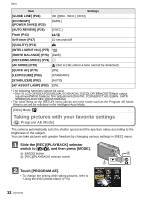
Press the halfway pressed shutter button, Aim the AF area at the point you want to focus on.
 |
UPC - 037988977581
View all Panasonic DMC-FX5 manuals
Add to My Manuals
Save this manual to your list of manuals |
Page 33 highlights
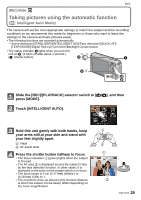
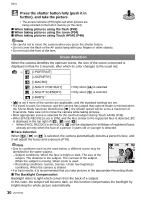
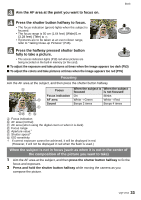
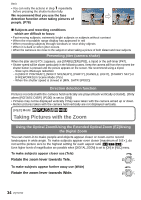
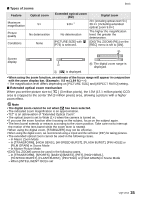
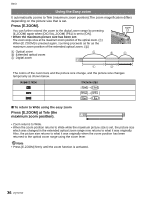
Basic Aim the AF area at the point you want to focus on. Press the shutter button halfway to focus. • The focus indication (green) lights when the subject is focused. • The focus range is 50 cm (1.64 feet) (Wide)/1 m (3.28 feet) (Tele) to ¶. • If pictures are to be taken at an even closer range, refer to "Taking Close-up Pictures" (P46). Press the halfway pressed shutter button fully to take a picture. • The access indication lights (P18) red when pictures are being recorded on the built-in memory (or the card). ∫ To adjust the exposure and take pictures at times when the image appears too dark (P53) ∫ To adjust the colors and take pictures at times when the image appears too red (P76) Focusing Aim the AF area at the subject, and then press the shutter button halfway. A Focus When the subject is When the subject focused is not focused Focus indication On Blinks B AF area White>Green White>Red Sound C Beeps 2 times Beeps 4 times DE F G A Focus indication B AF area (normal) C AF area (when using the digital zoom or when it is dark) D Focus range E Aperture value¢ F Shutter speed¢ G ISO sensitivity ¢ If correct exposure cannot be achieved, it will be displayed in red. (However, it will not be displayed in red when the flash is used.) When the subject is not in focus (such as when it is not in the center of the composition of the picture you want to take) 1 Aim the AF area at the subject, and then press the shutter button halfway to fix the focus and exposure. 2 Press and hold the shutter button halfway while moving the camera as you compose the picture. VQT1Y62 33
-
 1
1 -
2
-
3
-
4
-
5
-
6
-
7
-
8
-
9
-
10
-
11
-
12
-
13
-
14
-
15
-
16
-
17
-
18
-
19
-
20
-
21
-
22
-
23
-
24
-
25
-
26
-
27
-
 28
28 -
 29
29 -
 30
30 -
 31
31 -
 32
32 -
 33
33 -
 34
34 -
 35
35 -
 36
36 -
 37
37 -
 38
38 -
39
-
40
-
41
-
42
-
43
-
44
-
45
-
46
-
47
-
48
-
49
-
50
-
51
-
52
-
53
-
54
-
55
-
56
-
57
-
58
-
59
-
60
-
61
-
62
-
63
-
64
-
65
-
66
-
67
-
68
-
69
-
70
-
71
-
72
-
73
-
74
-
75
-
76
-
77
-
78
-
79
-
80
-
81
-
82
-
83
-
84
-
85
-
86
-
87
-
88
-
89
-
90
-
91
-
92
-
93
-
94
-
95
-
96
-
97
-
98
-
99
-
100
-
101
-
102
-
103
-
104
-
105
-
106
-
107
-
108
-
109
-
110
-
111
-
112
-
113
-
114
-
115
-
116
-
117
-
118
-
119
-
120
-
121
-
122
-
123
-
124
-
125
-
126
-
127
-
128
-
129
-
130
-
131
-
132
-
133
-
134
-
135
-
136
-
137
-
138
-
139
-
140
-
141
-
142
-
143
-
144
 |
 |