Panasonic DMC-FX5 Digital Still Camera - Page 19
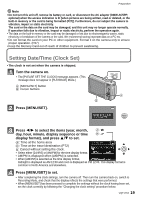
Setting Date/Time (Clock Set), Press [MENU/SET] to set.
 |
UPC - 037988977581
View all Panasonic DMC-FX5 manuals
Add to My Manuals
Save this manual to your list of manuals |
Page 19 highlights
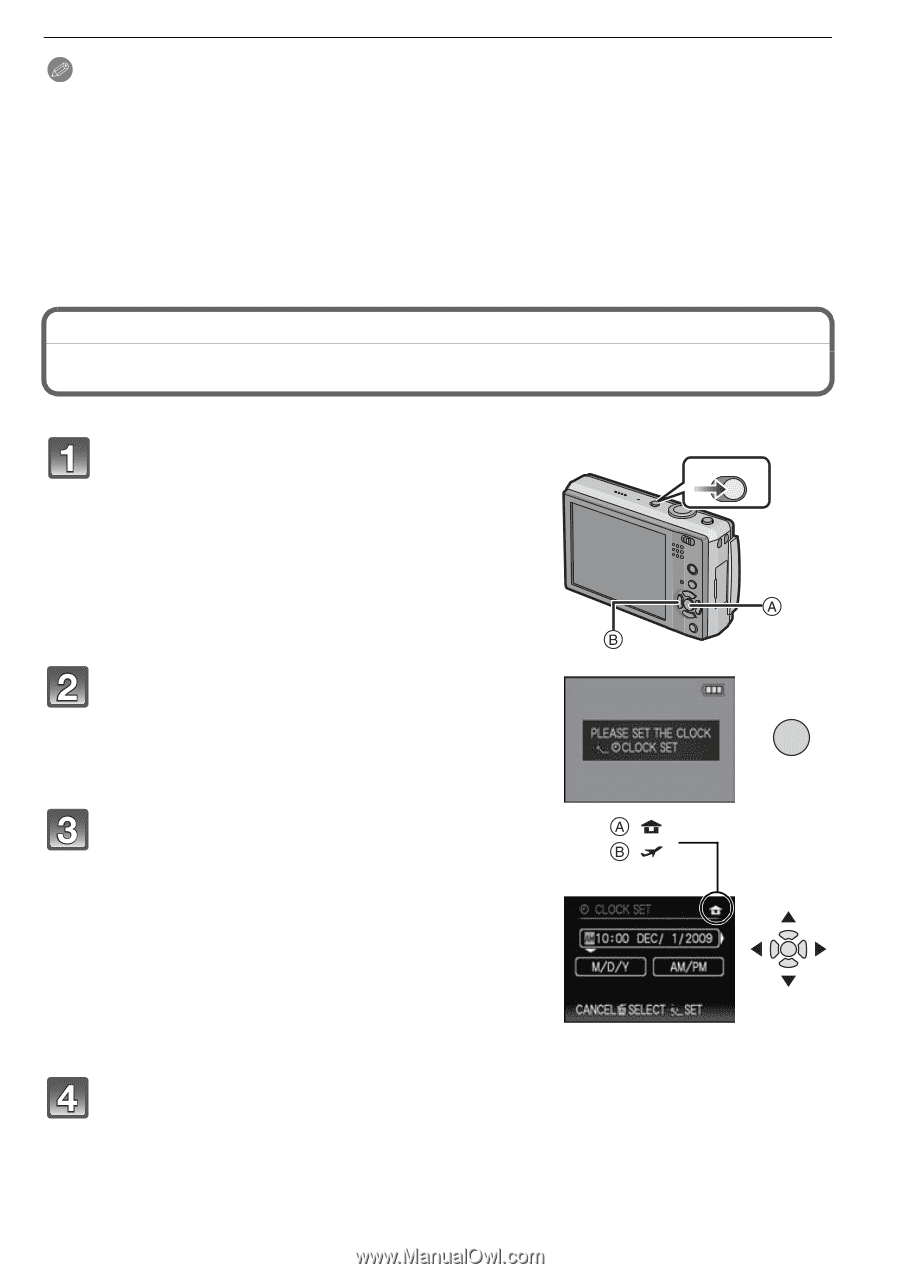
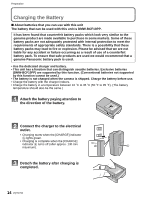
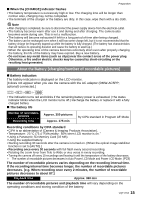
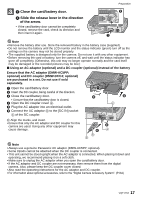
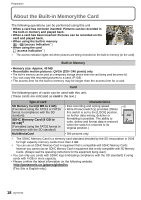
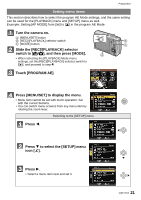
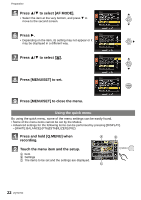
Preparation Note • Do not turn this unit off, remove its battery or card, or disconnect the AC adaptor (DMW-AC5PP; optional) when the access indication is lit [when pictures are being written, read or deleted, or the built-in memory or the card is being formatted (P27)]. Furthermore, do not subject the camera to vibration, impact or static electricity. The card or the data on the card may be damaged, and this unit may no longer operate normally. If operation fails due to vibration, impact or static electricity, perform the operation again. • The data on the built-in memory or the card may be damaged or lost due to electromagnetic waves, static electricity or breakdown of the camera or the card. We recommend storing important data on a PC etc. • Do not format the card on your PC or other equipment. Format it on the camera only to ensure proper operation. (P27) • Keep the Memory Card out of reach of children to prevent swallowing. Setting Date/Time (Clock Set) • The clock is not set when the camera is shipped. Turn the camera on. • The [PLEASE SET THE CLOCK] message appears. (This message does not appear in [PLAYBACK] Mode.) A [MENU/SET] button B Cursor buttons OFF ON Press [MENU/SET]. MENU /SET Press 2/1 to select the items (year, month, : day, hour, minute, display sequence or time : display format), and press 3/4 to set. A: Time at the home area B: Time at the travel destination (P72) ,: Cancel without setting the clock. • Select either [24HRS] or [AM/PM] for the time display format. • AM/PM is displayed when [AM/PM] is selected. • When [AM/PM] is selected as the time display format, midnight is displayed as AM 12:00 and noon is displayed as PM 12:00. This display format is common in North America and elsewhere. Press [MENU/SET] to set. • After completing the clock settings, turn the camera off. Then turn the camera back on, switch to Recording Mode, and check that the display reflects the settings that were performed. • When [MENU/SET] has been pressed to complete the settings without the clock having been set, set the clock correctly by following the "Changing the clock setting" procedure below. VQT1Y62 19
-
 1
1 -
2
-
3
-
4
-
5
-
6
-
7
-
8
-
9
-
10
-
11
-
12
-
13
-
 14
14 -
 15
15 -
 16
16 -
 17
17 -
 18
18 -
 19
19 -
 20
20 -
 21
21 -
 22
22 -
 23
23 -
 24
24 -
25
-
26
-
27
-
28
-
29
-
30
-
31
-
32
-
33
-
34
-
35
-
36
-
37
-
38
-
39
-
40
-
41
-
42
-
43
-
44
-
45
-
46
-
47
-
48
-
49
-
50
-
51
-
52
-
53
-
54
-
55
-
56
-
57
-
58
-
59
-
60
-
61
-
62
-
63
-
64
-
65
-
66
-
67
-
68
-
69
-
70
-
71
-
72
-
73
-
74
-
75
-
76
-
77
-
78
-
79
-
80
-
81
-
82
-
83
-
84
-
85
-
86
-
87
-
88
-
89
-
90
-
91
-
92
-
93
-
94
-
95
-
96
-
97
-
98
-
99
-
100
-
101
-
102
-
103
-
104
-
105
-
106
-
107
-
108
-
109
-
110
-
111
-
112
-
113
-
114
-
115
-
116
-
117
-
118
-
119
-
120
-
121
-
122
-
123
-
124
-
125
-
126
-
127
-
128
-
129
-
130
-
131
-
132
-
133
-
134
-
135
-
136
-
137
-
138
-
139
-
140
-
141
-
142
-
143
-
144
 |
 |