Panasonic DMC-FX5 Digital Still Camera - Page 20
Setting the Menu, Changing the clock setting
 |
UPC - 037988977581
View all Panasonic DMC-FX5 manuals
Add to My Manuals
Save this manual to your list of manuals |
Page 20 highlights
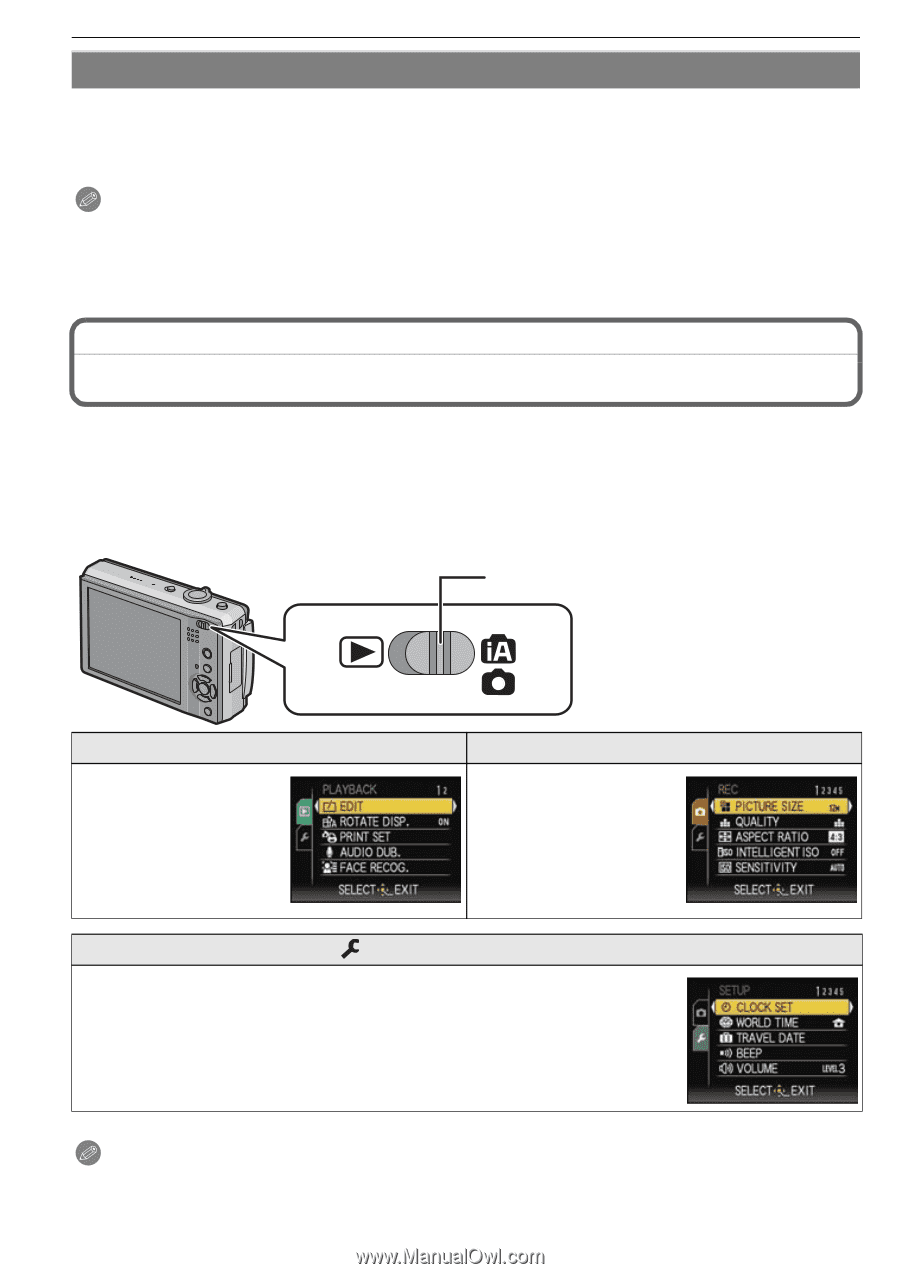
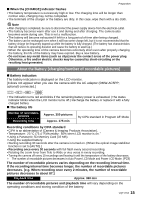
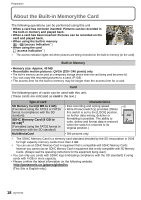
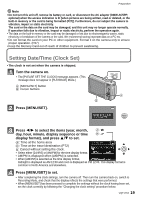
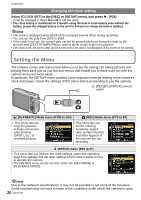
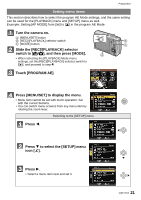
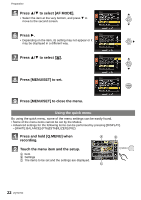
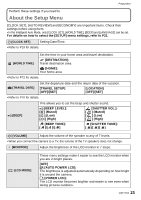
Preparation Changing the clock setting Select [CLOCK SET] in the [REC] or [SETUP] menu, and press 1. (P21) • It can be changed in steps 3 and 4 to set the clock. • The clock setting is maintained for 3 months using the built-in clock battery even without the battery. (Leave the charged battery in the unit for 24 hours to charge the built-in battery.) Note • The clock is displayed when [DISPLAY] is pressed several times during recording. • You can set the year from 2000 to 2099. • If the clock is not set, the correct date cannot be printed when you stamp the date on the pictures with [TEXT STAMP] (P96) or order a photo studio to print the pictures. • If the clock is set, the correct date can be printed even if the date is not displayed on the screen of the camera. Setting the Menu The camera comes with menus that allow you to set the settings for taking pictures and playing them back just as you like and menus that enable you to have more fun with the camera and use it more easily. In particular, the [SETUP] menu contains some important settings relating to the camera's clock and power. Check the settings of this menu before proceeding to use the camera. A [REC]/[PLAYBACK] selector switch ( [PLAYBACK] Mode menu (P100 to 103) ! [REC] Mode menu (P73 to 83) • This menu lets you copy the pictures, settings convenient when printing (DPOF), etc., of recorded pictures. • This menu lets you set the coloring, sensitivity, aspect ratio, number of pixels and other aspects of the pictures you are recording. [SETUP] menu (P23 to 27) • This menu lets you perform the clock settings, select the operating beep tone settings and set other settings which make it easier for you to operate the camera. • The [SETUP] menu can be set from either the [REC MODE] or [PLAYBACK MODE]. Note Due to the camera's specifications, it may not be possible to set some of the functions. Some functions may not work in some of the conditions under which the camera is used. 20 VQT1Y62
-
 1
1 -
2
-
3
-
4
-
5
-
6
-
7
-
8
-
9
-
10
-
11
-
12
-
13
-
14
-
 15
15 -
 16
16 -
 17
17 -
 18
18 -
 19
19 -
 20
20 -
 21
21 -
 22
22 -
 23
23 -
 24
24 -
 25
25 -
26
-
27
-
28
-
29
-
30
-
31
-
32
-
33
-
34
-
35
-
36
-
37
-
38
-
39
-
40
-
41
-
42
-
43
-
44
-
45
-
46
-
47
-
48
-
49
-
50
-
51
-
52
-
53
-
54
-
55
-
56
-
57
-
58
-
59
-
60
-
61
-
62
-
63
-
64
-
65
-
66
-
67
-
68
-
69
-
70
-
71
-
72
-
73
-
74
-
75
-
76
-
77
-
78
-
79
-
80
-
81
-
82
-
83
-
84
-
85
-
86
-
87
-
88
-
89
-
90
-
91
-
92
-
93
-
94
-
95
-
96
-
97
-
98
-
99
-
100
-
101
-
102
-
103
-
104
-
105
-
106
-
107
-
108
-
109
-
110
-
111
-
112
-
113
-
114
-
115
-
116
-
117
-
118
-
119
-
120
-
121
-
122
-
123
-
124
-
125
-
126
-
127
-
128
-
129
-
130
-
131
-
132
-
133
-
134
-
135
-
136
-
137
-
138
-
139
-
140
-
141
-
142
-
143
-
144
 |
 |